3 installing the load on the slider – IAI America SSPA User Manual
Page 45
6. Installation
37
6.3 Installing the Load on the Slider
x
The slider has threaded holes, so affix the load using these holes. The affixing method shall conform to the
method for installing the actuator.
x
Similarly when the slider is affixed and actuator is moved, install the slider using these threaded holes on the
slider.
x
The slider has two reamed holes. If repeatability is required after removal/re-installation, use positioning pins.
If squareness is required, use one positioning pin and make installation adjustment.
x
After removal/re-installation, repeatability can also be ensured by pushing the reference surface on the side of
the base.
x
Use high-tension bolts conforming to ISO 10.9 or higher.
x
When the threaded holes are used, determine the required thread length as specified below:
x
ISB, ISPB
Depth of threaded hole > Thread engagement length > Nominal thread size x 1.8
x
SSPA
Depth of threaded hole > Thread engagement length > Nominal thread size
z
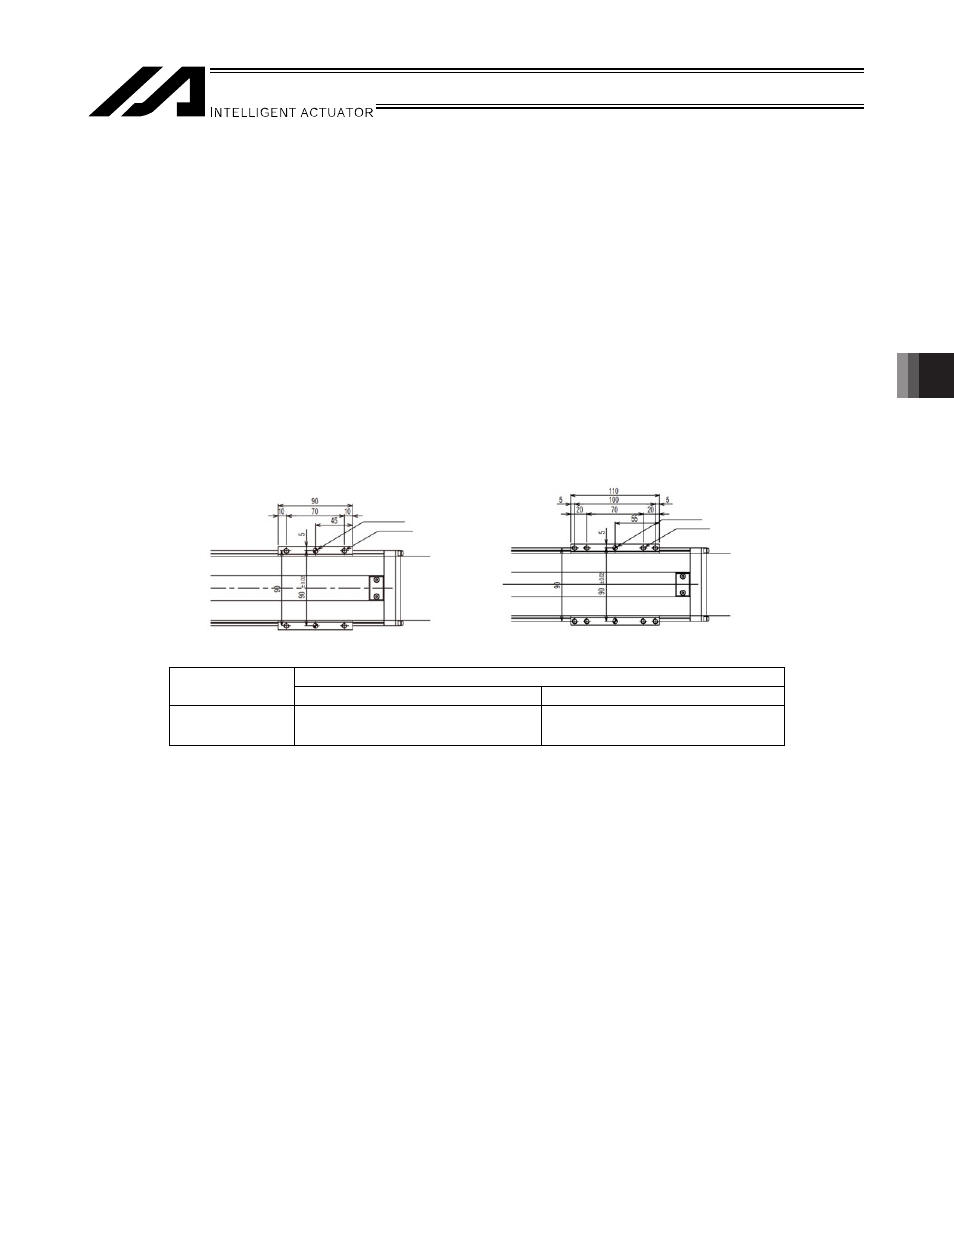
ISB, ISPB: Small type SXM/SXL
SXM slider
SXL slider
Tightening torque
Installation bolt
Bolt seating surface is steel
Bolt seating surface is aluminum
M6
12.3 Nxm
5.4 Nxm
(Note) When using positioning holes, use pins with an engagement tolerance of h7 or equivalent.
2-6H7, depth 10
4-M6 depth 18
2-6H7, depth 10
8-M6 depth 18