Valve and seat inspection – Ransburg Evolver 303 Dual Purge Solvent Robotic Applicator A12374-XXX User Manual
Page 52
47
Evolver 303 Dual Purge Robotic Atomizers - Maintenance
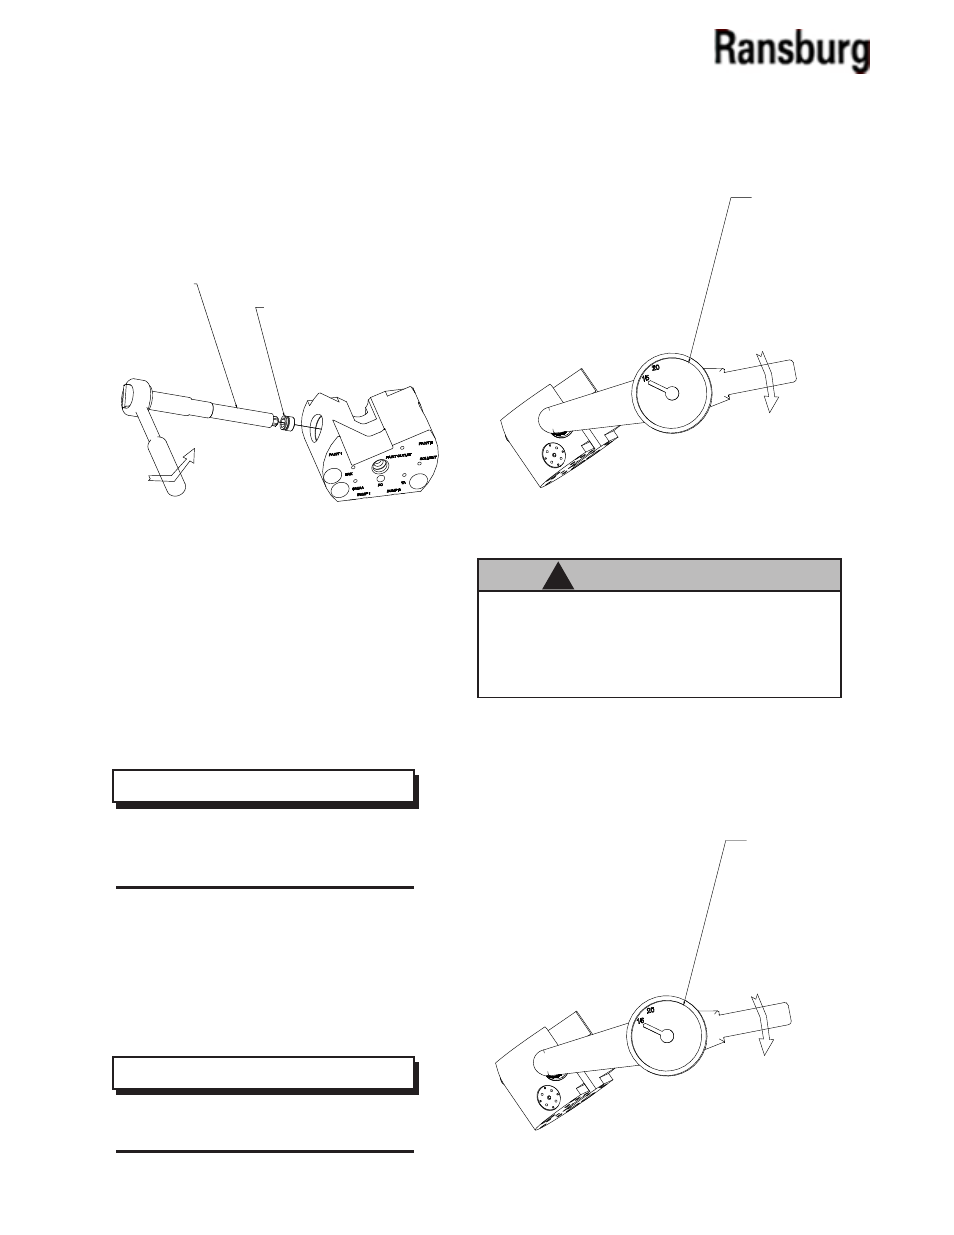
Figure 21: Seat Removal
Using the seat removal tool (A10756-00), insert the
smaller hex end into the block to engage the seat
female hex. Using a 3/8" (10mm) socket
end-wrench, or adjustable wrench, remove the seat by
turning counter-clockwise, as shown in Figure 21.
Valve and Seat Inspection
Inspect the valves and seats for any build-up of ma-
terials. Valves should be cleaned with an appropriate
cleaning solvent to remove the material on it.
Replacement
Lubricate the seat o-ring using a suitable lubricant.
>
A seat should not be replaced unless
there are indications of valve leakage in
operation.
NOTE
By hand, using the seat tool (A10756-00), carefully
start the seat into the pocket for the seat.
Hand tighten the seat in place. Using a torque wrench
with a 3/8" (10mm) socket, torque the valve seats to
15-20 lbs•in (1.2.3 Nm)
Figure 22: Valve Seat Torque
>
Carefully start the seat into the pocket.
It may be easily cross threaded.
NOTE
>
Always use a torque wrench to torque the
seats in place. Over-torquing the seats may
cause permanent irrepairable damage to the
rear manifold.
C A U T I O N
!
Lubricate the valve o-rings with a suitable o-ring
lubricant. By hand, start the threads clockwise of the
valve into the pocket. Tighten using a 1/2" (13mm)
socket and torque to 15-20 lbs•in (1.7-2.3 Nm).
Figure 23: Valve Torque
A10756-00
SEAT REMOVAL TOOL
VALVE SEAT
COUNTER-CLOCKWISE TO REMOVE
CW TO TIGHTEN
15-20 LBS-IN
(1.7-2.3 Nm)
TORQUE WRENCH
TORQUE WRENCH
CW TO TIGHTEN
15-20 LBS-IN
(1.7-2.3 Nm)
AA-08-01.1