Rear manifold removal / replacement – Ransburg Evolver 303 Dual Purge Solvent Robotic Applicator A12374-XXX User Manual
Page 51
46
Evolver 303 Dual Purge Robotic Atomizers - Maintenance
Low Voltage Cable Removal
(Refer to Figure 18)
1. Disconnect low voltage cable [3] from rear of power
supply. For A10406-XX power supply, disconnect
circular connector from receptacle on rear of power
supply. For LECU5004-XX power supply, disconnect
wires from connector J3 at rear of MicroPak.
2. Loosen retaining ring [13] (see Figure 16) and
remove applicator from robot wrist.
3. Using 3/16" Allen wrench, remove set screw [2]
(see Figure 18).
4. Remove the low voltage cable [3] by pulling through
the robot arm and mounting plate [1].
5. To reinstall, insert power supply end of cable [3]
through mounting plate [1], pull through robot arm
and connect to junction box or power supply. For
connections to power supply, plug connector into re-
ceptacle (A10406-XX power supply) or connect wires
as shown in Figure 4 (LECU5004-XX power supply).
6. Align the timing mark of the plug on the appli-cator
end of the cable [3] with the mark on the mounting
plate [1] and tighten set screw [2].
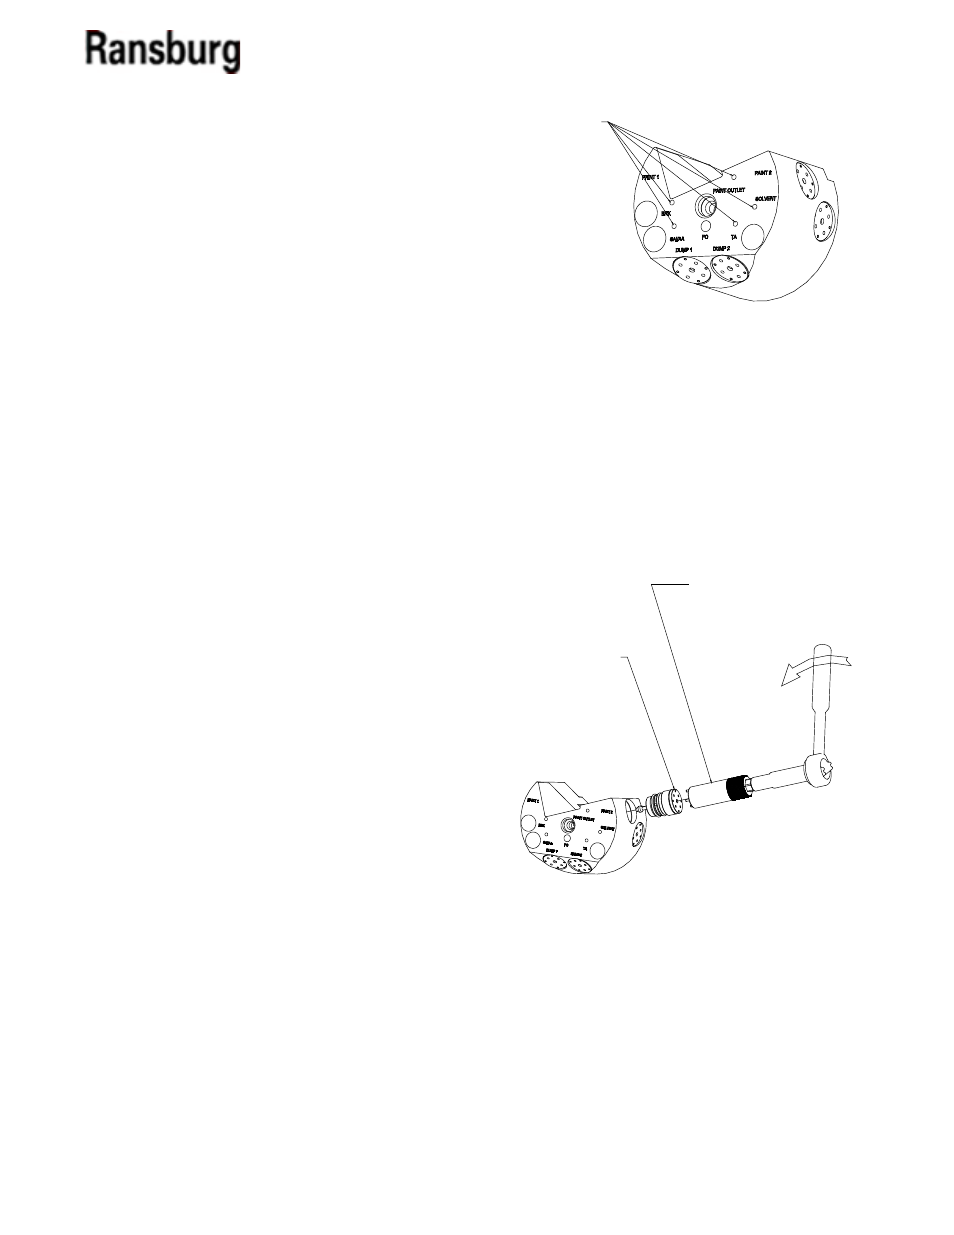
Rear Manifold Removal / Replacement
Remove the rear manifold from the applicator (see
"Spray Applicator Disassembly" in the "Maintenance"
section). Inspect the valve weep ports on the mani-
fold body for leaks or contamination. If any paint is
visible in these areas, the valves need to be replaced
as shown in Figures 20 and 21.
Figure 19: Weep Port Locations
To replace the valves, use the valve removal tool
(A11922-00). First, engage the four (4) pins on the tool
to the corresponding four (4) hole pattern in the top
of the valve. Using a 1/2" (13mm) socket, end-wrench,
or adjustable wrench, remove the valve by turning
counter-clockwise, as shown in Figure 20.
Figure 20: Valve Removal
COUNTER-CLOCKWISE TO REMOVE
VALVE
A11922-00
VALVE REMOVAL TOOL
WEEP PORTS
AA-08-01.1