Calibration procedure, Caution – GF Signet 4150 Turbidimeter User Manual
Page 9
9
Signet 4150 Turbidimeter
Calibration Procedure
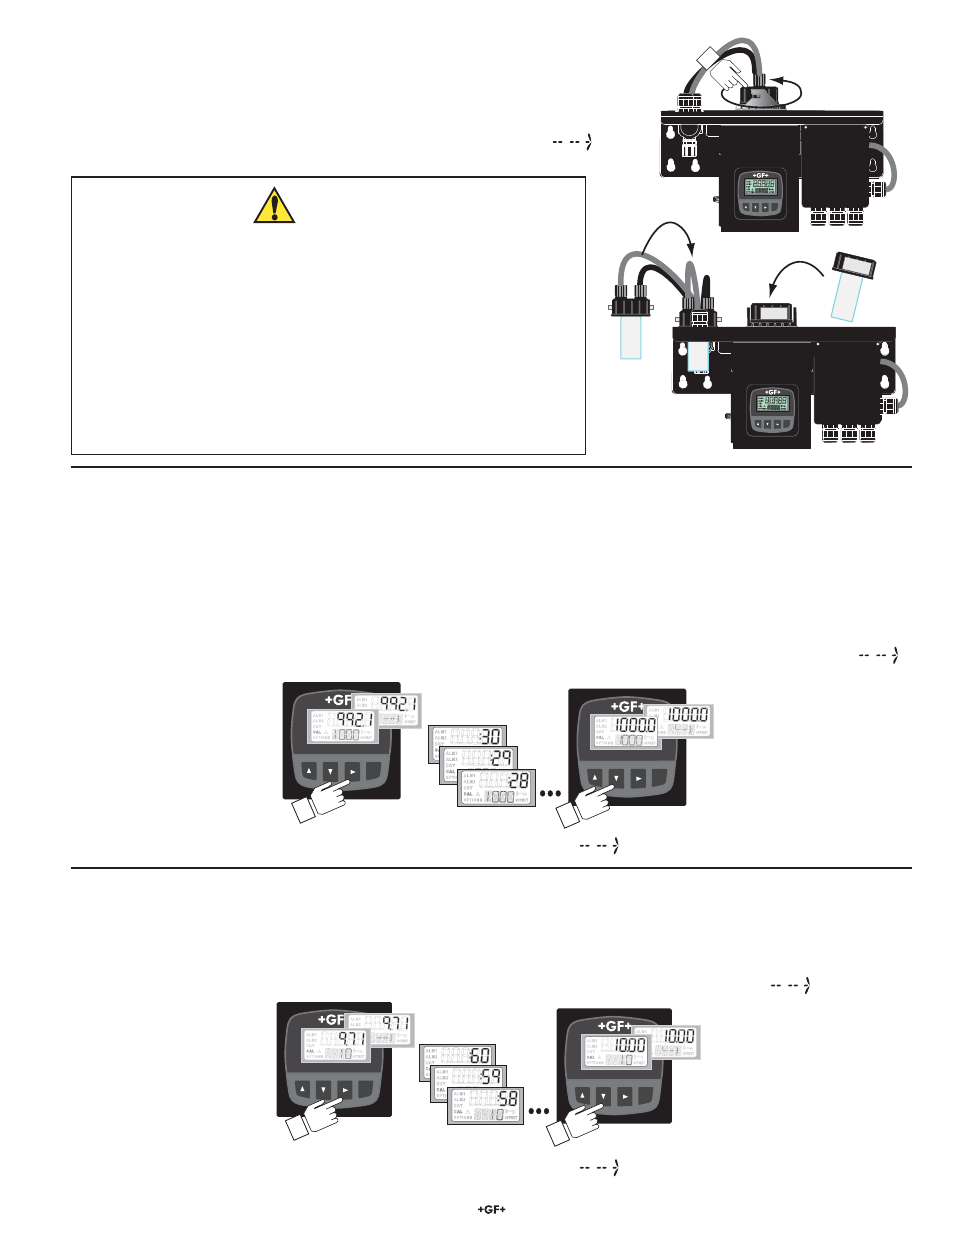
1. Access the Calibrate menu by pressing the ENTER key for 2 seconds.
2. Enter the access security code if necessary. (See pg. 7.)
• CAL will be illuminated on the display.
• The upper display will show the measured NTU value.
• The lower display will alternate the value of the ¿ rst NTU standard and
.
3. Remove the measuring cuvette and place it in the cuvette holder.
10 NTU
10 NTU
Signet Turbidimeter
ENTER
Signet Turbidimeter
ENTER
• Do not touch the glass surface of the cuvette! Substances on the
surface of the glass will cause errors in the measurement.
• Do not remove the glass cuvette from the cap while holding the
assembly over the measuring cell.
• Do not allow any debris to fall into the measuring cell.
• Do not leave the measuring cell open longer than necessary.
Extended exposure to the atmosphere may shorten the effective life
of the desiccant.
NOTE: Removing the cuvette will cause the cleaning cycle to be interrupted
for 30 minutes to allow the dessicant time to remove any introduced
moisture.
Signet Turbidimeter
ENTER
Signet Turbidimeter
ENTER
5.
Insert the 10 NTU calibration standard cuvette.
• Align the pointer of the indexing ring with the white reference line on the 4150 Turbidimeter. Slowly rotate the calibration standard
cuvette back and forth about 5° to locate the position of the cuvette having the lowest reading.
• Press the Ź key. The 4150 will begin the calibration process. Be sure the lower CAL number corresponds to the second calibration
standard you are using. In this example it is 10. The upper display will count down the progress. When the process is complete, the
upper display shows the new NTU value, while the lower display alternates the value of the NTU standard and
.
• Press the ź key. The lower display will show the next NTU Standard value and
.
Signet Turbidimeter
ENTER
Signet Turbidimeter
ENTER
4. Insert
the
¿ rst calibration standard cuvette requested by the 4150.
The ¿ rst NTU standard requested will be either 1000 or 100, depending on the range of your 4150. In this example it is 1000.
If the application will be limited to low turbidity values (less than 10 NTU), press the ź key to go to the 10 NTU calibration.
NOTE: 10 and 100 NTU solution must be replaced every three months and the glass cuvette must be cleaned properly.
• Align the pointer of the indexing ring with the white reference line on the 4150 Turbidimeter. Slowly rotate the calibration standard
cuvette back and forth about 5° to locate the position of the cuvette having the lowest reading.
• Press the Ź key. The 4150 will begin the calibration process. The upper display will count down the progress. When the process is
complete, the upper display shows the new NTU value, while the lower display alternates the value of the NTU standard and
.
• Press the ź key. The lower display will show the next NTU Standard value and
.
CAUTION!