ELRO HIS20S Security & home automation system EXPANDED USERS MANUAL User Manual
Page 9
7
connecting to a telephone master or secondary
outlet.
7. Do not locate the Smart Home Box closer than 1m
to any large metallic object, (e.g. mirrors, radiators,
etc) as this may affect the radio range of the Smart
Home Box.
MOUNTING THE SMART HOME BOX
1. Undo the two captive fixing screws on top of the
panel and open the cover. The cover is hinged
along the bottom edge.
2. Unclip and remove the two back-up batteries on
upper and lower right hand side of the panel.
3. Route the cable from the Power Supply Unit up
behind along the cable track on the right hand side
of the Smart Home Box, and connect the plug to
the DC power socket in the panel. Ensuring that
the cable is not trapped between the panel and the
wall.
4. Use the fixing template provided (p.56) to mark
the position of two fixing holes on the wall.
Drill two holes, and insert the supplied plastic wall
plugs and then fit two screws into the wall plugs
until almost fully home. Hang the Smart Home
Box over these screws using the two keyhole slots
on either side of the top corners of the panel
casing.
5. Fix the Smart Home Box by inserting a fixing screw
into the lower fixing hole in the panel and tighten
the screw until it just grip the casing. Do not over
tighten the fixing screws as this could damage or
distort the casing.
6. Ensure that the ‘Reset’ (P1) and the ‘Hard-Wired
Siren tamper detect’ (P51) jumper links are set in
the OFF position.
7. Connect battery leads to both back-up batteries
and refit batteries.
Battery 1 (upper): Blue lead to +ve battery terminal
Black lead to –ve battery
terminal
Battery 2 (lower): Red lead to +ve battery terminal
Blue lead to –ve battery terminal
IMPORTANT: Take care when connecting battery
leads to the batteries as connecting incorrectly
could damage the batteries or the Smart Home
Box.
Note: The Power LED may flash to indicate that
the unit is being operated from the back-up
batteries and that mains supply is not present.
8. If fitted, remove the plastic film covering the LCD
display and on the display window on the cover.
9. Close the lid of the Smart Home Box and tighten
the captive fixing screws.
10. Plug in and switch ON the Power Supply Unit, (the
Power LED should illuminate).
11. If required, connect the Smart Home Box to the
telephone line using the cable supplied by inserting
small RJ11 plug into socket marked LINE located
on the bottom edge of the Smart Home Box.
If the cable supplied is not long enough to reach a
suitable phone point then it will need extending
using a coupler and extension lead (not supplied).
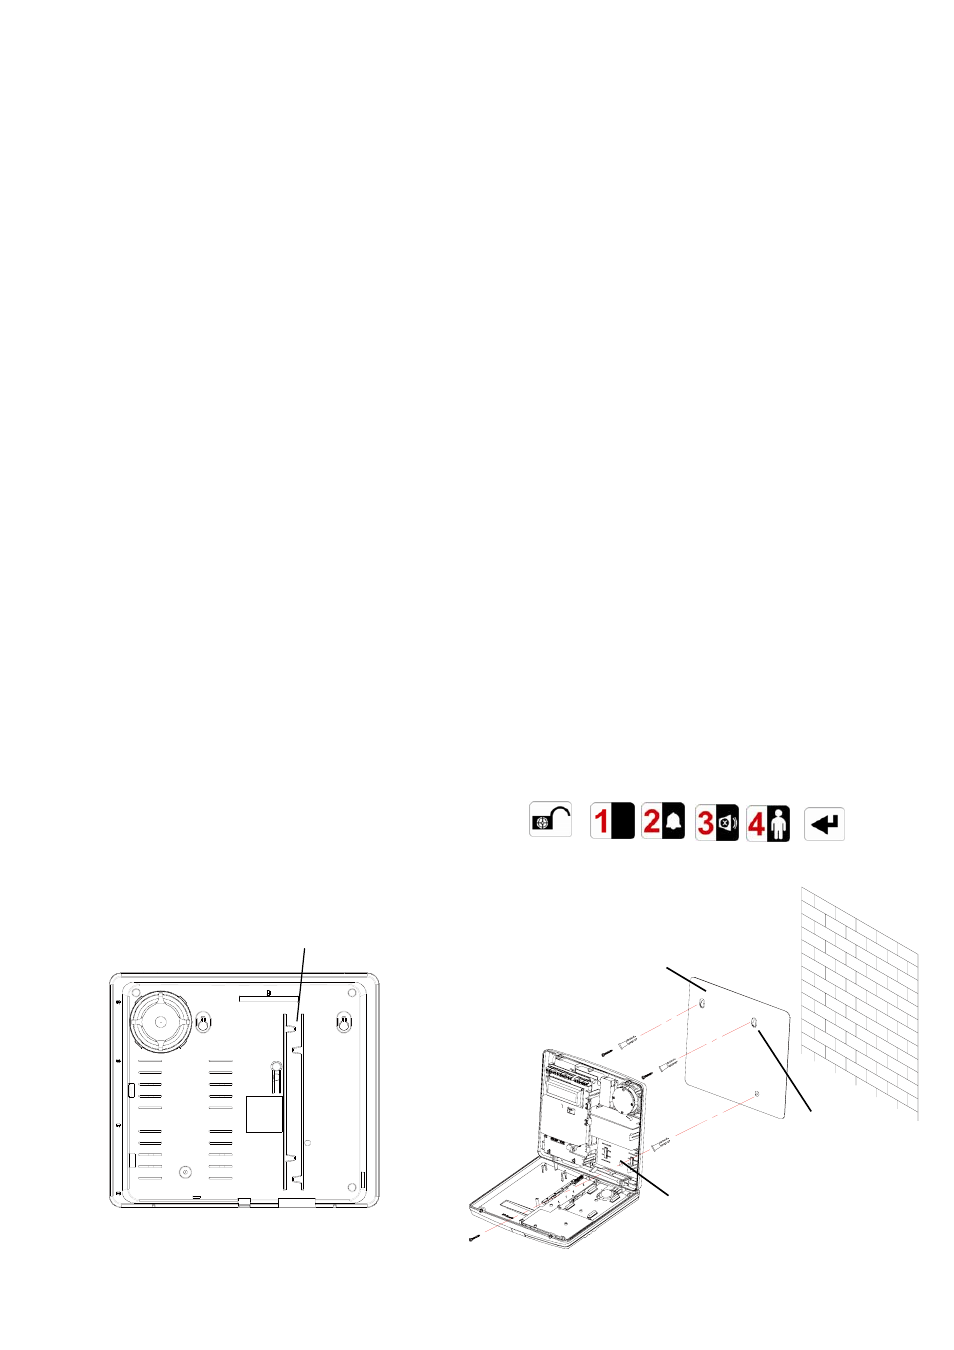
Note: If the Tamper of Smart Home Box alarm
sounds during the installation reset the alarm by
pressing:
, ,
on the Smart Home Box Keypad.
Cable Track
Smart Home Box
Fixing Template
Fixing Hole
Keyhole Slots