On/off receiver – ELRO HIS20S Security & home automation system EXPANDED USERS MANUAL User Manual
Page 16
14
b. Select ‘3-1 Wireless Sensor Zone’ and
press .
c. ‘Input (01-32) Sensor Zone’ and press .
d. An indication of ‘:1 Learning ID’ will be shown
and press .
By pressing tamper switch either located adjacent
to the PCB or rear cover of the Detector will emit
the ID code to the Smart Home Box instantly.
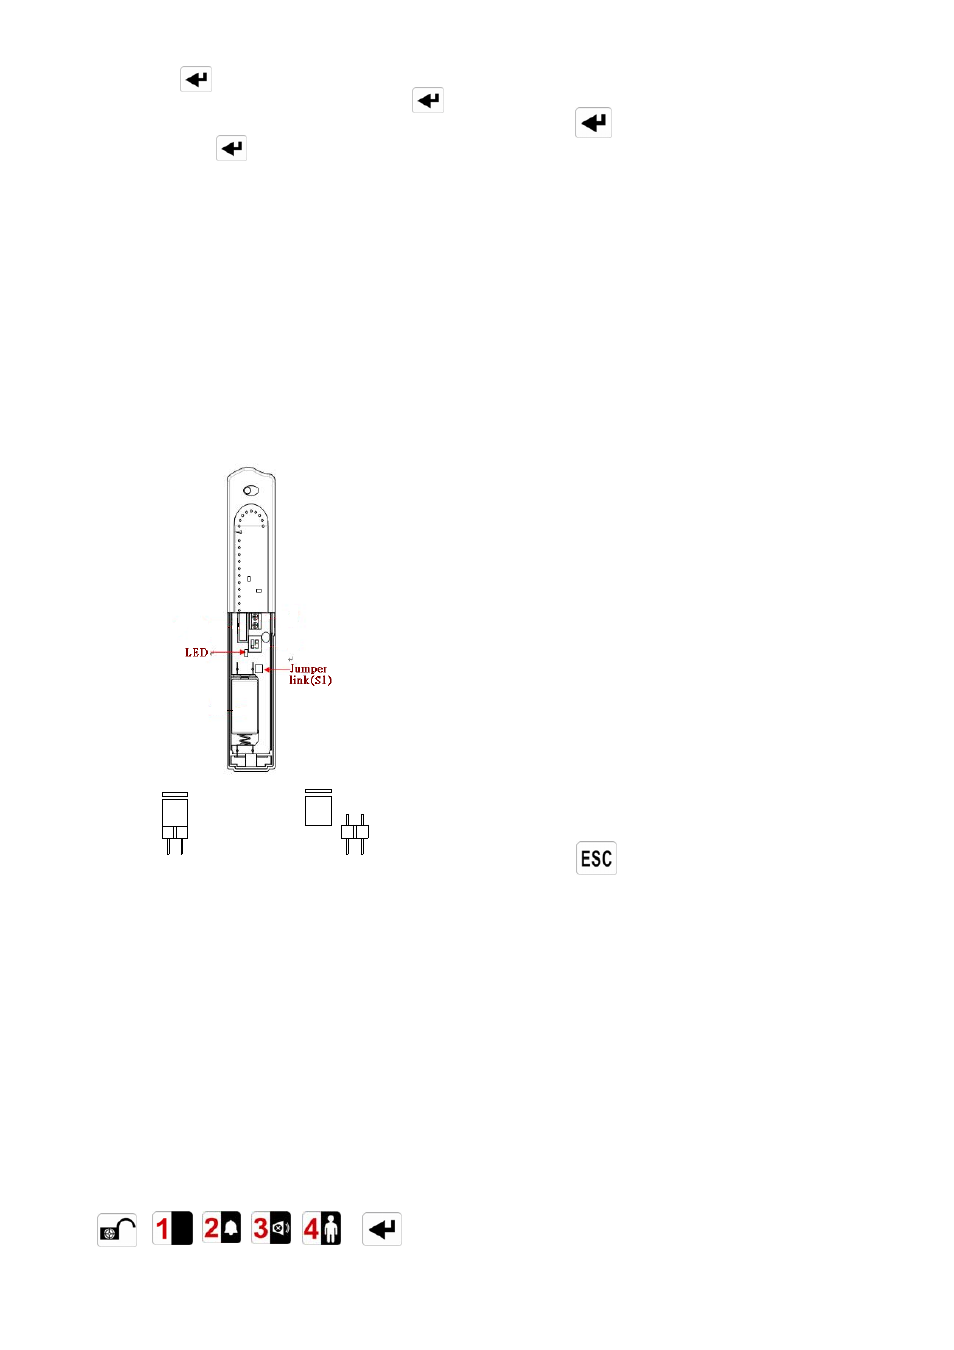
5. For quick start, jumper link (S1) will quick start the
battery this will take approx. 2 minutes. By
placing the jumper link (S1) into position, the LED
adjacent to the (S1) jumper link will become
illuminated, this implies the battery start up has
been completed. It is important to remove the
jumper link (S1) after this has been observed to
save battery power.
Jumper link (S1)
Note: On first battery start up, because of the
nature of the battery protection the battery may
incur a low battery status and may not start up
straight away, but will automatically start within 10
minutes.
Note: Only one of pins of Jumper link (S1) will be
inserted in position as factory default setting.
TESTING THE MAGNETIC CONTACT
DETECTORS
Ensure that the system is in Test Mode
1. Press
to put the system into Test mode.
‘WALK TEST’ will be displayed.
2. Press to activate Walk Test.
‘ Walk Test Waiting…’ will be displayed.
3. Remove the battery cover by sliding off. As the
battery cover is removed the LED on the Detector
will illuminate for approx. 1 second to indicate that
the tamper switch has been activated. In addition,
the Smart Home Box will chime to indicate that an
alarm signal has been received and ‘Magnetic
Contact Tamper’ will be displayed.
4. Open the door/window to detach the magnet from
the Detector. As the magnet is parted from the
detector the LED will illuminate for approx. 1
second to indicate that the Detector has been
triggered. In addition, the Smart Home Box will
chime to indicate that an alarm signal has been
received and the identity of the zone that the
detector is set for will be displayed.
Note: In normal mode with the battery cover fitted,
the LED on the detector will not illuminate when
the detector is triggered, (unless the battery is
low).
5. If connected, operate the wired Magnetic Contact.
As the contact is opened the LED on the Detector
should illuminate for 1 second to indicate that it has
been triggered and the Smart Home Box will
acknowledge the alarm signal.
6. Refit the battery cover on the Detector.
7. Press to return to the top level menu of
TEST MODE.
ON/OFF RECEIVER
It is a plug-in receiver to receive the Radio Frequency
signal from the Smart Home Box and through the
Smart Home Box controls the On/Off status of the
plug-in light fixture or home appliances.
INITIAL POWER UP
Plug the receiver to the electrical outlet, the LED on the
receiver will be flashing slowly. This implies that the
receiver does not memorize any ID code and cannot
be controlled by the Smart Home Box. However,
pressing the On/Off knob will control directly the On/Off