Wall switch – ELRO HIS20S Security & home automation system EXPANDED USERS MANUAL User Manual
Page 17
15
status of the plug-in light fixtures or home appliances
without controlling via Smart Home Box.
LEARNING ID CODE
In order to communicate with the Smart Home Box, the
Smart Home Box will send ID code to the receiver. To
proceed with ID code learning:
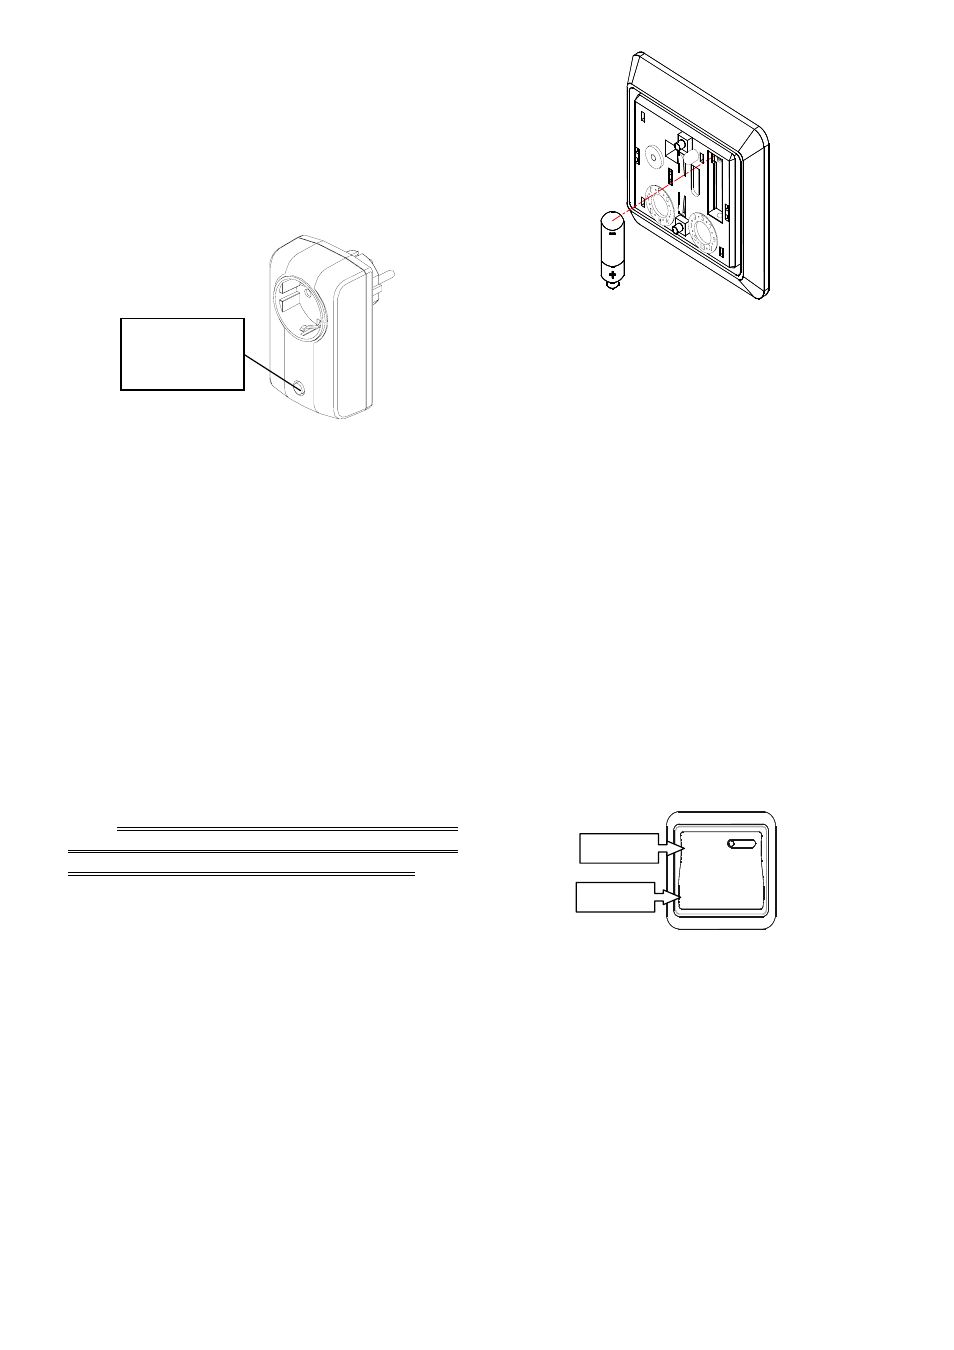
1.
In the front cover, there is an On/Off knob with
LED indicator.
2. Press the knob for 3 seconds until the LED
flashes rapidly, and then release the knob. The
receiver is about to learn the ID code.
3.
Set the Smart Home Box into Home Automation
mode. Select ‘6-1 Green Control’, input Green
Control number and select ‘:1 Link Panel to
Receiver’ so as to emit the ID code to Green
Control.
4.
If the receiver learns the ID code properly, the
LED will turn on and then off. If failure, re-try
step (2), (3) as mentioned above.
Note: DO NOT connect the receiver to light fixture,
electrical fans or other appliances to avoid possible
dangers which might be caused by ON/OFF test.
WALL SWITCH
INSERTING THE BATTERY
1. Using a flat screwdriver to detach the front case.
Fit the 23A 12V battery in the compartment with
battery leads ‘+’ to ‘+’ and ‘-‘ to ‘-‘.
2. By pressing the wall switch, the LED will illuminate,
implying that the battery has been inserted
properly.
EMITTING ID CODE
In order to communicate with the Smart Home Box, the
wall switch will send ID code to the Smart Home Box.
To proceed with ID code learning.
1.
Set the Smart Home Box into Home Automation
mode. Select ‘6-2 Green Remote/Sensor’, input
Green Remote/Sensor number and select ‘:1
Learning ID’. Wait for the wall switch to send ID
code to the Smart Home Box.
2. Press the OFF knob, a command of OFF signal
and ID signal will send out. Keep holding the
OFF knob for more than 3 seconds until the Smart
Home Box learns the ID code successfully.
INSTALLATION
For the best results, fix the wall switch on a solid
surface, 1.2m above the ground. To affix the wall
switch to an existing wall box, simply secure the bottom
case to the wall box using the 2 screws provided.
Alternatively, you may use the double-side tape
provided to affix it anywhere you desire. After installing,
replace the front case.
TESTING THE WALL SWITCH
Ensure that the system is in Test Mode
On/Off Knob
LED Indicator
ON knob
OFF knob