Acnodes FPC 6084 User Manual
Page 50
661 Brea Canyon Rd., Suite 3
Walnut, CA 91789
tel: 909.598.7388, fax: 909.598.0218
© Copyright 2011 Acnodes, Inc.
All rights reserved. Product description and product specifications
are subject to change without notice. For latest product information,
please visit Acnodes’ web site at www.acnodes.com.
FPC 6065 / 6084
3.12.2.2
FPC6084 PANEL MOUNTING
To mount the FPC6084 flat panel PC into a panel, please follow the steps below.
Step 1: Select the position on the panel to mount the FPC6084.
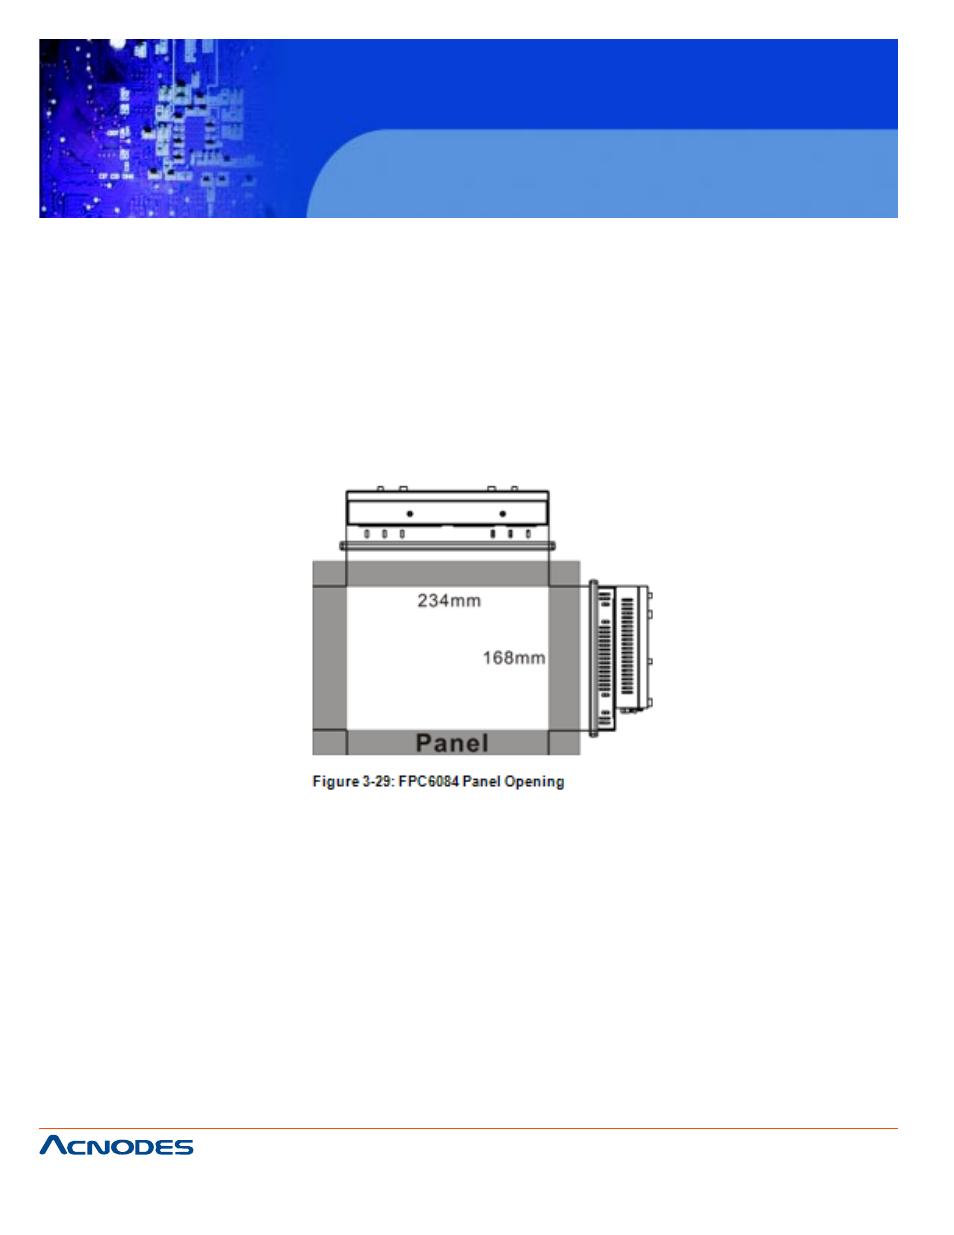
Step 2: Cut out a section from the panel that corresponds to the rear panel dimensions of the FPC6084.
Take care that the panel section that is cut out is smaller than the overall size of the metal frame that sur-
rounds the FPC6084 but just large enough for the rear panel of the FPC6084 to fit through (Figure 3-29).
Step 3: Slide the FPC6084 through the hole until the aluminum frame is flush against the panel.
Step 4: Insert the panel mounting clamps into the pre-formed holes along the edges of the chassis, behind
the aluminum frame. There are a total of 8 panel mounting clamps.
Step 5: Tighten the screws that pass through the panel mounting clamps until the plastic caps at the front
of all the screws are firmly secured to the panel (Figure 3-30).