E3 interface parameters, Editing logical interfaces, Editing a logical interface (frame relay) – RuggedCom RuggedRouter RX1100 User Manual
Page 82: Edit e3 interface, 82 8.6. creating a frame relay logical interface
8. Configuring Frame Relay/PPP And T3/E3
Revision 1.14.3
82
RX1000/RX1100™
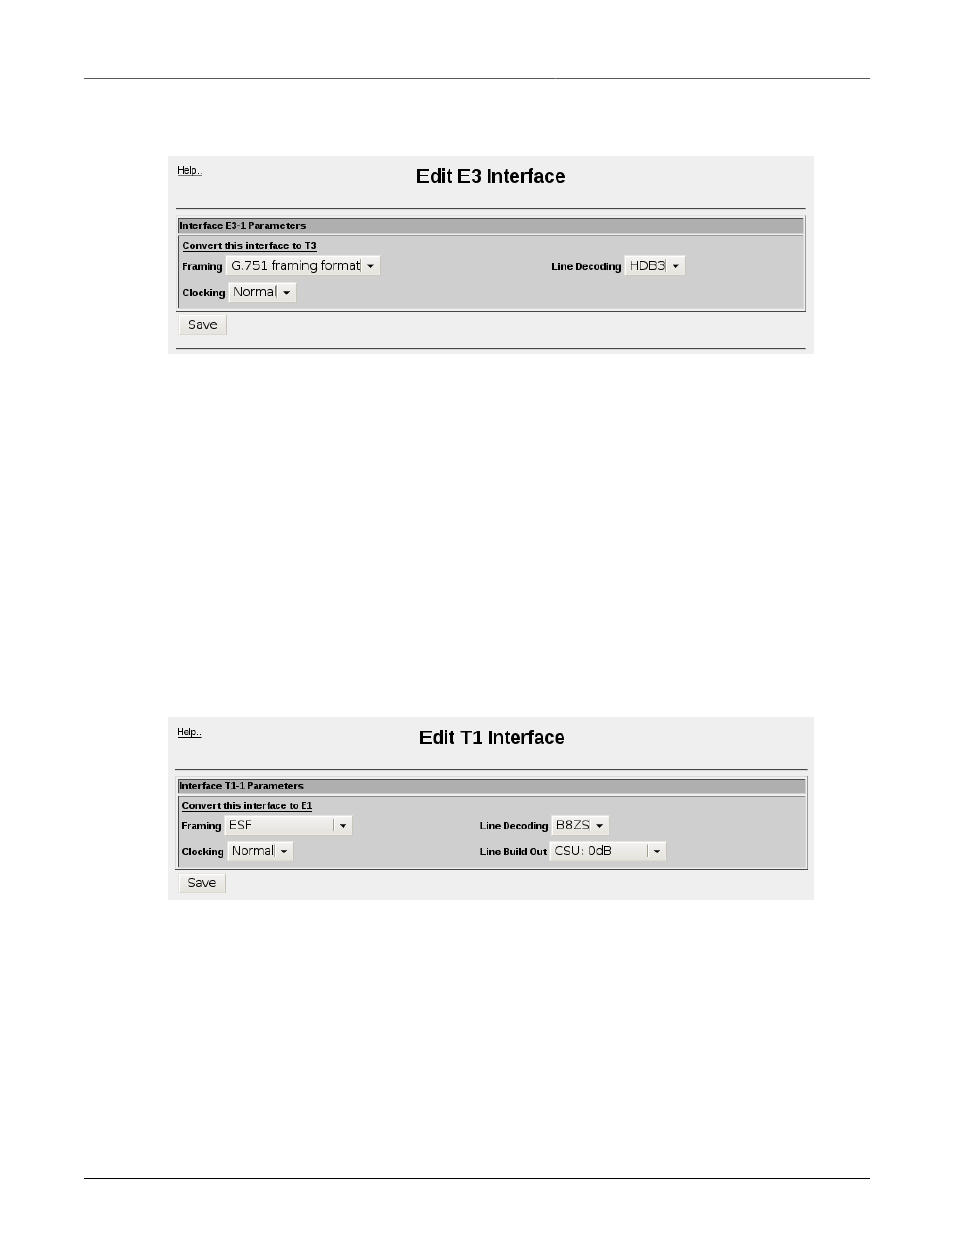
8.2.1.3. E3 Interface Parameters
Figure 8.5. Edit E3 Interface
The Framing field determines the framing format used. Your line provider will indicate the correct
format.
The Line Decoding field reflects the line encoding/decoding scheme.
The Clocking field selects whether to accept or provide clock signal. In normal use the central office
provides the clock signal in which case the setting should be "Normal". It is also possible to connect
to another router, for example, by using a cross-over cable and selecting "Master" on one of the two
routers to provide the clock signal.
The link: Convert this interface to T3 reconfigures the interface for use as a T3 trunk.
8.2.2. Editing Logical Interfaces
8.2.2.1. Editing A Logical Interface (Frame Relay)
Figure 8.6. Creating a Frame Relay Logical Interface
This menu allows you to display and configure logical interface fields for Frame Relay. The menu is
composed of two tables. The first table contains configuration parameters that apply to all DLCIs in
the Frame Relay link. The second table configures network parameters of individual DLCIs.
The fields and buttons in this menu are the same as those those described in the section on
Logical Interface (Frame Relay)
Chapter 7, Configuring Frame Relay/PPP And T1/E1
chapter.
Once the first DLCI has been configured, revisiting the link to that DLCI from the "Trunks And
Interfaces" page will display a menu that allows additional DLCIs to be configured.