2 configure the following, 3 click apply to save your settings, 1 click user setting from the advance menu – LOREX Technology Lorex Digital Video Surveillance Recorder lh1 10 User Manual
Page 62: 3 click edit to open the user settings window, 4 configure the following, 5 click apply to save your settings, 4 click apply to save your settings
48
2
Configure the following:
• Daylight Saving Time: Select Enable
• Time Offset: Select how many hours the
time should move forward or backward
• Daylight Saving Time Mode:
• Start Time: Select the Month, day, and
time DST begins.
• End Time: Select the Month, day, and time
DST ends.
3
Click Apply to save your settings.
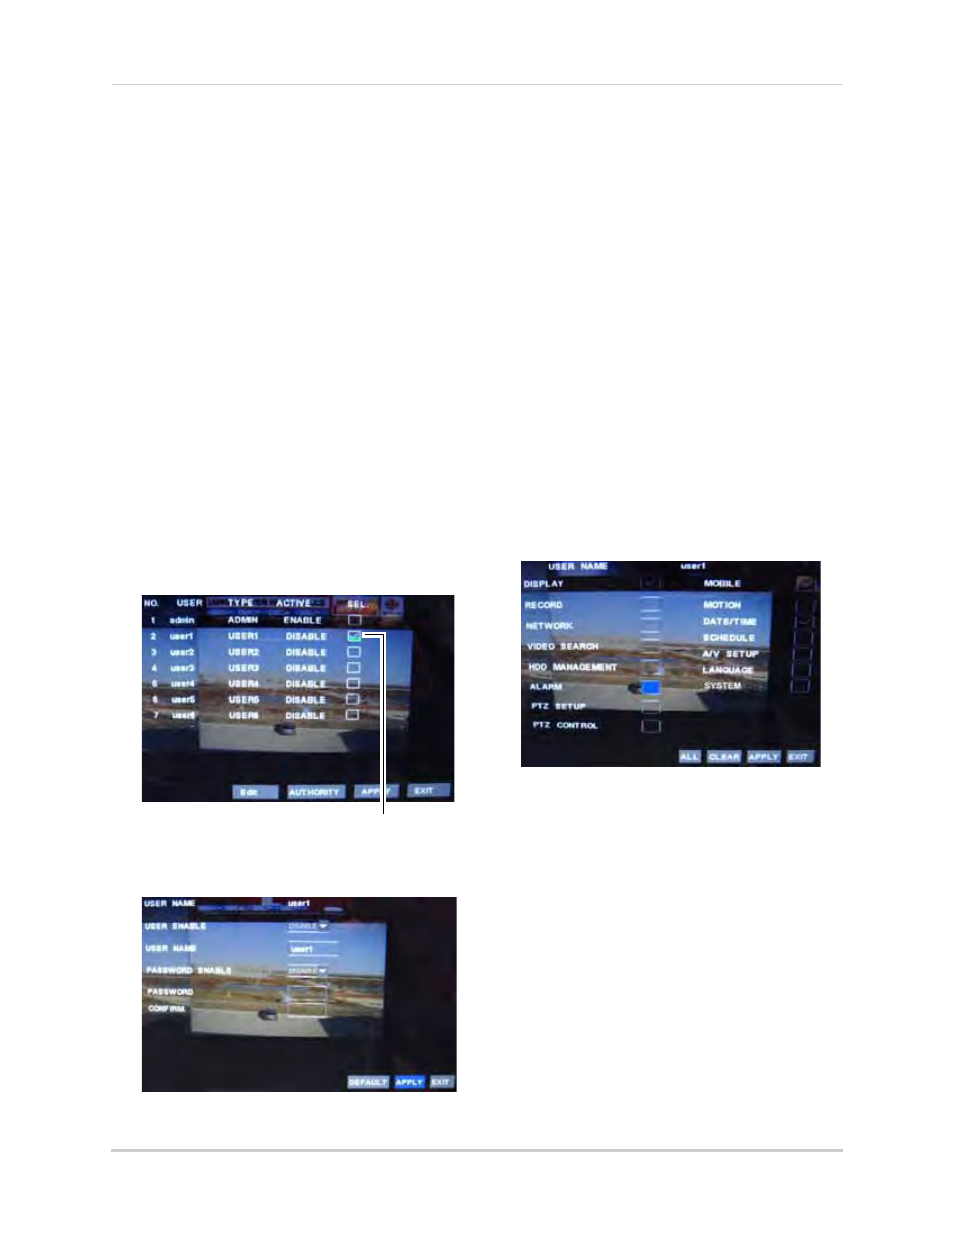
Configuring User Settings
The User Settings menu allows you to
add users, and edit user and admin
passwords for the system.
To create a new user:
1
Click User Setting from the Advance
menu.
2
Click the check box under "SEL" beside
the user that you wish to add.
3
Click Edit to open the user settings
window.
4
Configure the following:
• User Enable: Select ENABLE to add the
user.
• User name: Click the blank field to enter
a desired user name.
• Password Enable: Select ENABLE to
enable a login password for the user.
• Password: Enter your password.
• Confirm: Re-enter the same password to
confirm your password selection.
5
Click Apply to save your settings.
Editing User Menu Authority:
1
Click User Setting from the Advance
menu.
2
Click the check box under "SEL" beside
the user that you wish to edit.
3
Click AUTHORITY. Select the menus that
you want the user to have access to.
4
Click Apply to save your settings.
To edit a User or Admin password:
1
Click User Setting from the Advance
menu.
2
Click the check box under "SEL" beside
the user or admin account you wish to
change the password for.
3
In the Password Enable drop-down menu,
select ENABLE.
4
In the Password and Confirm fields, enter
the new password of your choice.
5
Click Apply to save your settings.
Select checkbox