Setting the date and time, 2 click advance>date/time, 3 configure the following – LOREX Technology Lorex Digital Video Surveillance Recorder lh1 10 User Manual
Page 34
20
Setting the Date and Time
To set the date and time:
1
Right-click anywhere on the screen to open the Sub-Menu and select MAIN MENU.
• The Main Menu opens.
2
Click Advance>Date/Time.
3
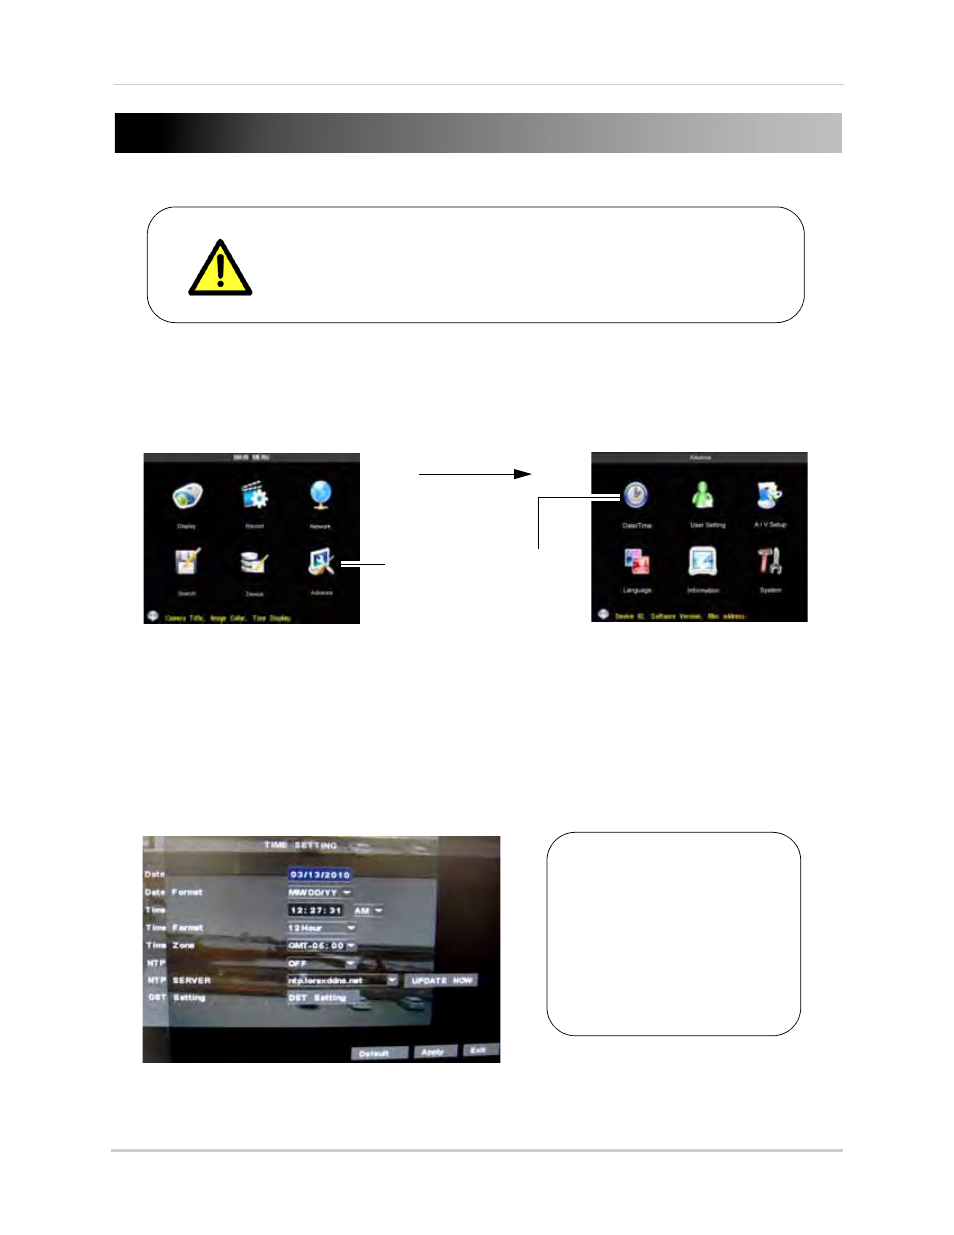
Configure the following:
• Date: Enter the month, date and year
• Date Format: SelectMM/DD/YYYY or , DD/MM/YYYY, or YYYY/MM/DD
• Time: Enter the time, select AM or PM
• Time Format: Use the drop-down menu and select 12HOURS or 24HOURS
• NTP: Select ON to enable automatic DST (Daylight Saving Time)
• Time Zone: Select your local time zone
• NTP SERVER: Select the time server that will keep track of DST settings. A constant internet
connection is required for the NTP server feature to function.
4
Click APPLY and then click UPDATE NOW to save your settings.
It is highly recommended to set the date and time when first
setting up your system.
Inaccurate time stamps may render your footage unusable for
court evidence.
Date/Time
Advance
If the system will not have
access to the internet, you
must manually configure
DST by clicking the DST
Setting button. For
details, see “Adjusting the
system time and DST
(Daylight Saving Time)
Settings” on page 47.