Power assy – SATO HT200e User Manual
Page 22
SECTION 2: INSTALLATION AND SETUP
Page 2-4
SATO HT200e
POWER ASSY
MAIN ELECTRICAL CONNECTION
Unless a battery pack is in use the printer must be connected
to a 100-220-volt power supply.
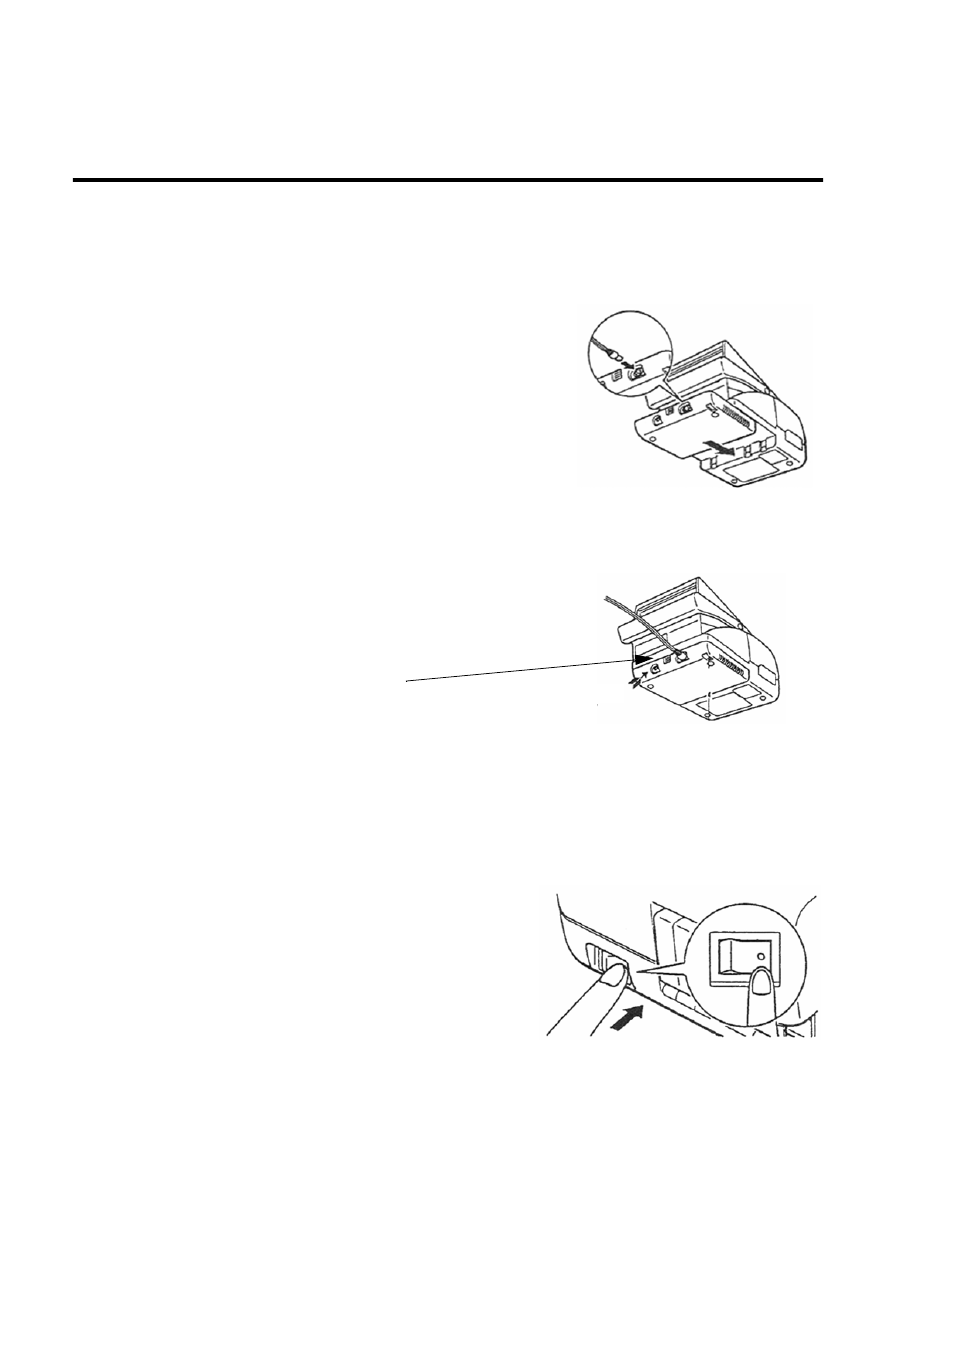
1. Connection of the Power Supply to the Main Unit.
Set the Power Supply to the groove of the main unit.
2. Insert it by sliding forward until you hear it click.
To remove it, push the lock of the power supply down and
slide towards you.
CAUTION
Do not attempt to remove the black plug.
Doing so invalidates the warranty.
3. Connection on the Wall Outlet side.
Insert the power supply plug into the wall outlet.
After inserting power supply plug into the wall outlet, be
sure to connect the printer ground wire to the ground;
otherwise, electric shock may occur.
4. Power Switch
Turn on the power switch.
In the initial setting step, set the power source to the
Power Supply.
CAUTION
After prolonged use the power supply may become warm.
This is normal after five or six rolls of labels have been printed continuously.