Master label printing for preset data – SATO HT200e User Manual
Page 100
SECTION 5
: PRESET, TABLE DATA
Page 5-8
SATO HT200e
MASTER LABEL PRINTING FOR PRESET DATA
[RCL]
[
→ ]
[
→ ]
[
→ ]
[
→ ]
[
→ ]
[ENTR]
[ENTR]
F O R M A T
N o
1 [
・
・ ]
H T 2 0 0 e
[ P R E S E T ]
2
P R I N T
S T R
M O D I F Y
D E L
D U M P
M A S T E R
[ P R E S E T ]
3
P R I N T
S T R
M O D I F Y
D E L
D U M P
M A S T E R
[ P R E S E T ]
4
P R I N T
S T R
M O D I F Y
D E L
D U M P
M A S T E R
[ P R E S E T ]
5
P R I N T
S T R
M O D I F Y
D E L
D U M P
M A S T E R
[ P R E S E T ]
6
P R I N T
S T R
M O D I F Y
D E L
D U M P
M A S T E R
[ P R E S E T ]
7
P R I N T
S T R
M O D I F Y
D E L
D U M P
M A S T E R
P R E S E T
N O . I N P U T
8
・
・ ・ ・ ― ・ ・ ・ ・
M A S T E R
P R I N T I N G
9
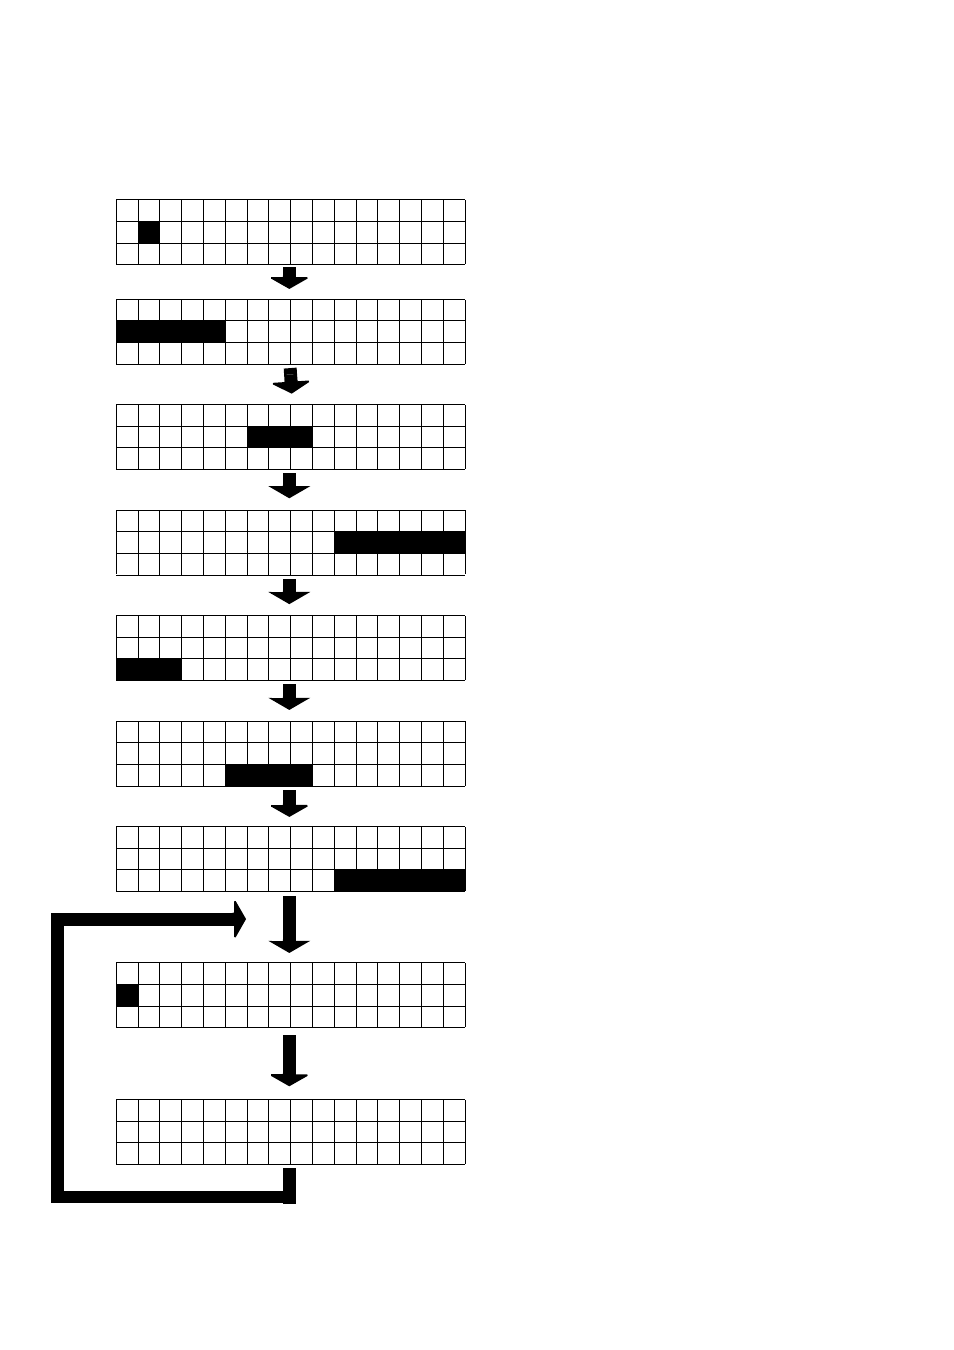
The screen for the selection of preset printing will
be displayed: Press [
→ ], so that it goes to the
screen for the process No. 3.
Press [RCL], so that it goes from the modes of the
print to the preset.
The screen for the selection of preset storing will
be displayed: Press [
→ ], so that it goes to the
screen for the process No. 4.
The screen for the selection of preset modification
will be displayed: Press [
→ ], so that it goes to the
screen for the process No. 5.
The screen for the selection of preset dump will be
displayed: Press [
→ ], so that it goes to the screen
for the process No. 7.
The screen for the selection of preset deletion will
be displayed: Press [
→ ], so that it goes to the
screen for the process No. 6.
The screen for the selection of preset master will
be displayed: Press [ENTR], so that it goes to the
entry of preset number.
The preset No. that is required to print master label
can be entered: Press [ENTR], so that it prints
master label for the preset specified.
Note that if [ENTR] is pressed without entering a
preset No., the preset data registered will be
printed from the beginning.
While master label is being printed, the screen of
the process No. 9 remains displayed. When print is
complete, it returns to the process No. 8.