Zkht1 trim kit (for 3/4" panels) – GE Monogram ZISB42D User Manual
Page 36
Note:
Optimal final
appearance depends on careful
routing depth. Do not exceed
1⁄4" routing depth.
• Position the handle bracket onto the steel door by
matching existing screw holes on the door and
bracket.
• Re-install dispenser trim, temporarily.
• Determine the desired location of the custom handle
and carefully mark centerlines of the screw holes.
• Drill 1⁄16" pilot hole through the trim until it starts
into the handle bracket. This marks the same location
onto the bracket.
• Remove dispenser trim and bracket.
Note:
The custom handle must
be installed against the handle
bracket. The custom handle
cannot exceed 11-3/4" length.
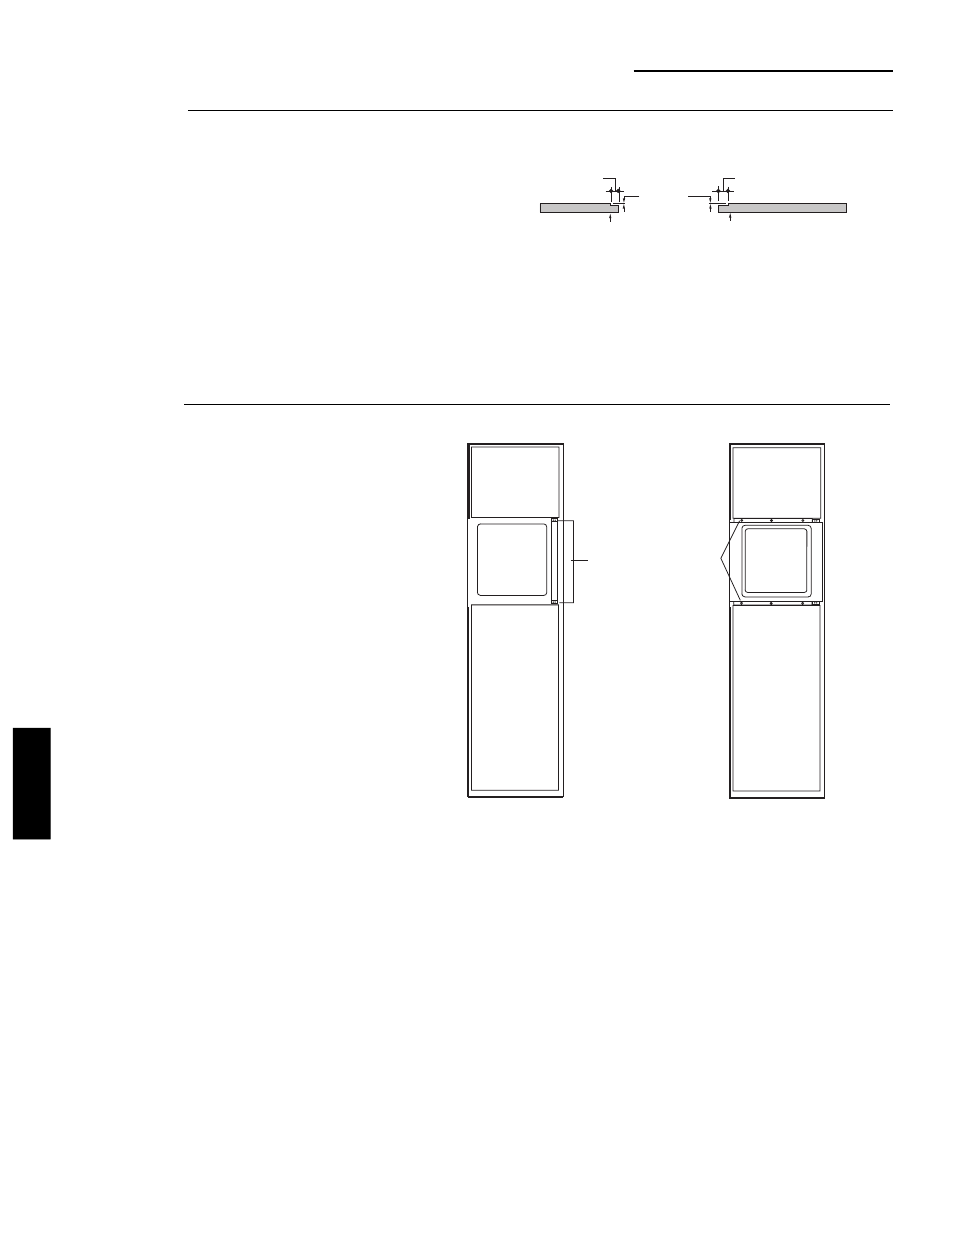
All 3 custom door panels must be routed to accommo-
date the door extrusions. Route the panels as
illustrated, max. 1/4" deep, 1-13/16" wide, top to bottom
on the handle side.
ZKHT1 Trim Kit (For 3/4" Panels)
Support for Custom Handles
Option 1 Installation
Refer to installation instructions for ZKT42 trim kit,
Option 2.
• Follow Step No. 1 to remove standard aluminum trim.
• Follow Step No. 2 and 3 to attach new 3/4" trim pieces
and install panel support brackets.
OPTION 2
For dispenser
model using
full-width
trim
Before
you
begin
Step 1
Locate position
of handle
36
Temporarily
Secure
Handle
Bracket
With
Screws
Temporarily
Secure
Dispenser
Trim
With
Screws
1-13/16"
1-13/16"
Back Side
Handle Side
Handle Side
Freezer Panel
Fresh Food Panel
1/4" Max.
Back Side
ZKHT1
INSTALLATION