Removing the pinchćarm sensor – HP 220 User Manual
Page 87
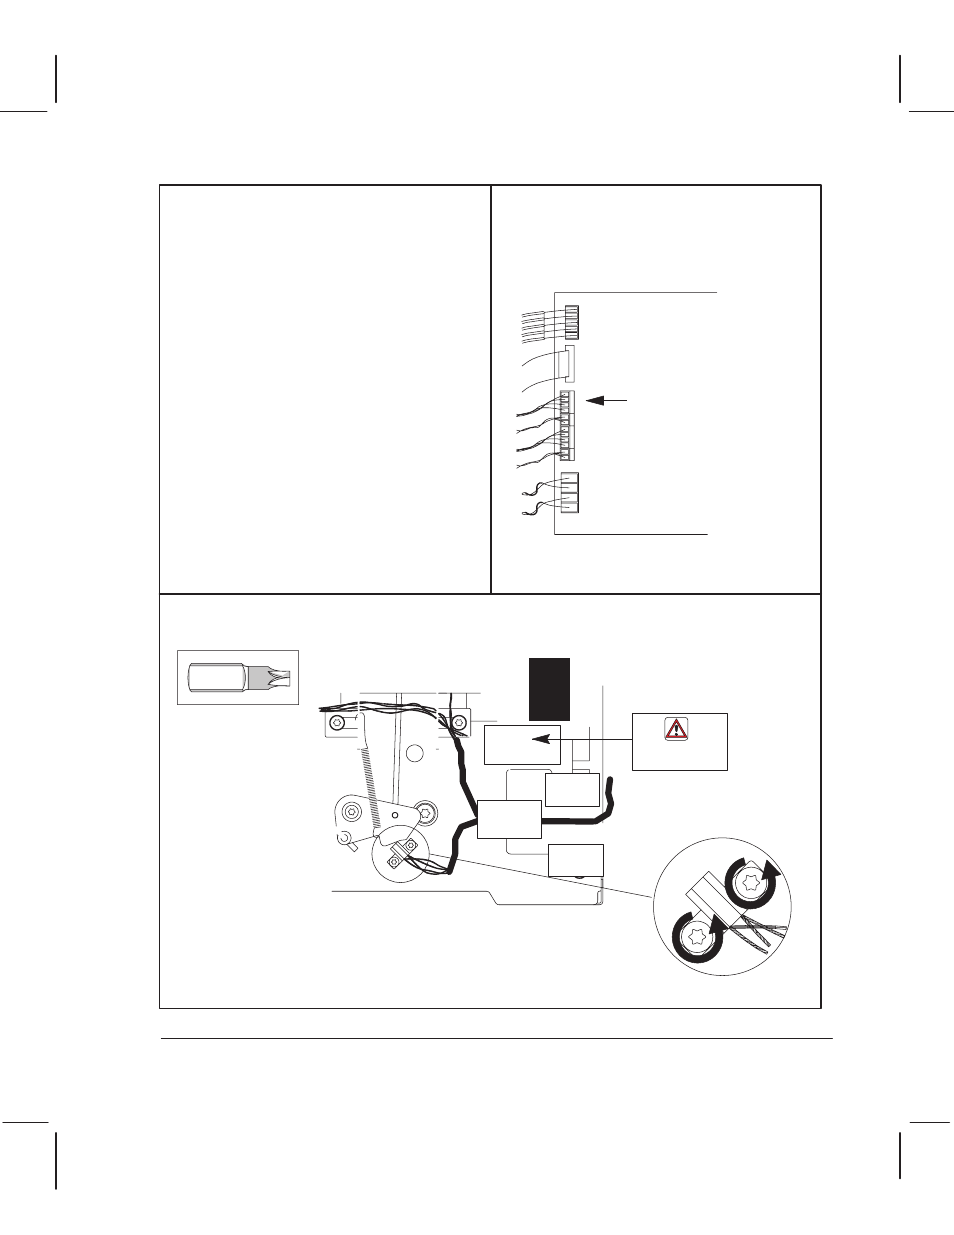
1 Remove the electronicsĆenclosure
cover ' page 6Ć5.
2 Remove the window ' page 6Ć15.
3 Remove the center cover ' page 6Ć16.
4 Remove the right endcover ' page 6Ć19.
5 Disconnect the pinchĆarmĆsensor cable
connector from the main PCA and from
the ferrite on the right sideplate.
Pinch-arm-
sensor connector
6 Remove the two screws that attach the pinchĆarm sensor to the right sideplate.
7 Lift the pinchĆarm sensor, with cable, clear of the plotter.
Torx-10
Pinch-arm
sensor
KEEP THIS AREA
FREE OF CABLES
ЙЙЙЙ
ЙЙЙЙ
Reassembling: The cable g e h
gh he
fe i e indica ed in he diag am bel w
The fe i e h lde
en f m he
Ferrite
6Ć23
Removal and Replacement
C3187Ć90000
Removing the PinchĆArm Sensor
This manual is related to the following products: