HP 220 User Manual
Page 112
1 Remove the window D page 6Ć15.
2 Remove the center cover D page 6Ć16.
3 Remove the left endcover D page 6Ć18.
4 Remove the right endcover D page 6Ć19.
5 Remove the encoder strip D page 6Ć39.
6 Remove the trailingĆcable guide D page 6Ć43.
7 Remove the YĆtensioner and
housing D page 6Ć45.
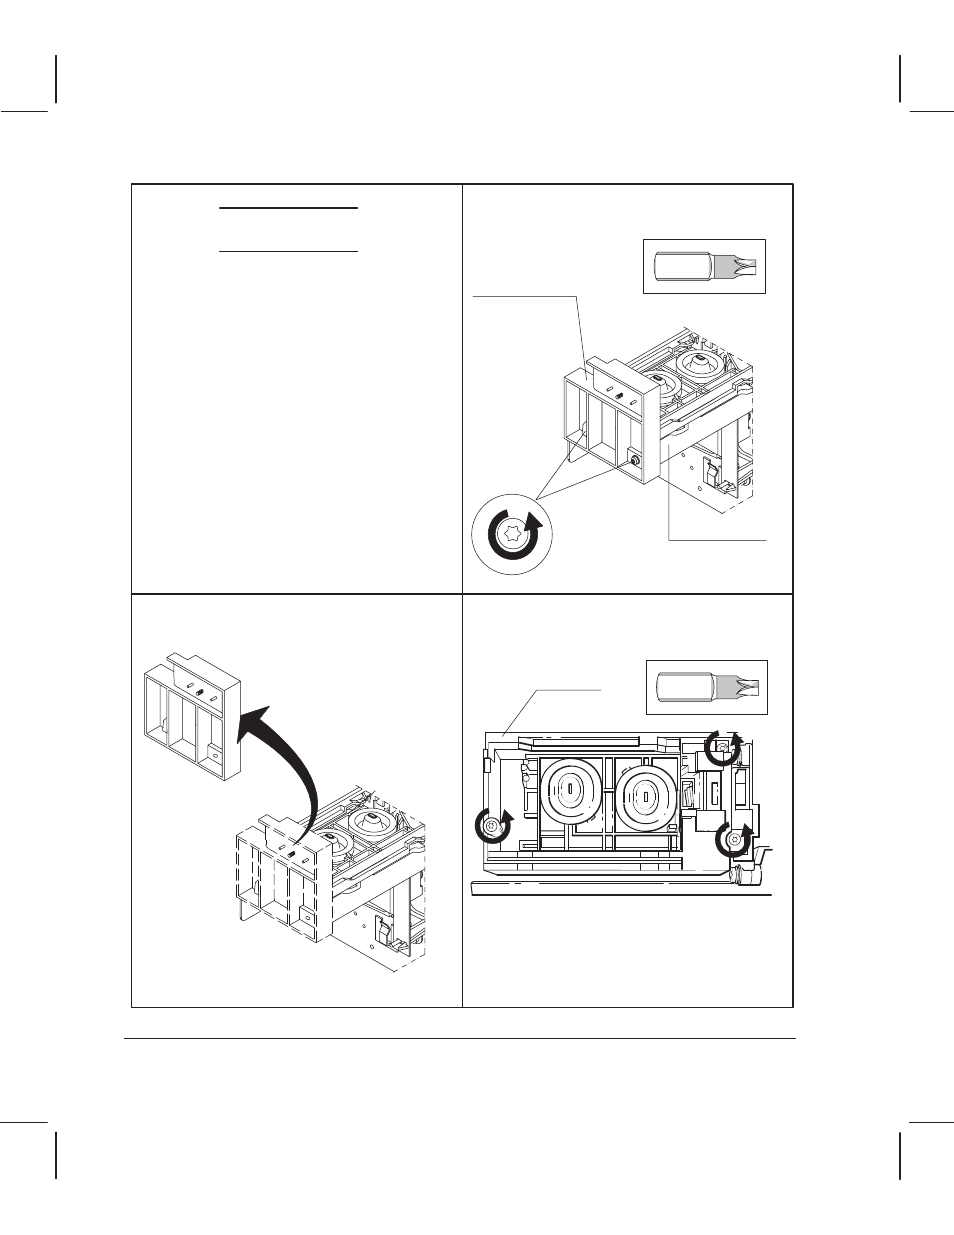
8 Remove the two screws that secure the
encoderĆstrip bracket to the serviceĆ
station housing.
Encoder-strip
bracket
Service-station
housing
Torx-15
9 Lift the encoderĆstrip bracket clear of the
plotter.
10 Remove the three screws that secure the
serviceĆstation cover to the
serviceĆstation housing.
0D2 DmbtinJ: Do no o e igh en he
h ee c e
Man ally mo e he
e ice a ion led o en
e ha i
mo e f eely benea h he co e
Torx-15
Cover
If you are installing a new cartridge carriage or
a new carriage PCA, ensure that the plotter
firmware is compatible with it.
Incompatibilities could destroy the cartridges.
(Details D chapter 9.)
C A U T I O N
6Ć48 Removal and Replacement
C3187Ć90000
Removing the CWrtridge CWrriWge Wnd MWin Drive Belt