Performing the accuracy calibration – HP 220 User Manual
Page 145
SHIFT
Accuracy
Calib. Print
7Ć7
Calibrations
C3187Ć90000
Performing the Accuracy Calibration
, Enter service mode D page 7Ć2.
. Plot a service configuration plot D page 8Ć23.
A Measure the distance between the centers of the X" marks on the configuration plot.
An accuracy calibration is needed if this distance is not
500 mm (20 in) 1 mm (0.04 in) under normal environmental conditions.
If the measured accuracy, media thickness, or environmental conditions vary greatly from
the factory standards, recalibrate the plotter by continuing with the following steps.
4 Place a sheet of media (preferably inkjet polyester film) over the top of the plotter for 10
minutes to let the sheet stabilize to the environmental conditions.
Use a sheet approximately 61 x 91 cm 24 x 36 in .
5 Select the appropriate
Media Type
on the front panel.
6 Loadthe media in portrait orientation into the plotter.
If using inkjet polyester film, load the film with the matte dull side down.
7 When the
Ready
LED lights up, holddown the
SHIFT
key andpress
Accuracy Calib. Print.
The Busy LED lights up and the plotter plots a
calibration plot. The plotter ejects the sheet,
and the
Load Media
LED lights up.
8 Unloadthe sheet.
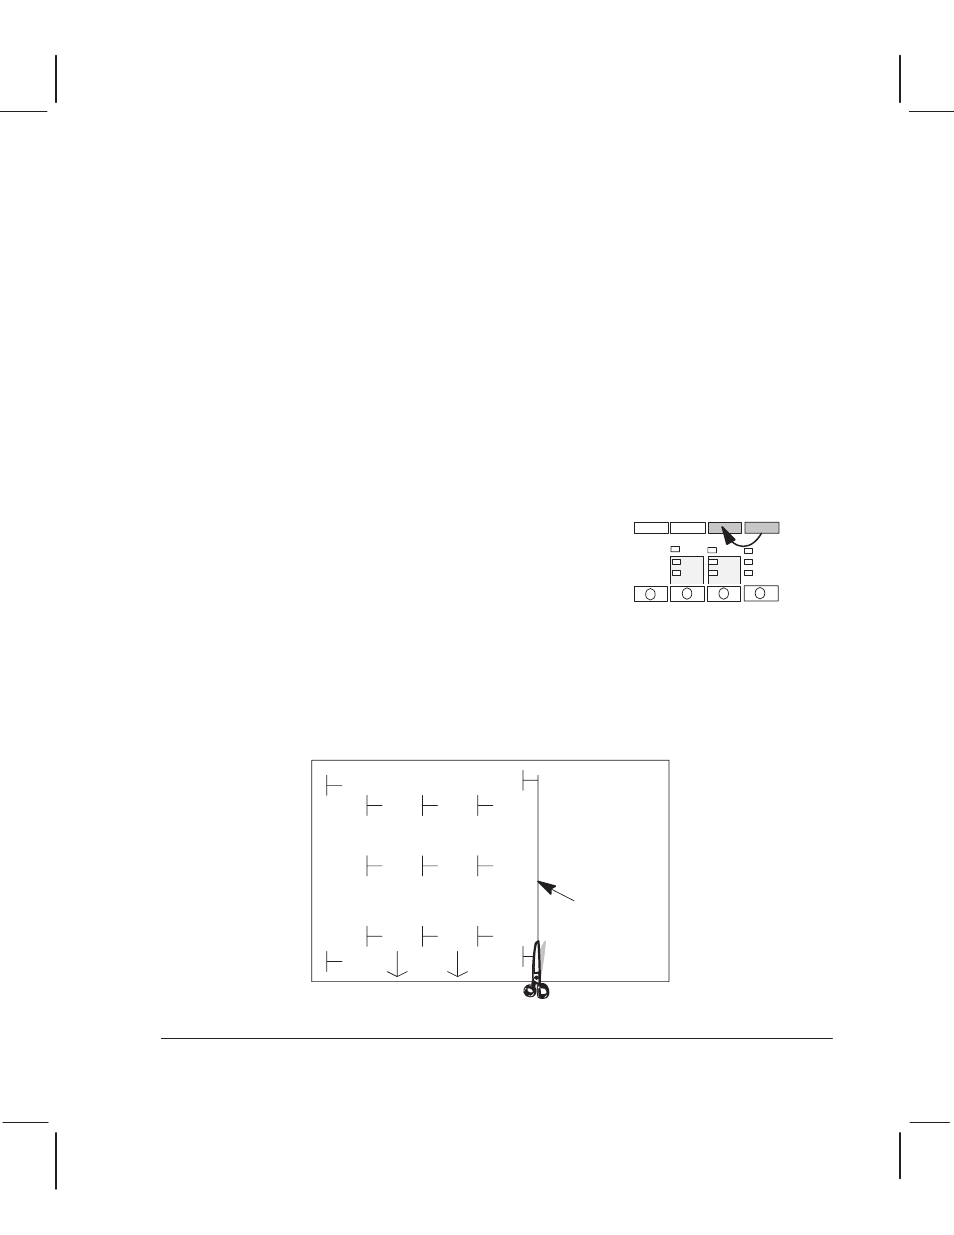
9 Reloadthe sheet facedown into the plotter, in the direction indicated by the arrows on
the calibration plot.
If the plotter is D/A1 size, the sheet does not fit in the entry slot in the orientation
indicated by the arrows. In this case, cut the blankend off the media so that it fits.
Cut along the long line on the plot; the cut must be very straight so that the sheet can
be loaded.
For D/A1-size plotters,
cut along this line