Internal control panel – Blackmagic Design URSA Mini Pro 12K (PL) User Manual
Page 71
16
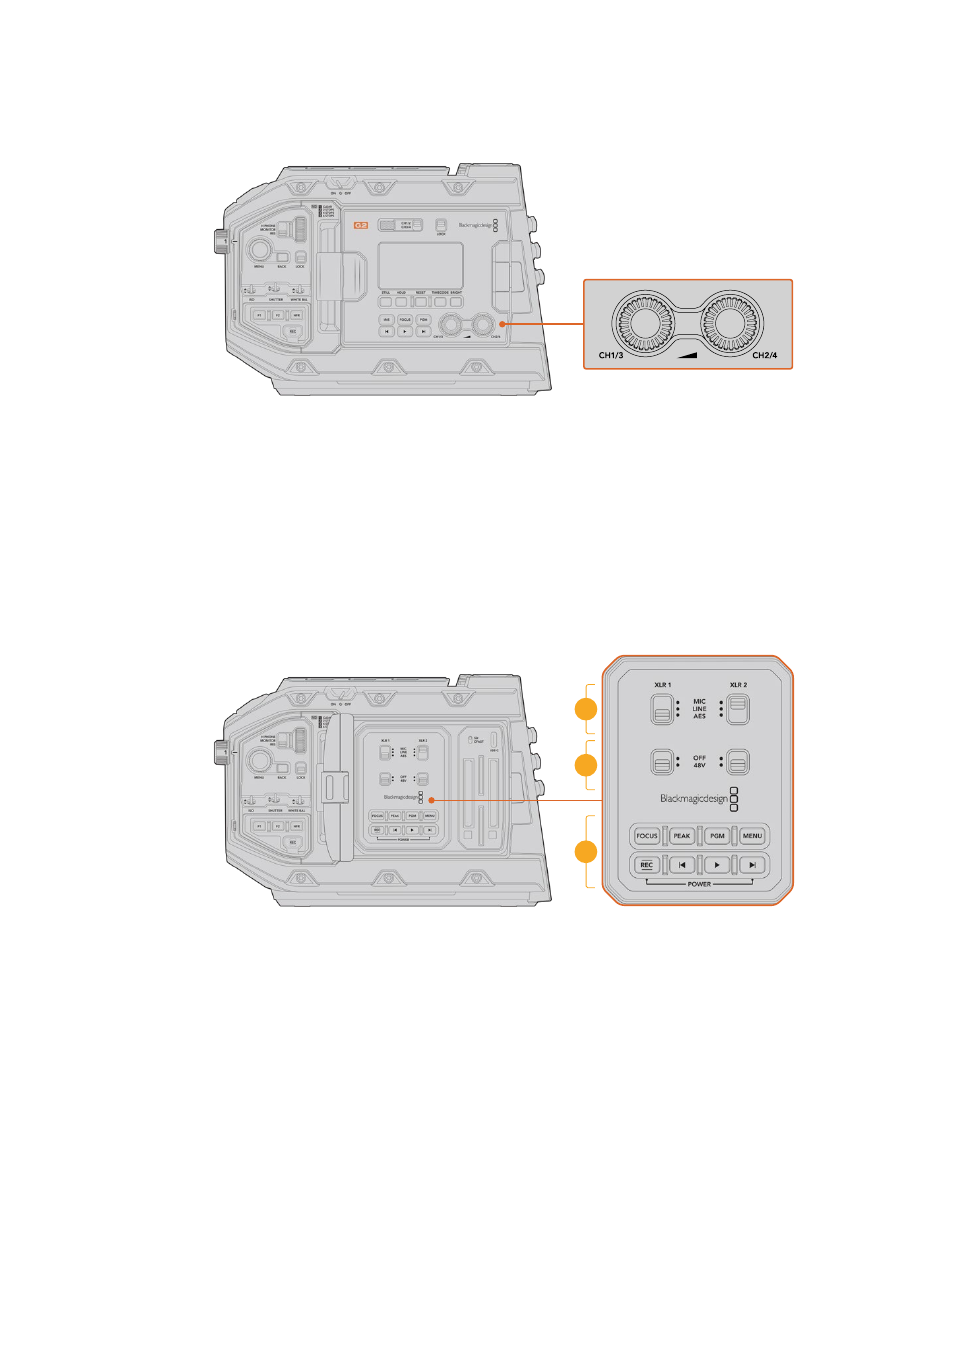
Audio Level Adjustment Knobs
URSA Mini Pro 4.6K G2 audio adjustment knobs
Use the built in adjustment knobs to set the recording levels for audio channels 1 and 2.
Turn each knob clockwise or counterclockwise to increase or decrease the recording
level for each channel of audio. Monitor the corresponding on screen audio meters as
you adjust each knob so you can see the best level to set it to.
Internal Control Panel
With your URSA Mini Pro’s foldout monitor open, you can access the internal control panel. Use
the controls here to set your audio inputs as well as phantom power settings, iris, focus, menu
and playback controls and more.
17
18
19
URSA Mini Pro internal control panel
17
XLR1 / XLR2
Use these switches to set how your URSA Mini Pro’s XLR inputs behave when selected
as an input source. The options available are mic audio, line level audio and AES
digital audio.
18
Phantom Power
Your URSA Mini Pro’s XLR inputs can provide 48V phantom power so you can use
microphones that aren’t self powered. Move this switch to ‘48V’ to enable phantom
power for any microphone connected to the XLR above, or ‘off’ to disable
phantom power.
71
URSA Mini Pro Control Buttons