Attaching the f mount – Blackmagic Design URSA Mini Pro 12K (PL) User Manual
Page 216
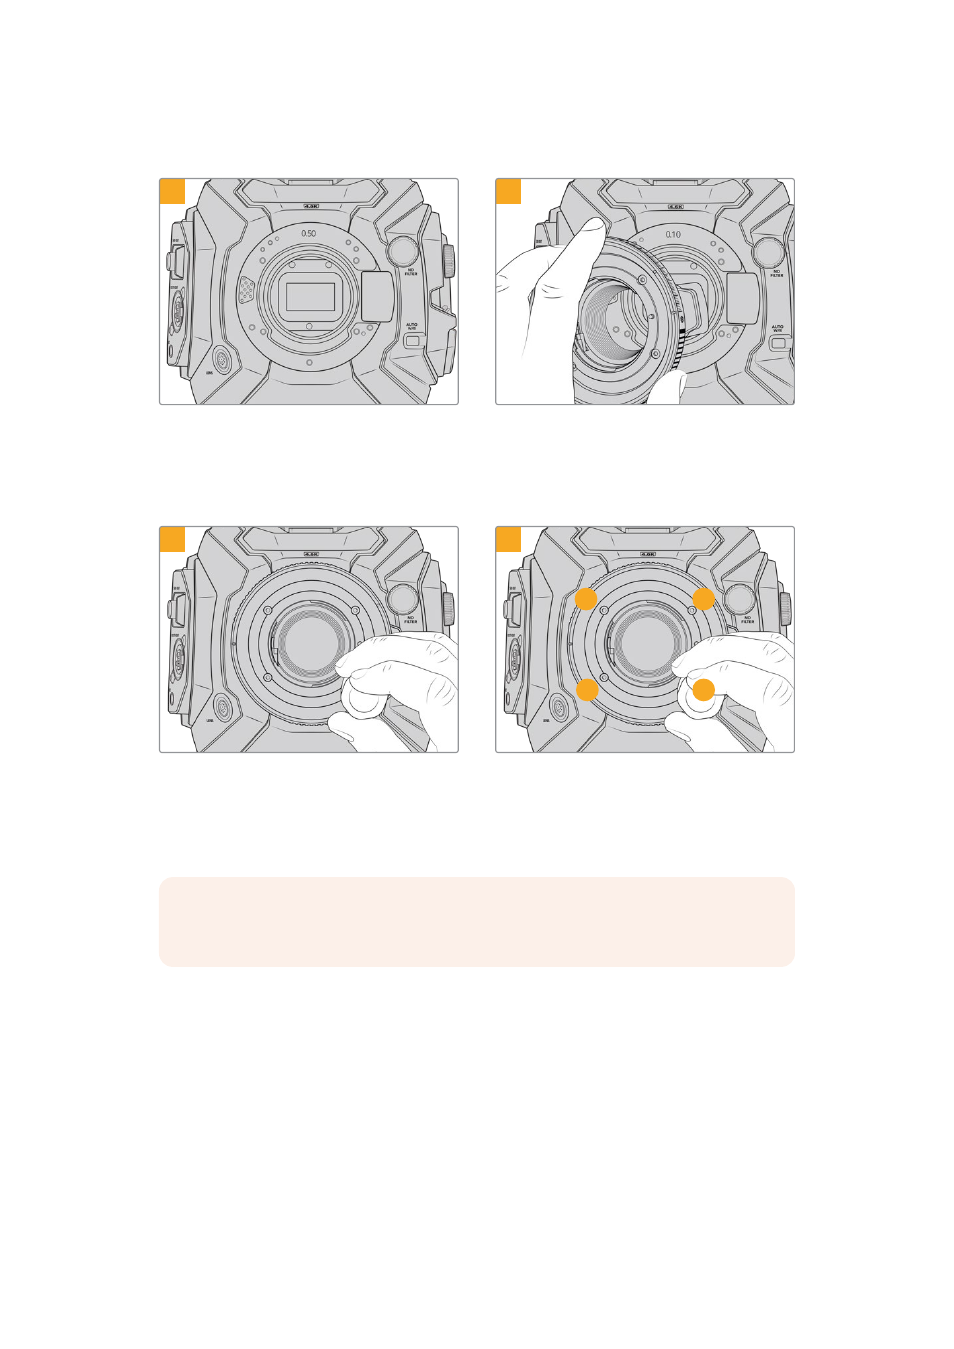
Attaching the F Mount
1
2
Place Blackmagic URSA Mini Pro vertically on a
solid, clean bench top to ensure the mount can
be attached vertically. If changing from the PL to
the F mount, ensure that you have removed the
PL baffle before inserting the F mount.
Carefully place the Blackmagic URSA Mini Pro
F mount onto the camera body ensuring the
white dot is at the 2 o’clock position.
3
4
1
3
4
2
Using a 2mm Hex driver or torque wrench set to
0.45Nm, loosely turn the four mounting screws
until initial contact is made with the shoulder of
the lens mount.
Confirm the lens mount is level and correctly
aligned, then tighten the screws in the order
shown here to an even pressure without over-
tightening the screws.
NOTE
When removing the F mount, simply follow the instructions in reverse order
from step 4 to step 1.
216
Interchangeable Lens Mount