Blackmagic Design URSA Mini Pro 12K (PL) User Manual
Page 281
3
4
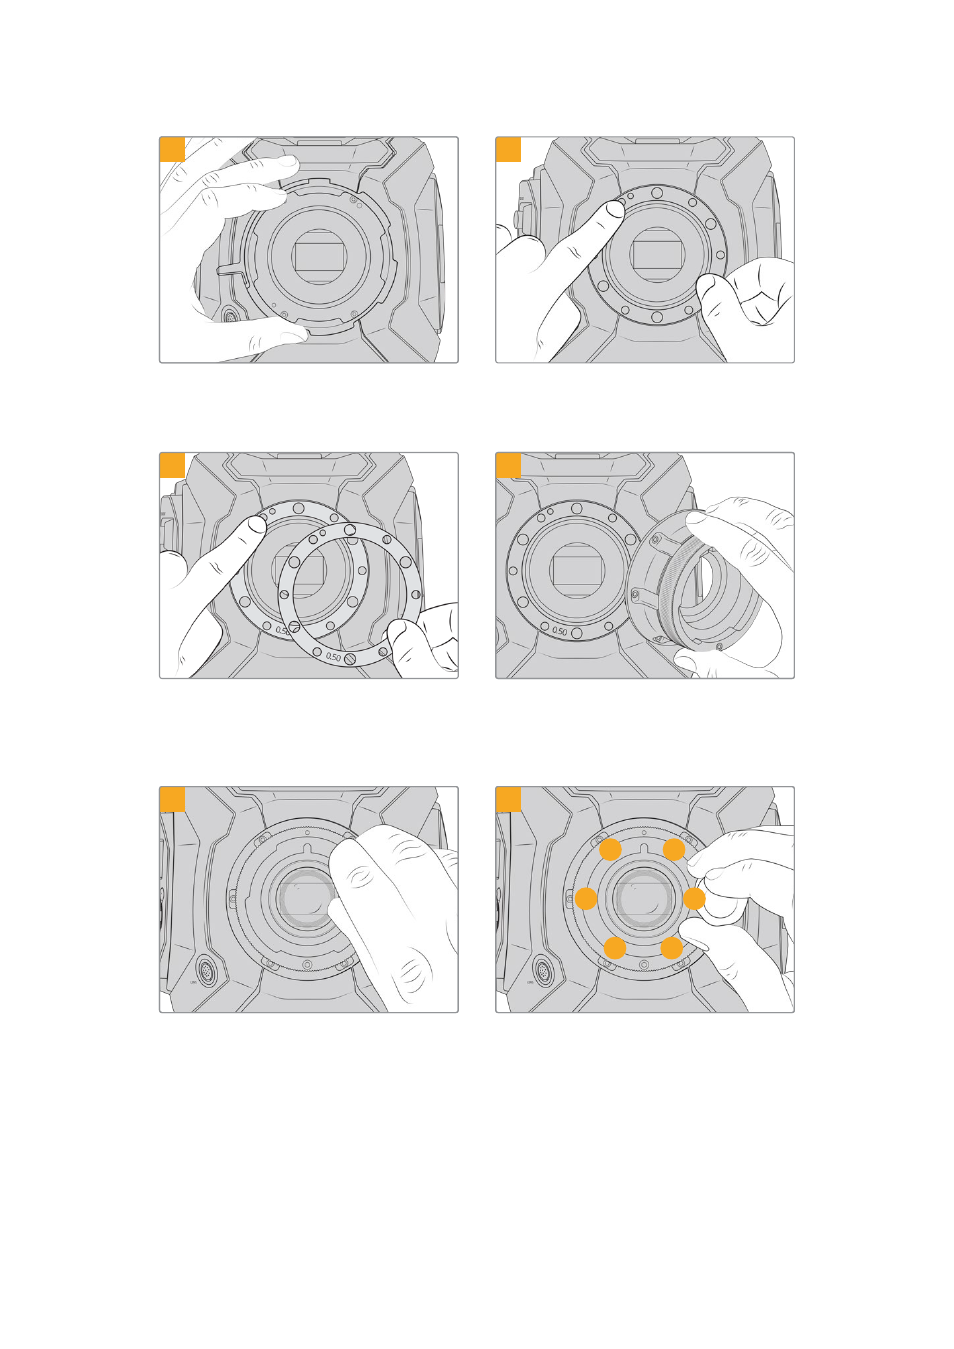
Carefully lift the lens mount away from the
camera body. Keep the screws safely located
close to the lens mount.
Note the alignment of the existing 0.50mm shim
with the alignment pin at the 11 o’clock position.
5
6
Place the 2 x 0.50mm shims supplied with your
Blackmagic URSA Mini B4 lens mount onto the
original 0.50mm shim. This creates the clearance
needed to optimize the flange focal distance.
Carefully place the Blackmagic URSA Mini B4
lens mount onto the camera body ensuring
the registration slot is aligned with the
alignment pin at the 11 o’clock position.
7
1
3
4
5
6
2
8
Using a 2mm Hex driver or torque wrench set to
0.45Nm, loosely turn the six mounting screws
until initial contact is made with the shoulder of
the lens mount.
Confirm the lens mount is level and correctly
aligned, then tighten the screws in the order
shown here to an even pressure without over-
tightening the screws.
281
Blackmagic URSA Mini B4 Mount