2 editing points, 1 specifying point no, 2 changing point label – Epson TP1 User Manual
Page 46: 3 changing coordinate data and pose flag, 4 deleting point data
Operation 2. TEACH Mode
36
TP1 Rev.5
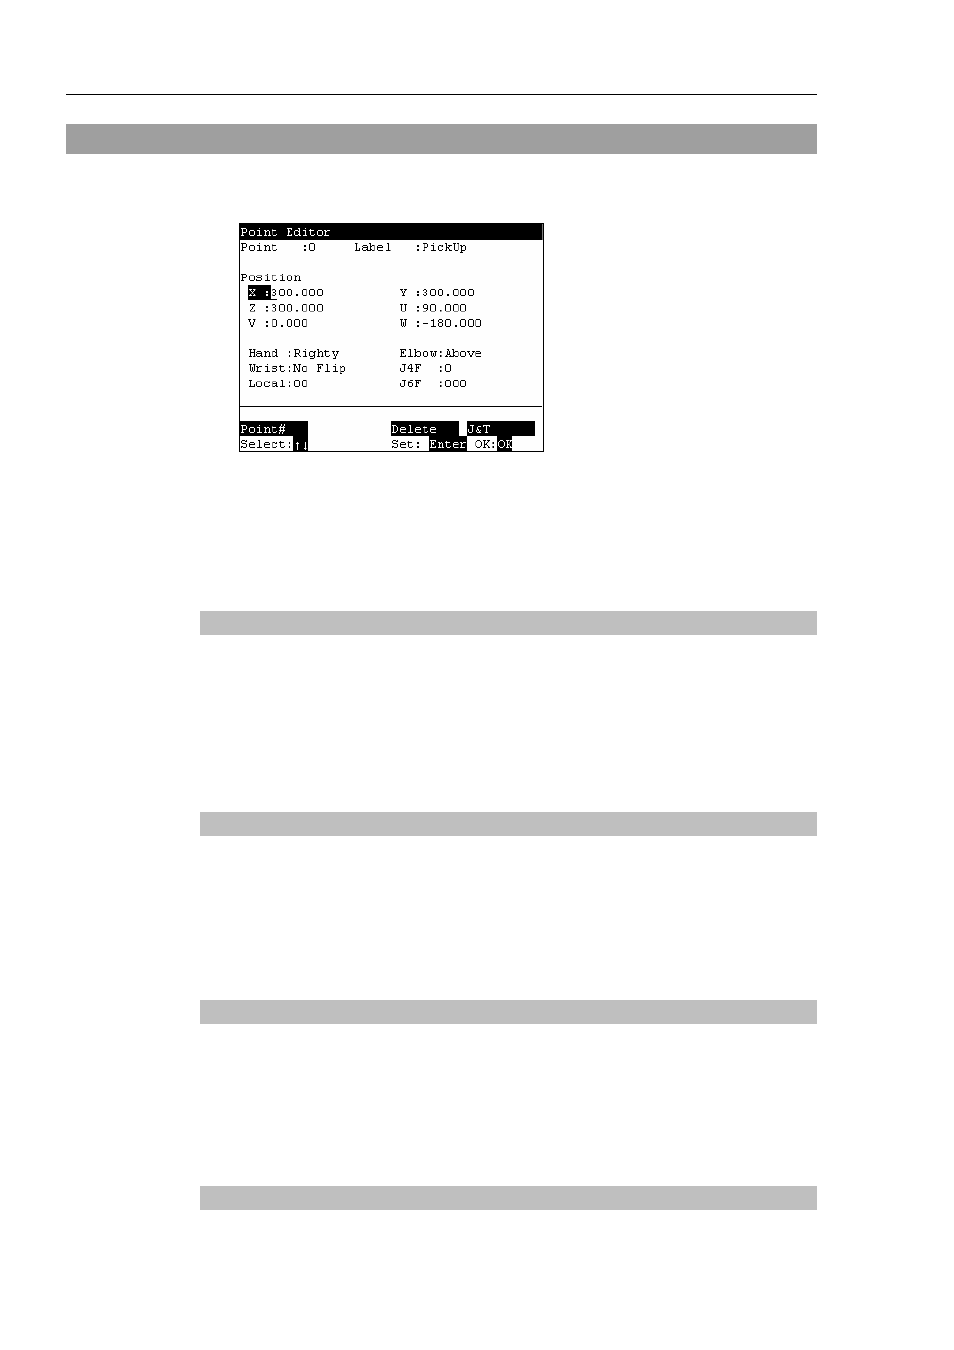
2.2 Editing Points
This section indicates settings in the [Point Editor] screen.
(1)
Press the
(2)
Set the data items currently displayed in the [Point Editor] screen. (See 2.2.1 to
2.2.4.)
(3)
Note down the robot position. (See 2.1.9.)
(4)
Back up the point data to a file. (See 2.1.10.)
2.2.1 Specifying Point No.
(1)
Specify the point number by changing the value in the [Point] using the <
↑> and
<
↓> keys.
Chang the point No. to change the indication at [Label].
(2)
Press the
(3)
Press the
2.2.2 Changing Point Label
(1)
Press the
(2)
Enter the label name at [Label] to set the name.
(3)
Press the
(4)
Press the
2.2.3 Changing Coordinate Data and Pose Flag
(1)
Press the
(2)
Move the cursor to each joint, and set the coordinate data/pose flag.
(3)
Press the
(4)
Press the
2.2.4 Deleting Point Data
Press the