Installing an rse-x1 mpu, Installing an mcp mpu – H3C Technologies H3C SR6600 User Manual
Page 26
16
6.
Fasten the captive screws with a Phillips screwdriver.
7.
If the router is powered off, power it on.
The RUN LED (green) flashes fast (at 8 Hz). It flashes slowly (at 1 Hz) after the RPE-X1 application
is loaded. This means that the RPE-X1 runs correctly. For the LED description, see "
."
Installing an RSE-X1 MPU
The RSE-X1 MPU is hot swappable and you must perform the remove slot number command to stop the
module before you remove it.
When two RSE-X1 MPUs are installed on the router, the ACT LED (green) is steady on.
To install an RSE-X1:
1.
Locate the slot to install the RSE-X1 (slot 1 or slot 2, the figures illustrate how to install an RPE-X1 to
slot 1).
2.
Remove the captive screws on the filler panel with a Phillips screwdriver.
3.
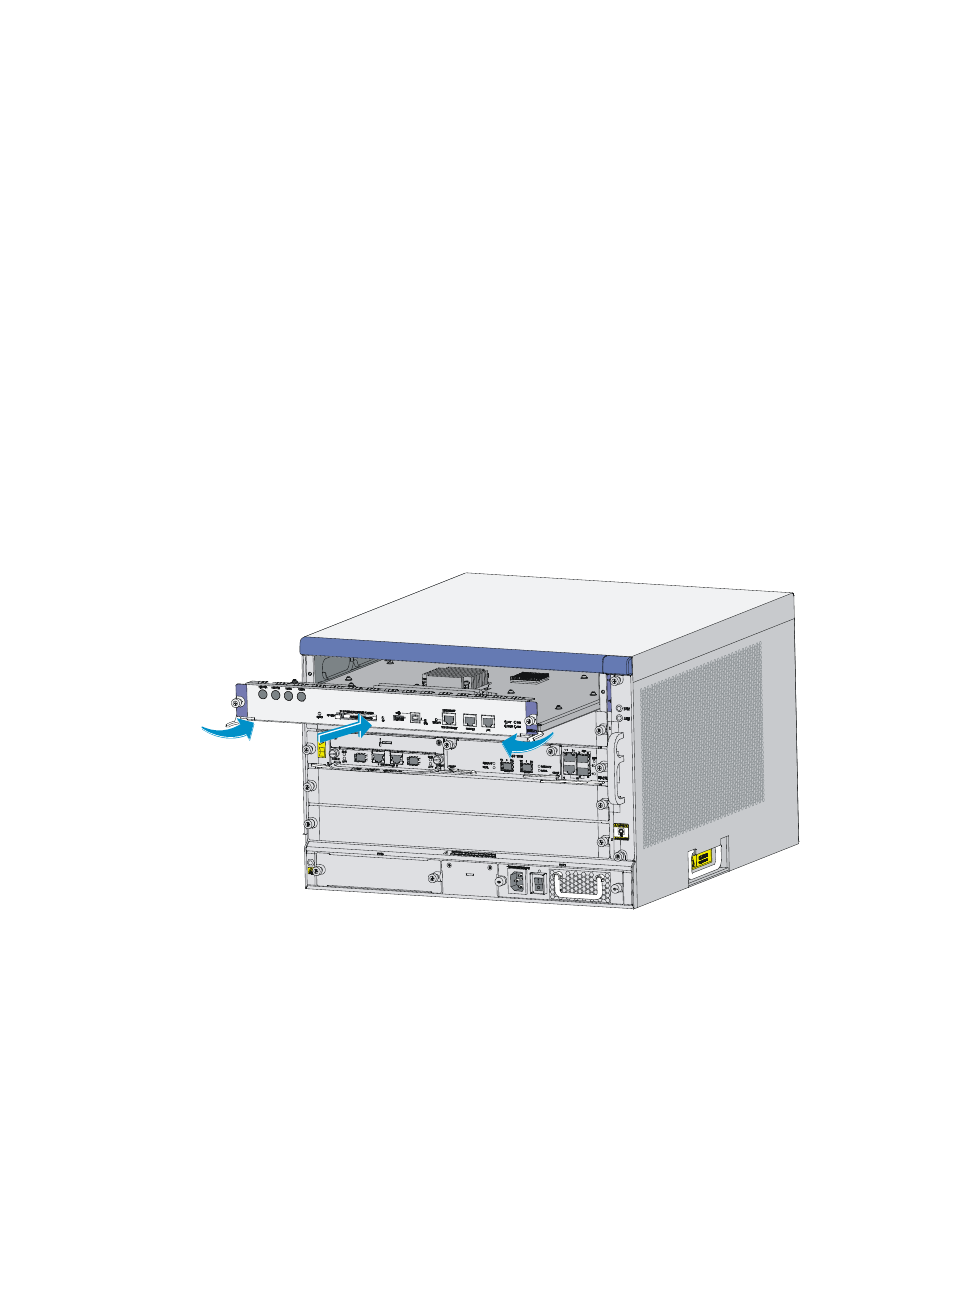
Use even pressure to gently push the RSE-X1 into slot 1 along the slide rails, and then push the
ejector levers inward to lock the RSE-X1 in position.
Figure 13 Inserting the RSE-X1 into the slot
4.
Fasten the captive screws with a Phillips screwdriver.
5.
If the router is powered off, power it on.
After the RSE-X1 is powered on, the RUN LED (green) flashes fast (at 8 Hz). It flashes slowly (at 1
Hz) after the RSE-X1 application is loaded. This means that the RSE-X1 runs correctly. For the
RSE-X1 LED description, see "
."
Installing an MCP MPU
The MCP supports FIP 10 and FIP 20 only.