Message waiting light settings, Table 1. avaya definity configuration example – Dialogic M7324 User Manual
Page 38
Dialogic
®
PBX Integration Board User’s Guide
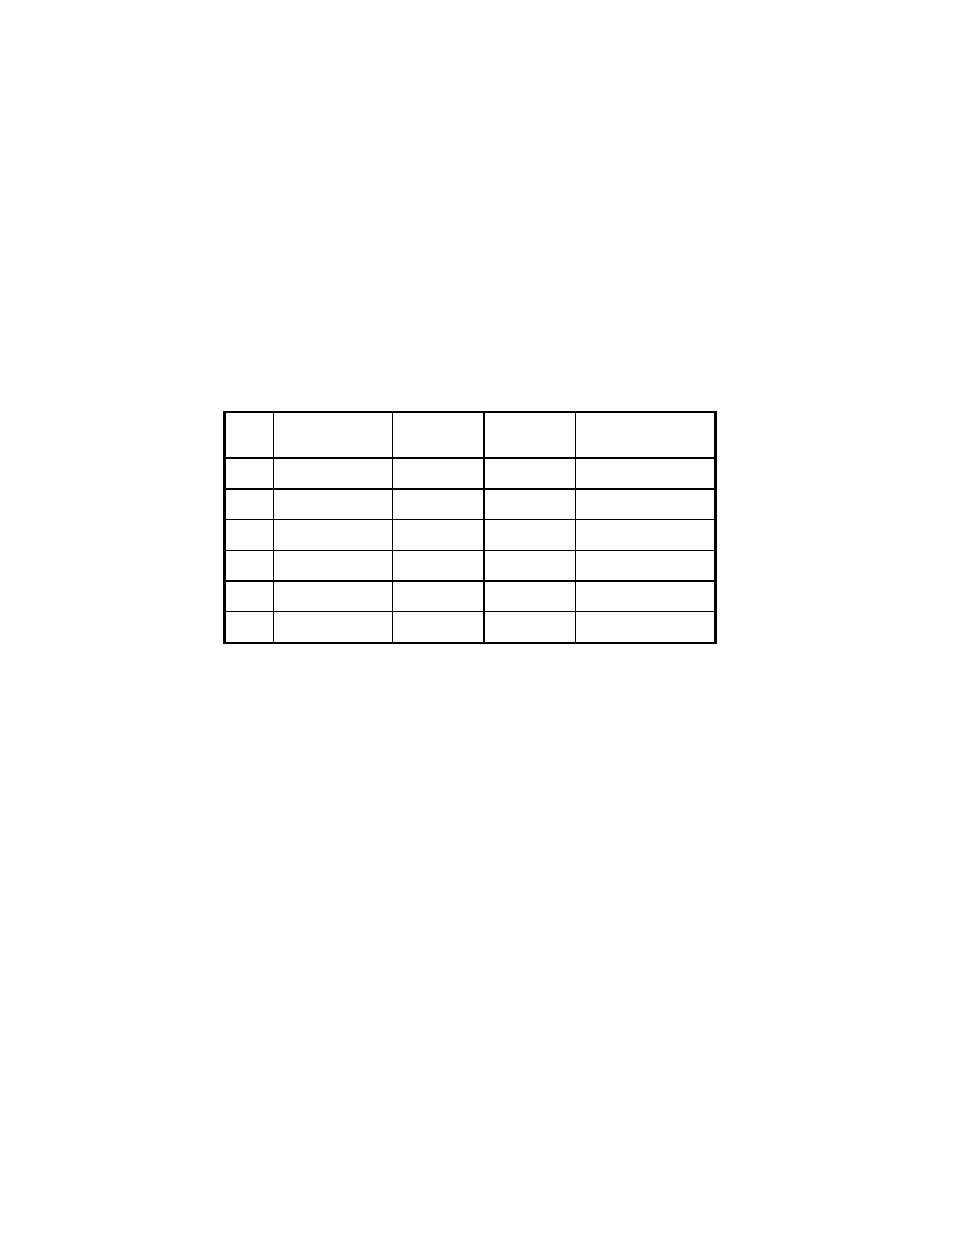
lists the structure used if configuring an Avaya Definity PBX. For
details about programming an Avaya PBX, refer to the appropriate Avaya
manual.
The following are examples of the switch settings:
Table 1. Avaya Definity Configuration Example
Slot
#
Board
Type
Telephone
Type
Extension
Numbers
Port
Settings
3 TN2181
2-wire
8434D 1000-1015
01A0301-01A0316
4 TN2181
2-wire
8434D 1016-1031
01A0401-01A0416
5 TN754B
4-wire
7434D 1032-1039
01A0501-01A0508
6 TN754B
4-wire
7434D 1040-1047
01A0601-01A0608
7 TN754B
4-wire
7434D 1048-1055
01A0701-01A0708
8 TN754B
4-wire
7434D 1056-1063
01A0801-01A0808
The settings above can be tailored according to your specific needs.
Message Waiting Light Settings
You must make certain settings from an Avaya management terminal for
Message Waiting Indicator (MWI) features to work correctly.
1. Login to switch from a management terminal.
2. Type command ‘CH STAT
Dialogic
®
PBX Integration Board port.
On the Avaya phone sets, go to the Button Assignments page and set
button 32 to ‘lwc-store’ and button 33 to ‘lwc-cancel’.
NOTE:
If these features are programmed into any other button, they
must be removed, as there may be only one occurrence of these
features per extension.
3. Repeat as necessary for other extensions.
38