Sehing the timer, Preparation, If you press the tuner/band button – Aiwa NSX-999 User Manual
Page 62: Setting the timer
Attention! The text in this document has been recognized automatically. To view the original document, you can use the "Original mode".
SEHING THE TIMER
nUD i_)
0““Q
The unit can be turned on at the specified time every day by the
buiit-in timer. You can aiso set timer recording from the radio orthe
connected equipment.
Preparation
Make sure the ciock is set correctiy.
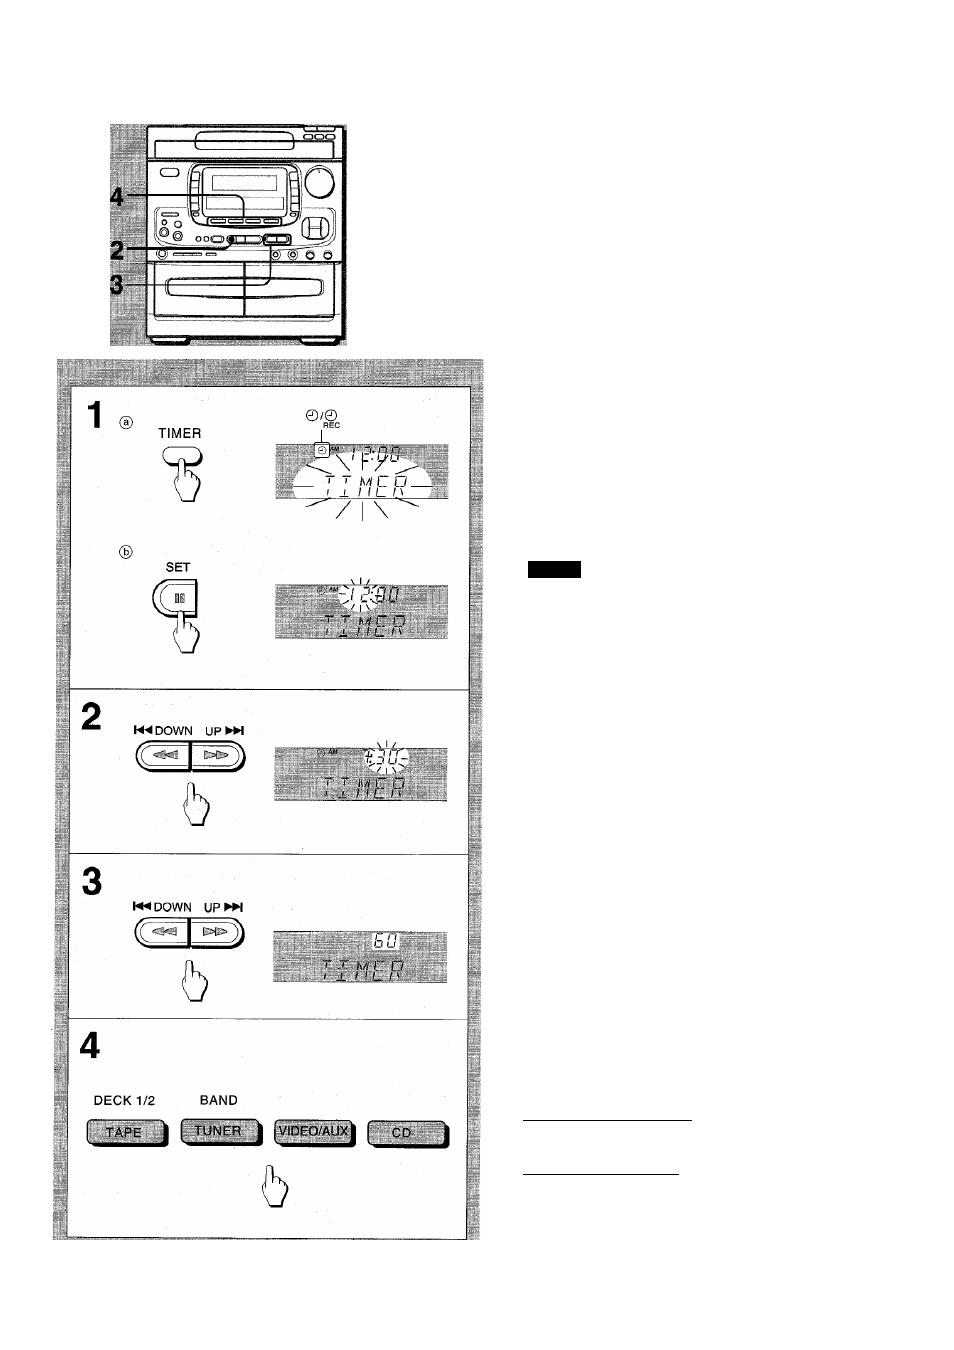
1 ® Press the TIMER button on the remote control
to select timer playback mode or timer record
ing mode.
Each time it is pressed, © or ^ is dispiayed.
©Timer piayback mode-^ ©Timer recording mode
REC
■ Cancei -
J
The
II
SET button iights, and TIMER and one of the source
names flash alternately in the display
for 4 seconds.
If TIMER
in the display goes out, press the TIMER button again.
(b) Within 4 seconds, press the
II SET button.
The hour in the display flashes.
NOTE
If the
II
SET button is pressed after TIMER in the display goes
out, another operation may start.
Press the DOWN or ►► UP button and the
II
SET button to designate the timer-on time.
After designating the timer-on time, “TIMER” and one of the
source names flash alternately in the display
for 4 seconds.
Within 4 seconds, select the duration for the timer-
on period with the DOWN or ►► UP button.
The duration for the timer-on period can be set between 10 and
240 minutes in 10-minute steps.
With i n 4 seconds, press one of the function buttons
to select a source.
The selected source name and TIMER flashes in turn in the
display.
After4 seconds, TIMER in the display goes out and timer setting
is completed.
If you selected the timer recording mode in step 1
Only the TUNER or VIDEO/AUX function can be selected.
If you press the TUNER/BAND button
The tuner function is selected, but bands cannnot be selected
in this step. Go to step 5, and select a band.
Get ready for the source.
In
0
timer playback mode
Load a disc, insert a tape, or tune in to a station.
©
In timer recording mode
After the preparation for each source, set the tape to be
recorded on into deck 2. (See steps 1 to 3 on page 46.)
62
To be continued.