Making an audio recording, Chapter 5: working with audio – Mariner Software WinJournal for Windows User Manual
Page 56
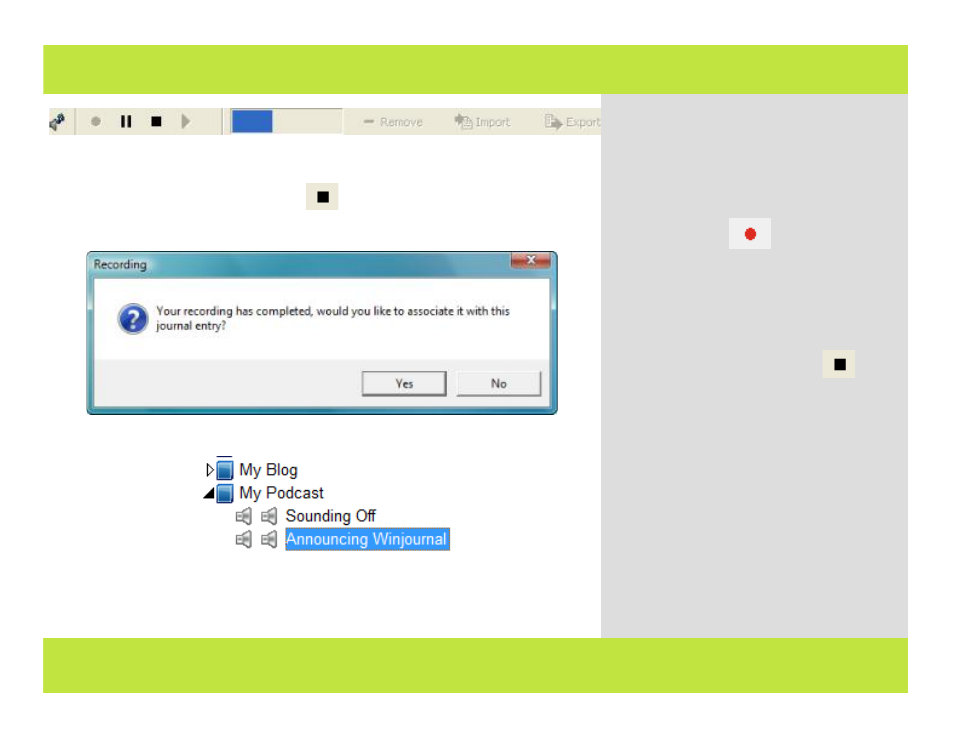
Making an Audio Recording
1
The Audio Recording Bar
2
The Stop Recording Button
4
Recording finished dialog.
5
Audio badges on entries
To record audio, you need to have a
microphone either attached or built in to
your computer. Once you have verified this,
you are ready to proceed. To Record an
Audio Entry:
1
To start recording audio, press the round
red Record button
on the Recording
bar (alternately, you can go to the Tools >
Recording menu and select Start Recording).
Start talking, performing or doing your best
Ira Glass impersonation. Once you've
finished:
2
Press the square Stop button
when
you are finished recording (or, you can go to
the Tools > Recording menu and select Stop
Recording).
3
A dialog appears.
4
Click Yes to attach the audio recording to
the current entry. Click No to cancel.
5
The entry appears in the Journals pane
with a sound badge next to it.
Click the play button to hear the audio
recording.
Chapter 5: Working with Audio
Chapter 5: Working with Audio
56 of 92