Custom menu – Futaba 3PKS User Manual
Page 38
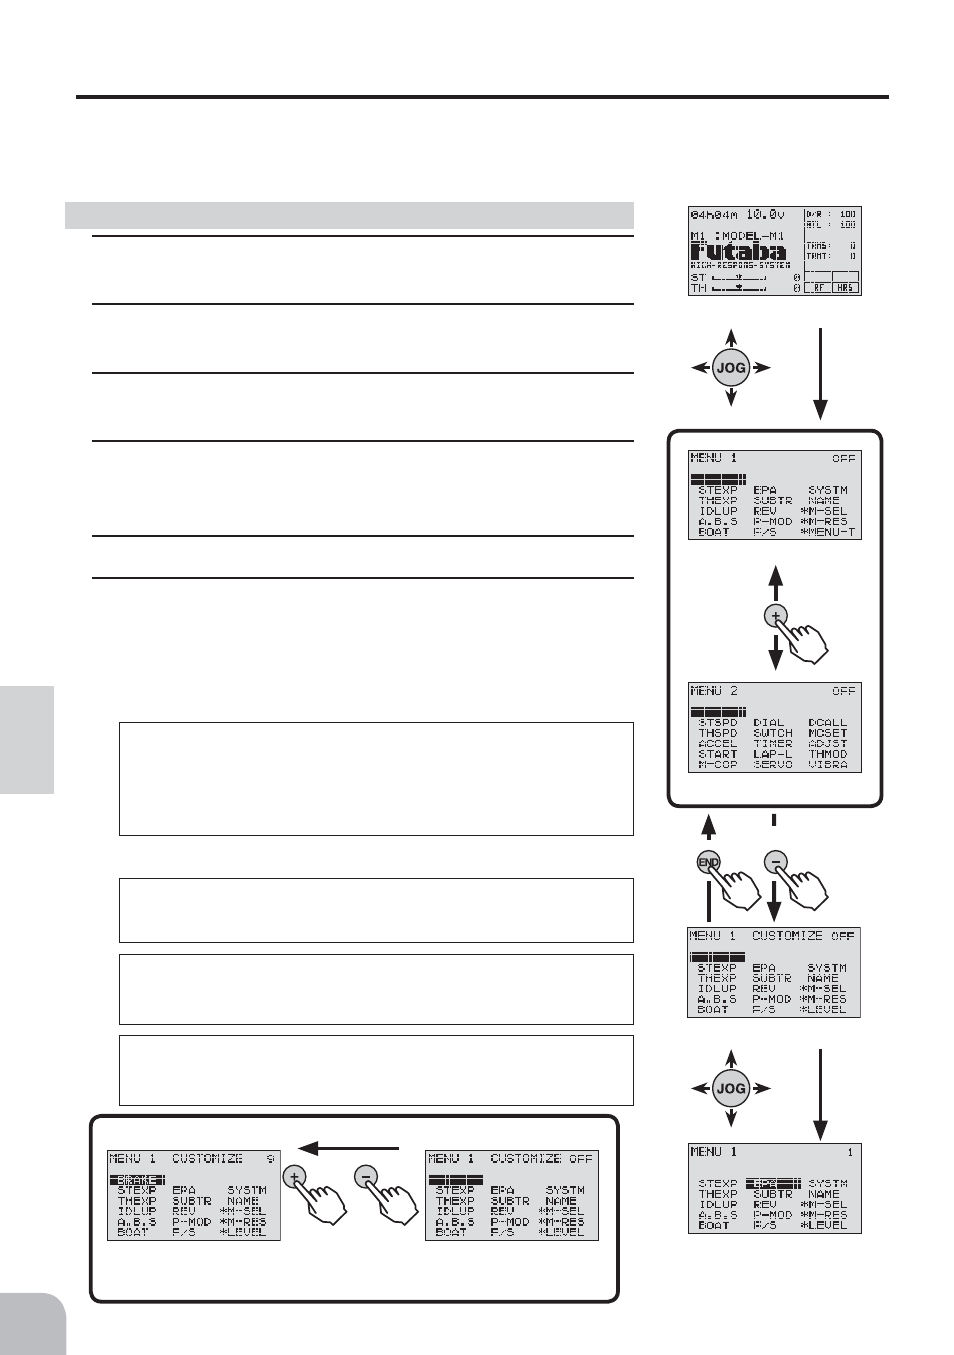
Press
(CUSTOMIZE MENU screen)
(approx. 1sec)
Press
Press
(MENU1 screen)
(MENU2 screen)
(Opening Screen)
Example of setting BAKE (brake mixing) where nothing
was set at LEVEL2 MENU1.
Press
Press
or
The highlighted item is the cur-
rently selected function.
38
F
u
nction M
a
p
Custom Menu
A menu matched to the purpose (custom menu) can be created by using the menu cus-
tomize function.
A different menu can be created for each model memory.
1
Call the menu screen from the initial screen by (JOG) button
up, down, life, or right operation.
2
Use the (+) button to Select the MENU1 or MENU2 screen
too be edited.
3
Press the (-) button for about 1 second. A confirmation beep
is generated and the menu customize screen is displayed.
4
Select the location where the function is to be assigned or
modified by moving the cursor by (JOG) up, down, left, or
right operation.
5
Use the (+) or (-) button to select the function to be assigned.
6
When assignment is complete, end by returning to the menu
screen by pressing the (END) button.
Menu assignment
Note:
This function consists of 3 fixed functions; *M-SEL (model select), *M-RES
(model reset), and * MENU-T (menu type select), and cannot be moved or de-
leted.
One point
This function allows modification of the menu list and
addition (except LEVEL3) or removal of functions. All
the functions can also be grouped at MENU1 only de-
pending on the purpose.
When the menu type is changed from the created customize menu to another
menu type by * MENU-T, the customize menu is reset and the menu is initial-
ized to the original menu.
The set values of a function deleted from the menu remain valid. When an un-
used function is turned OFF or rate adjustment, etc. related to other functions is
performed, check the set values before deleting the function.