Targeting the pedestal – Vinten Radamec Control (VRC) User Manual
Page 97
VRC System User Guide
96
Targeting the pedestal
1.
Select the camera unit to be targeted on the touch screen or the control panel.
2.
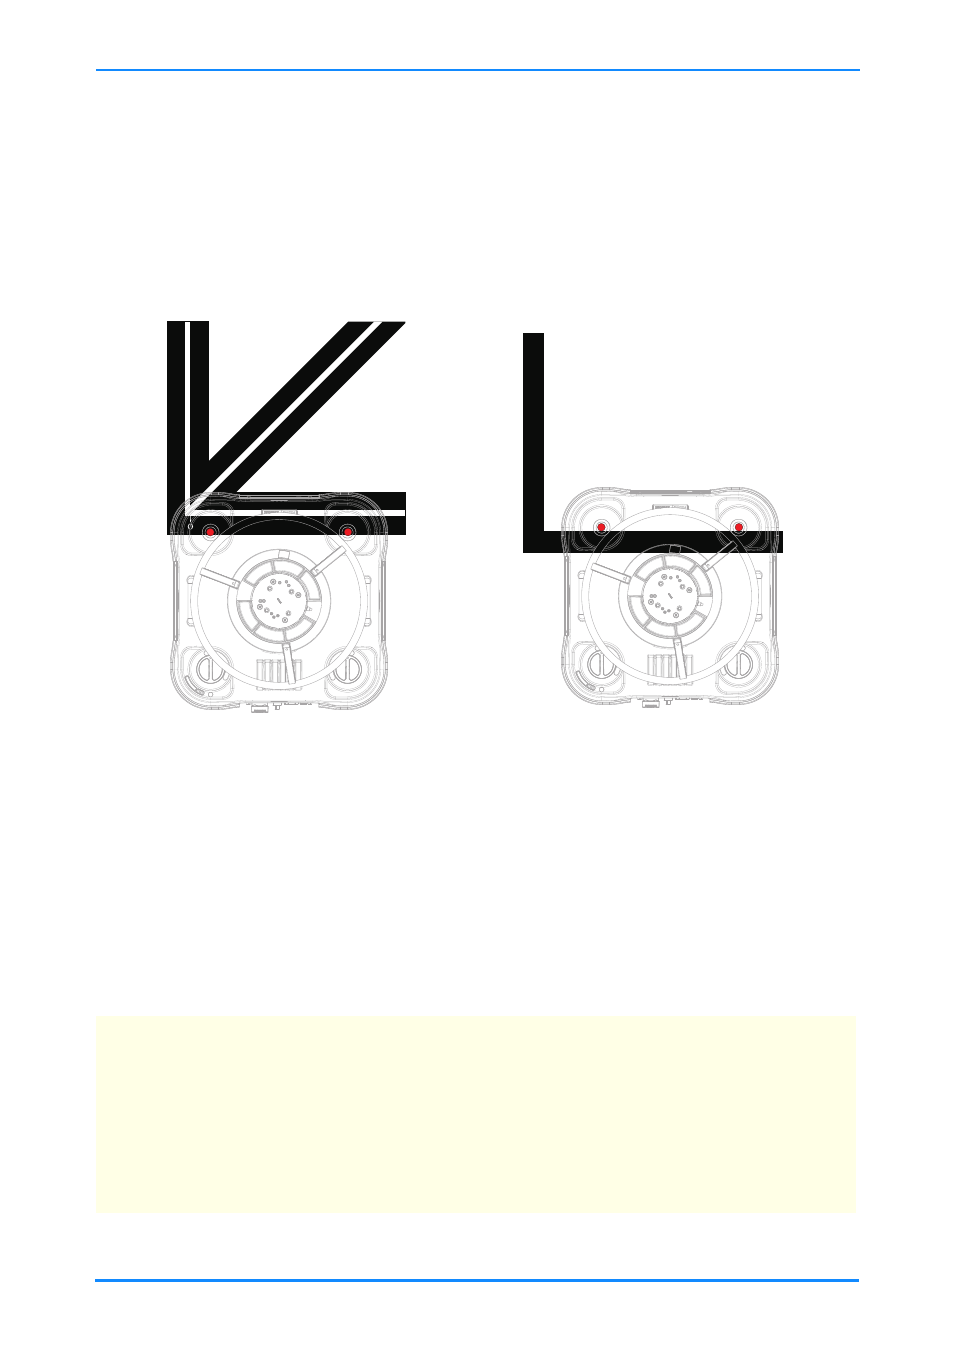
Installations may use either a 3-line target or an L-shaped target as shown in
Fig. 64. Use the XY/Height joystick on the control panel to position the
pedestal so that its north side (with the Emergency Stop switches) is
positioned over the edge of the relevant target type as shown in Fig. 64.
3.
If the edge of the pedestal and the edge of the target are not parallel, switch
the pedestal from Auto to Manual and from Crab to Steer, rotate the pedestal
to align it with the target. Switch from Steer to Crab and switch from Manual
to Automatic mode. Touch Opts > Enable to enable the pedestal.
4.
Touch Opts > Target to display a list of all available targets in the system.
Fig. 64 Fusion pedestal targeting start positions
NOTE: If you have targets installed in multiple studios, make sure that you select
the correct target for the pedestal being targeted in the studio that you are
currently working in – for example, select Studio 1 : Target 1 to target
camera #1 in studio #1 or select Studio 2 : Target 1 to target camera #1 in
studio #2. Stored shows and shots can only be recalled correctly, if you
use the same target that was used when the shows and shots were
created.
Pedestal with 3-line target
Pedestal with L-shaped
target