Elecraft KDSP2 Manual User Manual
Page 24
24
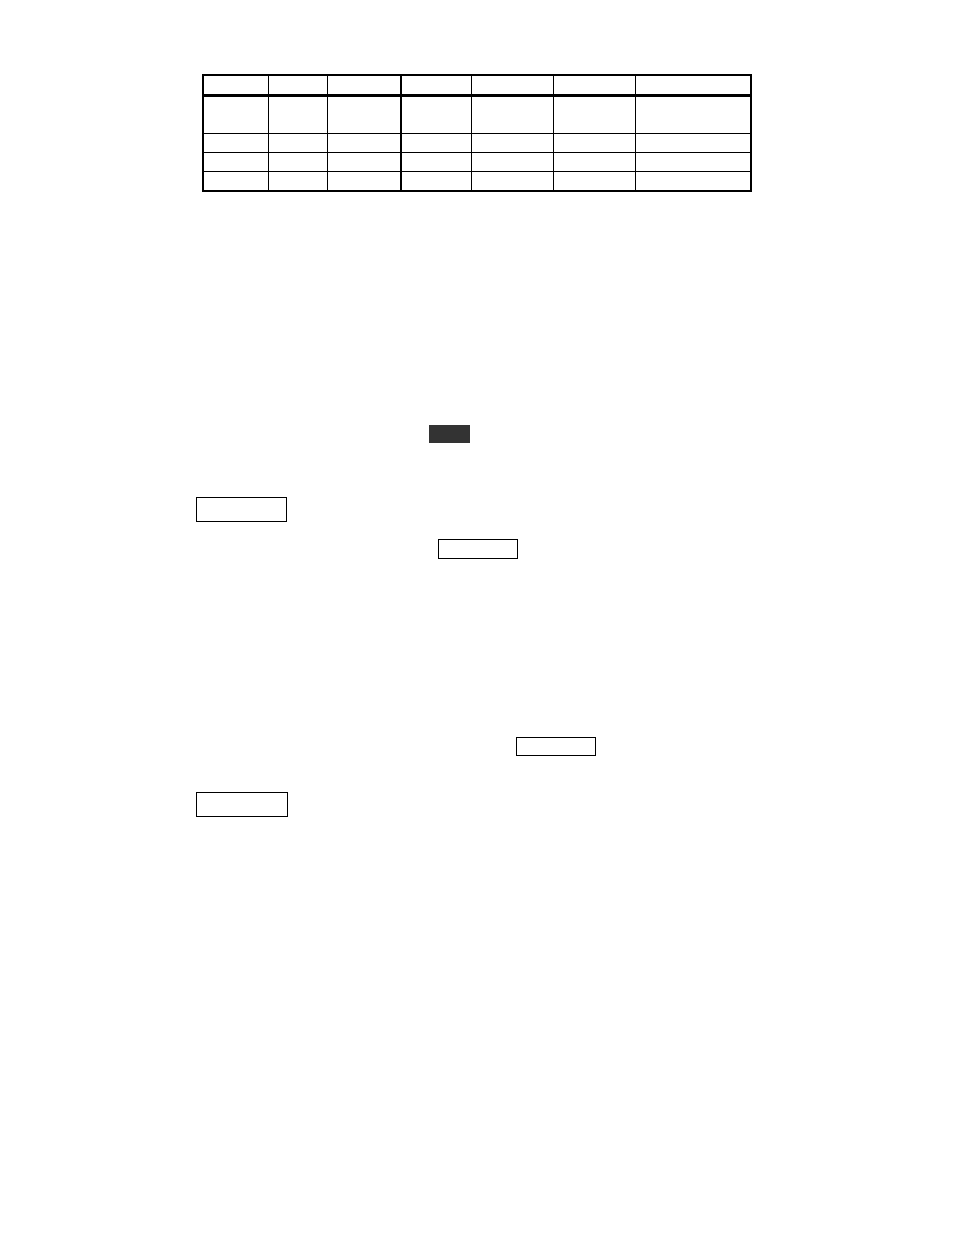
Mode Filter Center Width Notch Denoise Denoise
Level
RTTY 1 LOW
PASS
LOW
PASS
Not avail
Not avail
Not avail
2
2.5 kHz 1000 Hz Not avail
Not avail
Not avail
3
2.2 kHz
300 Hz
Not avail
Not avail
Not avail
4
1.0 kHz
200 Hz
Not avail
Not avail
Not avail
Table 1 - Factory Default Filters
For CW and RTTY, the first column of numbers represent the bandpass filter center frequency and the
second column the width. This is because these modes are commonly tuned and referred by their center
frequency.
For SSB, the first column represents the lower frequency of the audio passband and the second column the
upper frequency of the passband. This is generally more convenient than specifying a center frequency and
width. You may think of the first column as “low cut” and the second as “high cut” in passband terms.
Filter Selection
When you select a DSP filter (by pressing the
AFIL
button) the mode and filter number momentarily
appear in the K2 display. For example, when going from CW filter 1 to CW filter 2, the display will briefly
show:
CF2
To display the KDSP2’s primary menu, tap the DISPLAY button.
KDSP2 Primary Menu
In SSB or CW modes, the primary menu is used for the auto-notch and noise reduction functions. In
RTTY, the primary menu is the Filters menu, described below.
From the primary menu, you can toggle the noise reduction adaptive filter (generally referred to as a
“denoiser” and, in the SSB mode, the auto-notch filter. You can also adjust the denoiser’s level from 1
(least aggressive) to 4 (most aggressive).
Let’s assume you were in SSB mode using filter 2. Tap the DISPLAY button to bring up the primary
menu in the K2 display:
S2 nr nt
This indicates SSB mode, filter 2, denoiser and autonotch are off.