1 to setup remote system setting, To setup remote system setting, Chapter 8.2 – AVer NX8000 User Manual
Page 85
78
8.1.1 To Setup Remote System Setting
Click OK to exit and save the setting and Cancel to exit without saving the setting. The setting
here applies to Remote DVR only.
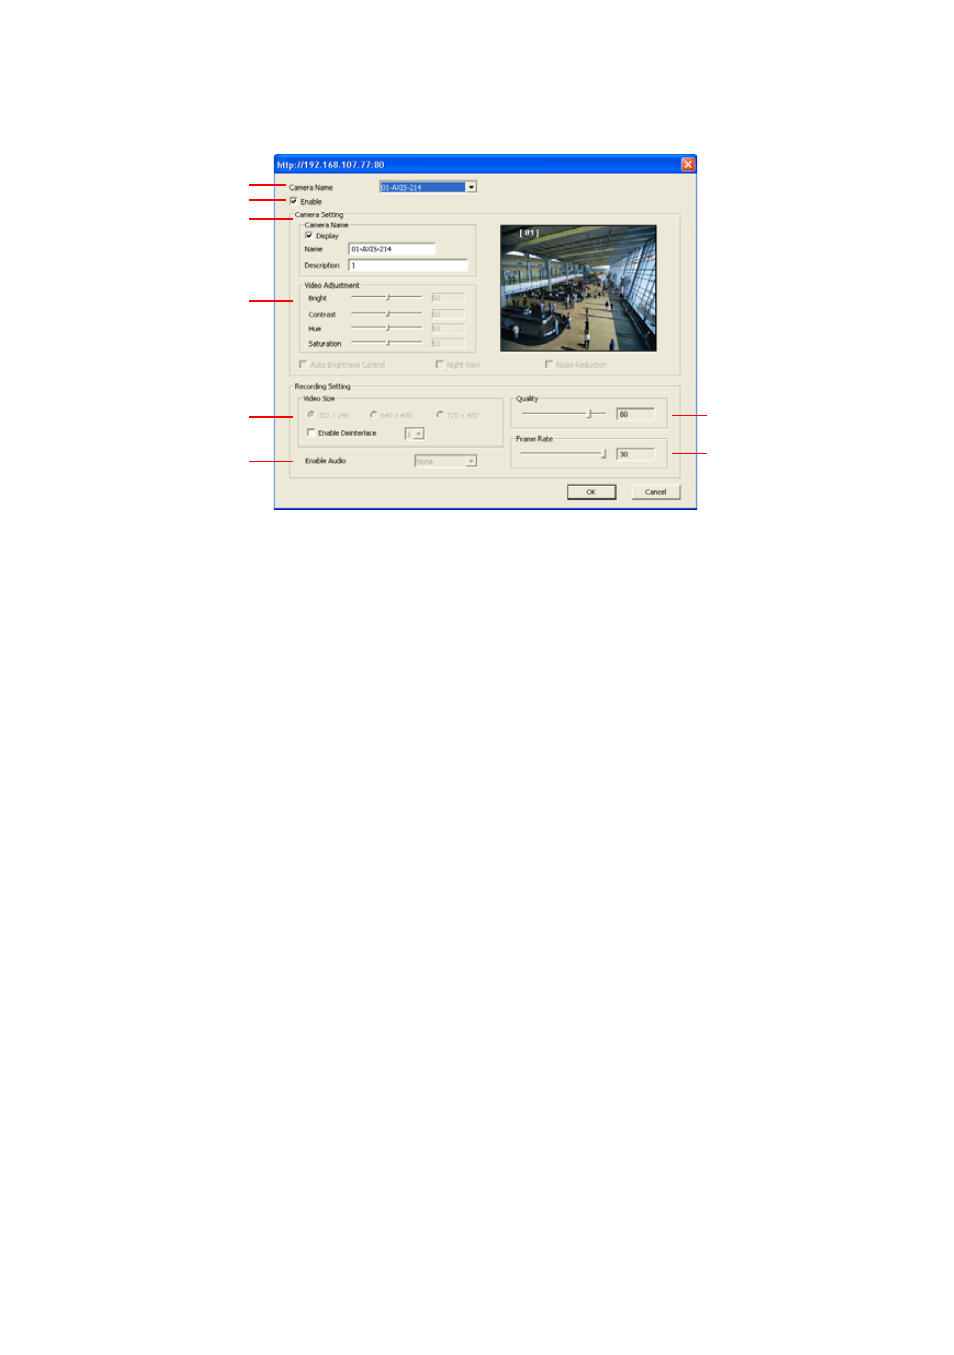
(1)
(2)
(3)
(4)
(5)
(6)
(7)
(8)
(1) Camera Name
Select the camera you want to adjust the settings.
(2) Enable
Set to enable/disable the selected camera. When there is no video source on the camera, we
suggest disabling it so that the system won’t detect it as video loss error.
(3) Camera Name
-
Display
Enable/disable to show the video. Even if the video of the selected camera is hidden you
can still record the video and preview it in playback mode.
-
Name
Change the camera name.
-
Description
Add a short comment.
(4) Video Adjustment
Adjust the Brightness, Contrast, Hue and Saturation of the selected camera.
(5) Recording Setting
Select the size of the video and click the ~ button. The higher the size, the larger the file it
create. You can also activate the Enable Deinterlace to enhance the video quality. Set the
Enable Deinterlace
mode to #1, if you are capturing motionless picture and #2, if it captures
lots of movement.
(6) Enable Audio
Select to assign the audio channel of the selected camera. You can only assign one audio
channel to one camera source. This way you can record both audio and video.
(7) Quality
Adjust the video quality. The higher the value, the lower the compression level and uses more
hard disk space.
(8) Frame Rate
Set the number of images per second of the video to be recorded. The frame rate ranges from
1 to 30 for NTSC and 1 to 25 for PAL. The higher frame rate, it uses more hard disk space.