6 to setup alarm recording setting, 7 to setup sms/mms setting, To setup alarm recording setting – AVer NX8000 User Manual
Page 71: To setup sms/mms setting, Chapter, Chapter 5.9.7, Chapter 5.9.8
64
5. Click
OK
to exit and save the setting and Cancel to exit without saving the setting.
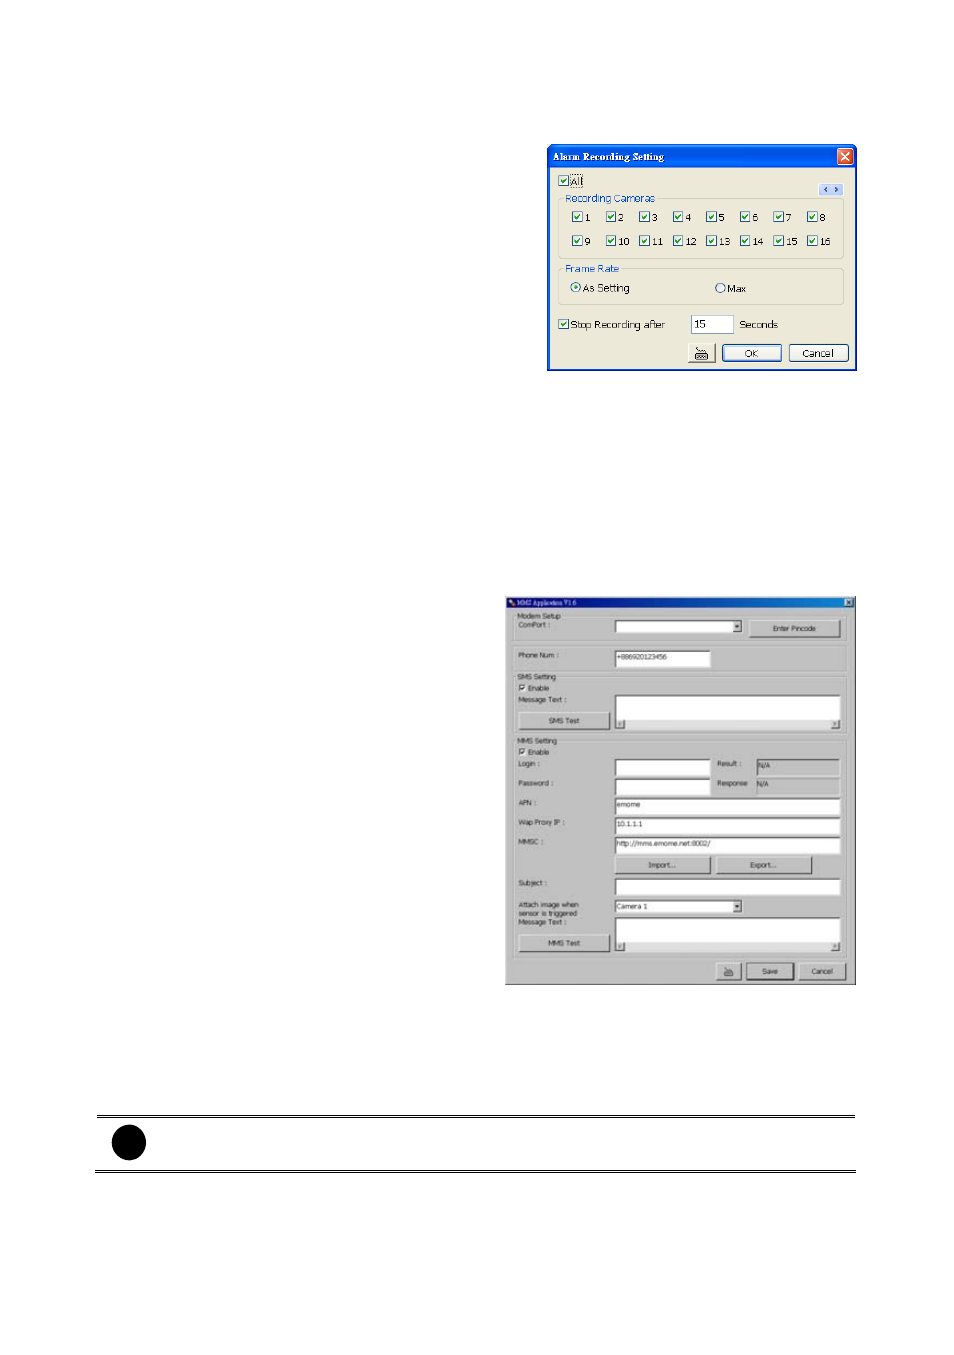
5.9.6 To Setup Alarm Recording Setting:
1. Beside the Start Recording check box, click
Detail
.
2. In the Alarm Recording Setting dialog box,
select the camera to enable/disable video
recording. Enable All to select all cameras.
3. In the Frame Rate selection, select As Setting
to record the number of frames based on the
Recording Setting or Max to record the
maximum of frames based on the available
speed (maximum is 32 pictures) .
4. In
the
Stop Recording after
text box, mark and set the number in second for the
program to continue recording after the alarm has ended. The time range is 1~600
seconds. If user doesn’t mark and set the time, the alarm recording will continue
recording until alarm is reset.
5. Click
OK
to accept the new settings and Cancel to exit without saving.
5.9.7 To Setup SMS/MMS Setting:
To use this feature, GSM/GPRS modem is
required. Connect the GSM/GPRS modem to
the serial COMM port of PC. Beside the
SMS/MMS check box, click Detail.
1. Select the port number in ComPort drop
down list from where the GSM/GPRS
modem is connected.
2. Click
Enter Pincode
button to enter the
pin code of phone number if your phone
system required.
3. In
Phone Num
text box, enter the contact
number.
4. You may now set to send thru SMS &/or
MMS. If you enable SMS setting, just enter
the message in the text box.
5. If you enable MMS, enter the APN name,
WAP IP
, MMS address and the message.
Enter the Login account and password if
required. If you are not sure, please
contact your mobile service provider. The Import… button allows user to import the pre-
saved configuration and also export the current configuration by clicking Export… button.
6. Attach image when sensor is triggered: Select the camera that the images will be
capture and send when the sensor is triggered.
7. Click
OK
to accept the new settings and Cancel to exit without saving.
i
Make sure your ISP provider and cell phone provider both support JPG file format
transmitting.