2 camera setting, Camera setting – AVer NX8000 User Manual
Page 48
41
5.2
Camera Setting
In the Camera Setting dialog box, click OK to accept the new settings, click Cancel to exit
without saving, and click Default to revert back to original factory setting.
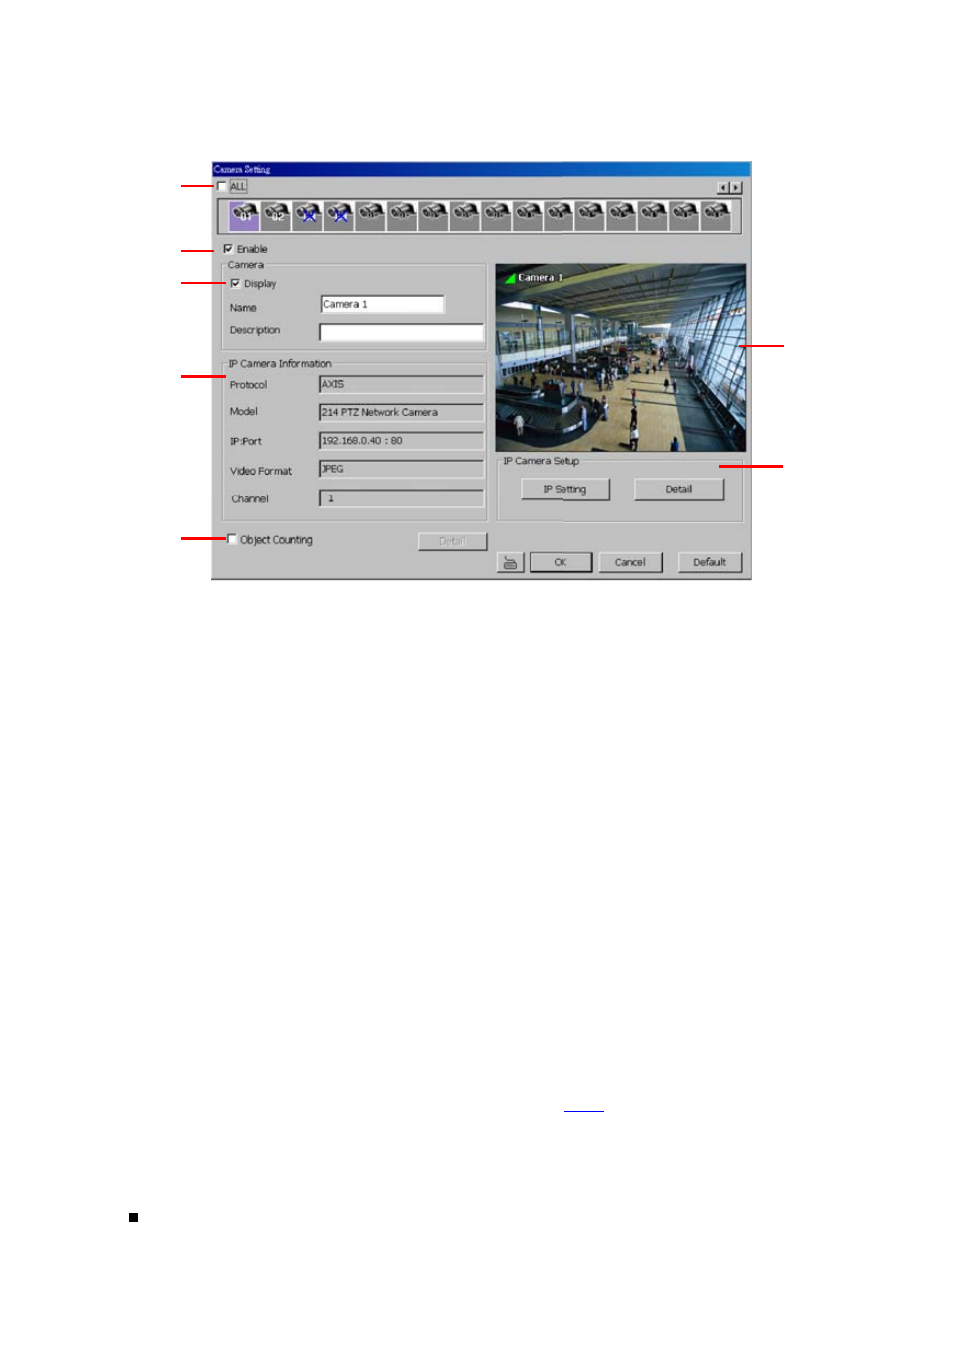
(2)
(1)
(3)
(4)
(5)
(6)
(7)
(1) Camera Icons
Select the camera number you want to adjust the video setting. To select all the cameras,
enable the ALL check box. To select more than one camera, Right click on the camera icon.
To select one camera only, Left click on the camera icon. The camera icon turns red when it
is selected.
(2) Enable
Set to enable/disable the selected camera. When there is no video source on the camera, we
suggest disabling it so that the system won’t detect it as video loss error.
(3) Camera
-
Display
Enable/disable to show the video. Even if the video of the selected camera is hidden
you can still record the video and preview it in playback mode.
-
Name
Change the camera name.
-
Description
Add a short comment.
(4) IP Camera Information
Click the camera icon to display the connected IP camera information in here.
(5) Object Counting
Select the two regions on the screen and the system will count the objects that appear from
one selected region to another selected region. (See also
(6) Video Screen
Display the video of the selected camera.
(7) IP Camera Setup
The video source is coming from Network camera.
IP Setting:
click IP Setting to enter the IP Camera Settings windows. In the IP Camera
Settings dialog box, select to connect using Protocol or URL and then enter the
required info. User also can click Search Device to find the selected protocol of