Setup the ip ptz camera, 2 setup the ip ptz camera – AVer IWH5000 series User Manual
Page 75
67
4.6.2
Setup the IP PTZ Camera
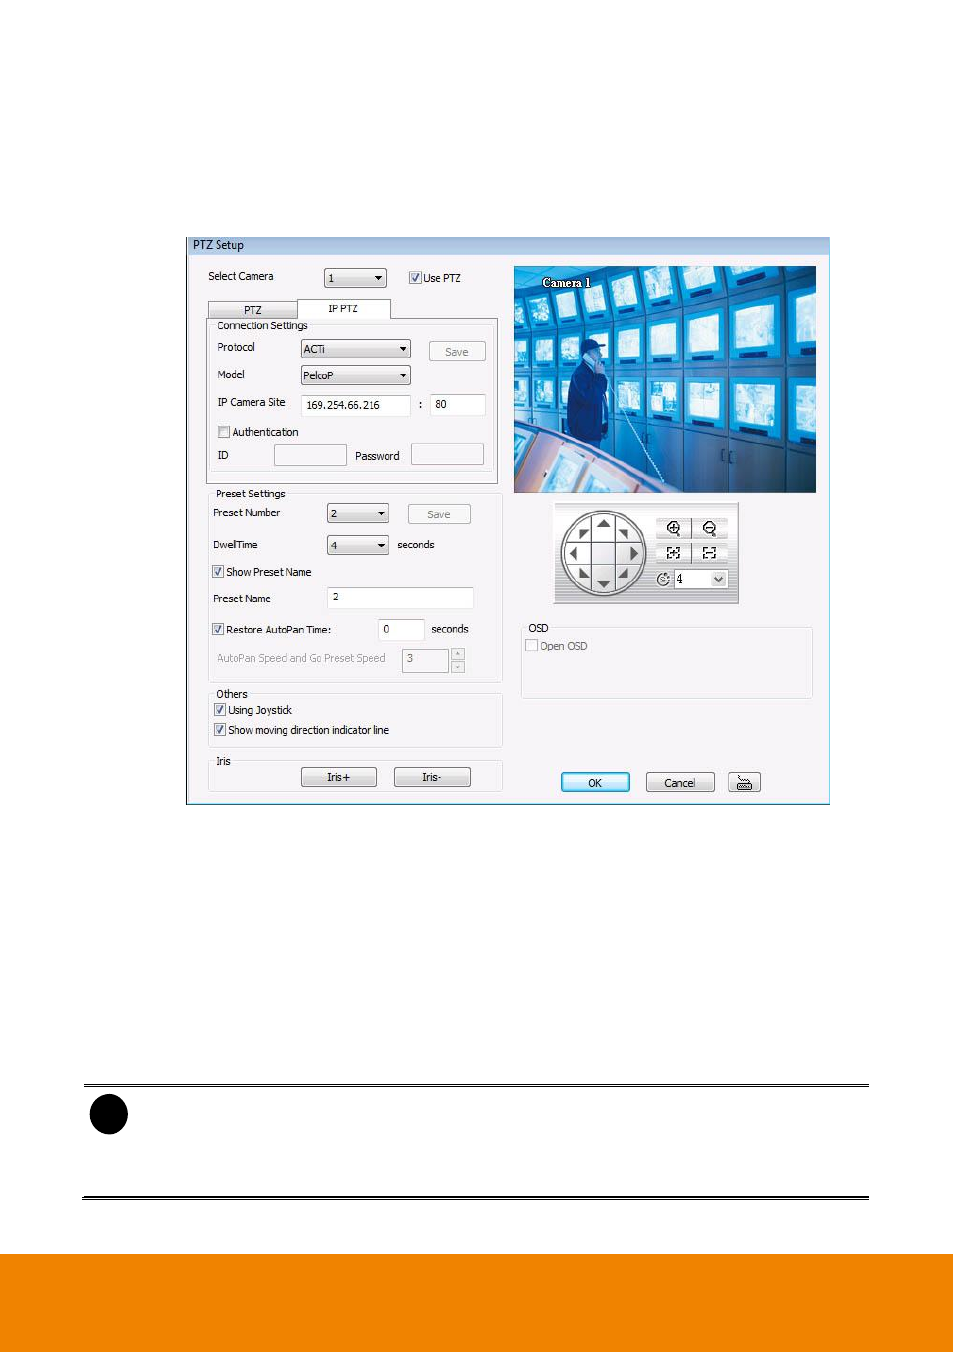
1. In the PTZ control panel, click Setup.
2. When the PTZ Setup dialog box appears, click IP PTZ tab.
3. Select the camera number and check the Use PTZ box.
4. In the Connection Settings section, select the Protocol and Model of PTZ camera that user
wants to connect and enter the IP or URL of IP camera in IP Camera Site column. Mark the
Authentication box if ID and Password is required when connecting to IP PTZ camera. And
then, click Save to keep the settings.
5. In the Preset Setting section, use the PTZ control panel and adjust the position of the PTZ
camera and select the preset number to assign a number for the PTZ camera current position.
6. Set the DwellTime (1-60 sec) for how long the IP PTZ camera stays in that position before it
moves to the next one. If you want to add description, check the Show Preset Name box and
in the Preset Name text box, type the word. When done, click Save to keep the settings.
7. Repeat step 5 & 6, if you want to save another IP PTZ camera position.
i
- The numbers of preset position are depended on the IP camera protocol has
supported.
- Only Pelco-P and Pelco-D protocol can support over 16 PTZ preset points.
- Only Canon
has supported “Auto Pan Speed” function.
8. Restore AutoPan Time: set a time period for restoring auto path function after the IP PTZ
camera has been moved. Mark the check box and set the time period in second.