AVer IWH5000 series User Manual
Page 192
184
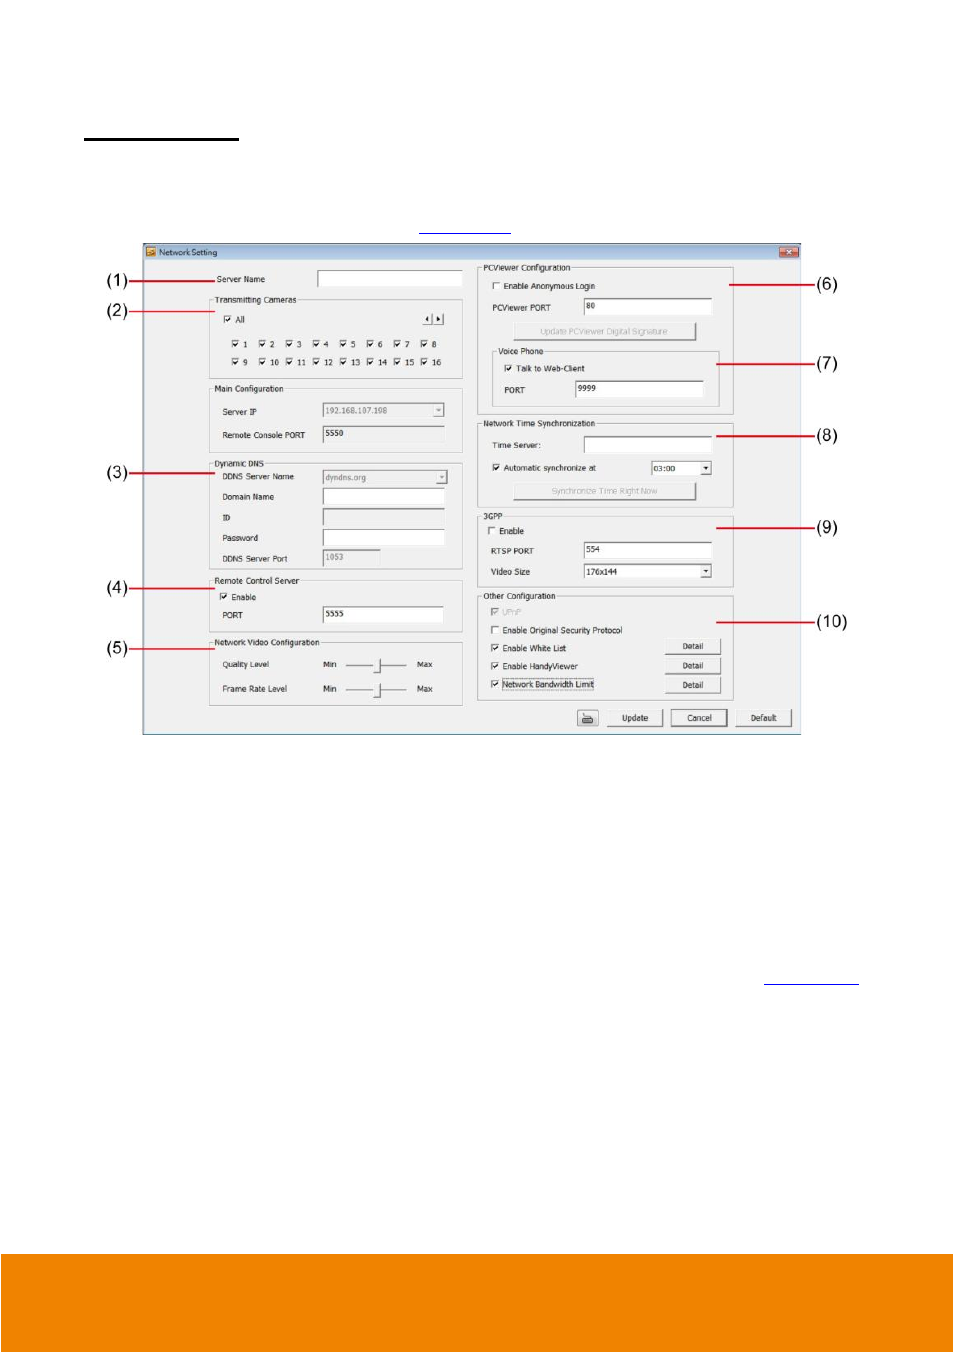
Network Setting
In the Network Setting window, click Update to accept the new settings, click Cancel to exit
without saving, and click Default to revert back to original factory settings. For the network service
ports that use by DVR server, please see
(1) Server Name
Assign a name for the DVR unit. Letters of the alphabet and numbers only.
(2) Transmitting Cameras
Select and click on the camera number in the Transmitting Camera section you want to make it
accessible via internet using PCViewer, Remote Console, PDA Viewer and HandyViewer (still
image). To select all the cameras, enable the ALL check box.
(3) Dynamic DNS (Domain Name System)
Enter the Domain Name and Password the user has setup when applied a DDNS. To use this
feature, go to http://ddns.avers.com.tw or http://dydns.org to register. (see also
).
Use this service if the IP address changes each time when you connect to internet.
(4) Remote Control Server
Enable/disable remote control from remote application (ex. CMS). Enter the remote accessing port
in Port column.
(5) Network Video Configuration
Set up the video quality and frame rate for viewing and transmitting to the remote program.
Scrolling adjust bar to set the Quality Level and Frame Rate Level.