3 deployment, Deployment – Acronis Snap Deploy 4 - User Guide User Manual
Page 25
25
Copyright © Acronis International GmbH, 2002-2012
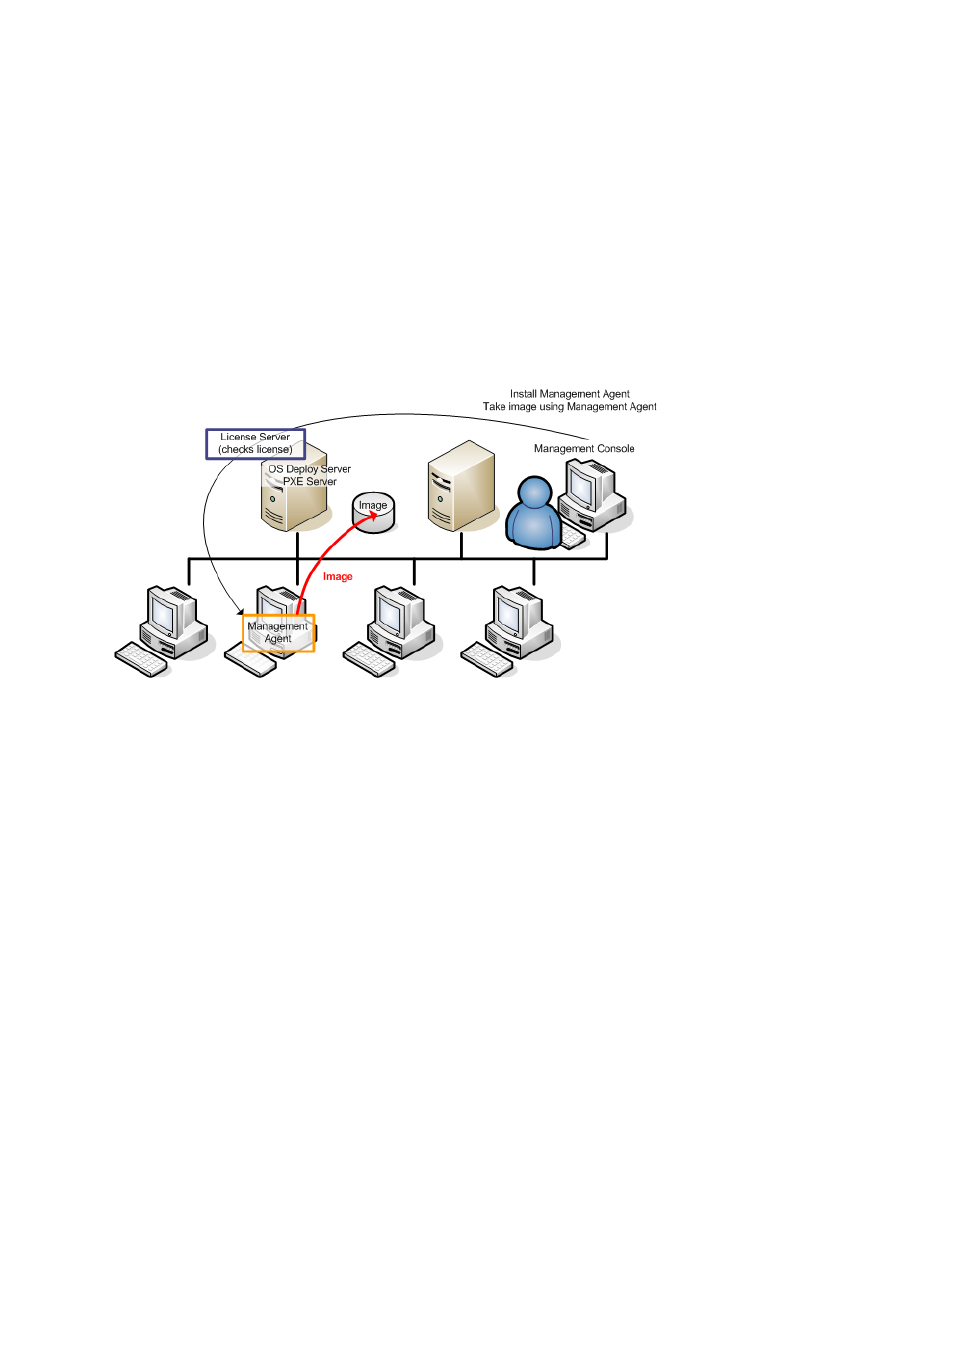
To perform online imaging
1. Configure the master system.
2. Install Acronis Snap Deploy 4 Management Console.
3. Install Acronis Snap Deploy 4 Management Agent on the master system either locally by using
the setup program, or remotely by using Acronis Snap Deploy 4 Management Console.
After Acronis Snap Deploy 4 Management Agent is installed, you can image the master system
online (without restarting the machine) at any time.
4. Connect the console to the master system, click Create image -> Next -> A master image. Follow
the instructions of the Master Image Creator wizard to configure and launch the imaging
operation. The image can be saved in a network folder, on detachable media (such as an USB
drive) or on removable media (such as a DVD).
Online imaging
2.5.3 Deployment
This section illustrates the Acronis components functionality by the example of deployment that you
start manually. For details about the ways of deployment, see “Deploying a master image” (p. 80).
This procedure presumes that you have installed Acronis Snap Deploy 4 Management Console and
created a master image.
To perform deployment
1. Install Acronis Snap Deploy 4 License Server. Import licenses to the license server. Install Acronis
Snap Deploy 4 OS Deploy Server.
2. Do one of the following:
Create bootable media (either Acronis media or WinPE-based media) with Acronis Snap
Deploy 4 Agent.
OR
Install Acronis PXE Server, connect the console to the PXE server, and then upload Acronis
Snap Deploy 4 Agent.
3. Depending on your choice in the previous step, boot the target machines into Acronis Snap
Deploy 4 Agent from the bootable media or from the PXE server.