Bio-Rad EXQuest Spot Cutter User Manual
Page 16
SYSTEM INSTALLATION
2-3
2.3
SYSTEM LEVELING
To level the EXQuest spot cutter:
1.
Place the spot cutter on a lab bench that is sturdy and level.
2.
Loosen the 9/16 inch lock nuts on the spot cutter legs and remove the lifting brackets. The handles
on each end of the lifting bracket are removable so that the lifting bracket can be slid out from under
the instrument.
3.
Place the bubble level, that was shipped with the instrument on the base plate immediately to the
left of the gel tray. The bubble level should be placed as close to the center as possible.
4.
Use a 5/8 inch wrench to adjust each leg until the spot cutter is leveled.
5.
Once the instrument is leveled, tighten the lock nuts with the 9/16 inch wrench.
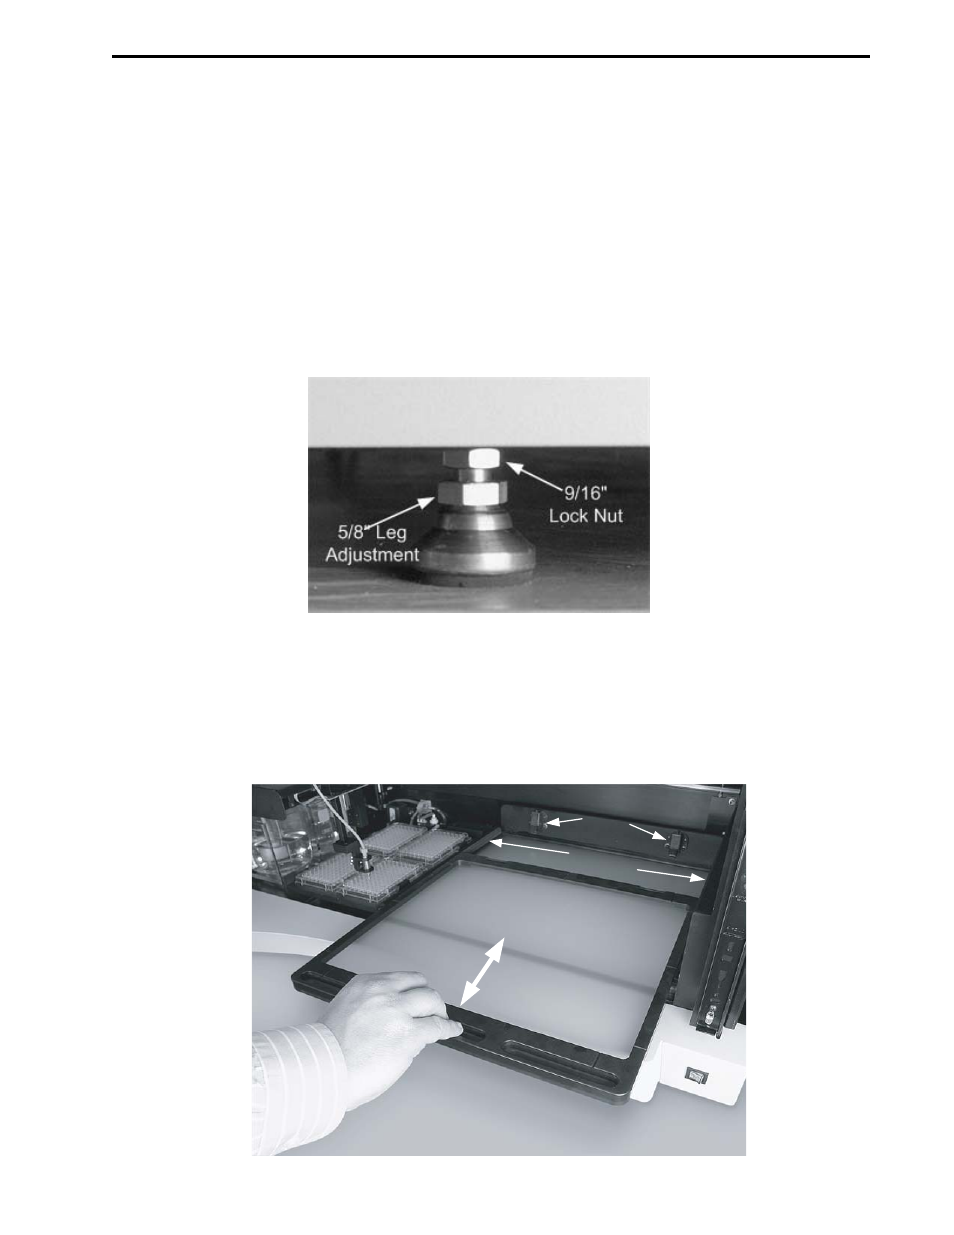
Figure 2-1. Spot cutter leg.
2.4
GEL TRAY INSTALLATION
Open the spot cutter front door and insert the tray, deep side up, in the tray guides that are located above
the light box as shown below. To insert the tray push it in until it latches. To remove the tray pull it straight
out. Note that each latch must be pointing outward before the gel tray can be inserted.
Figure 2-2. Gel tray installation.
Tray
Latches
Tray
Guides