Hydraulic cylinder plumbing, See figure 3.39 – Wheatheart Swing Away Flex Auger User Manual
Page 56
3. A
SSEMBLY
W
HEATHEART
- SA F
LEX
A
UGER
3.13. H
YDRAULICS
(71’–91’)
71’ - 111’
56
30651 R5
3.13.2. H
YDRAULIC
C
YLINDER
P
LUMBING
Note:
Refer to Appendix for hydraulic fitting tightening specifications. Use pipe sealant
on all joints. See Table 3.4 for the proper hose length.
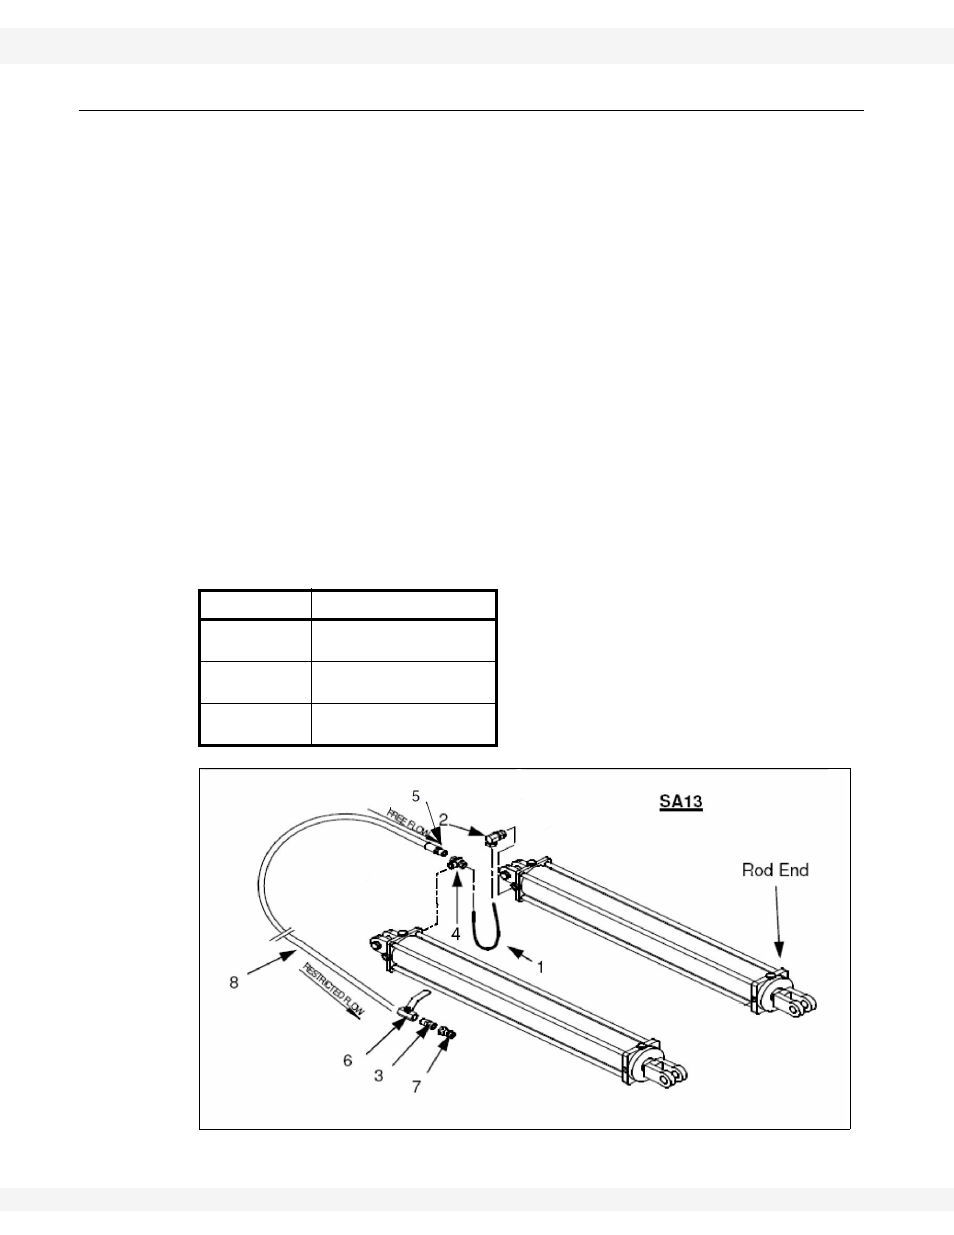
1. Remove plugs from the hydraulic cylinder.
2. Install
elbow
(2)
into cylinder port.
3. Attach tee (4) to cylinder port. See Figure 3.39.
4. Attach the hydraulic hose end (5) to tee (4) (Figure 3.39).
5. Install
hydraulic
hose 3/8” x 2’ (1).
6. Lay the hose (8) (Figure 3.39) along the upper scissor and tube (Figure
7. Secure
the
hydraulic
hose along the top of the upper scissor and on the tube
using the welded hose clips.
8. Provide slack or a loop between each secured point.
9. Bend tops of welded clips over slightly to retain hose.
Important:
Do not make bends in hydraulic hose too tight. The bends must have a radius of
at least 4” to prevent failure of the hose.
10. Install the ball valve (6), coupling (3), and optional pioneer tip (7) on the
hydraulic hose end (5) (Figure 3.39).
Figure 3.39
Table 3.4
Auger
Hose Length
71’
53’
(16.2 m)
81’
58-1/2’
(17.8 m)
91’
67’
(20.42 m)