Correct, Incorrect, Omnidrive™ electronic dimmable driver – Diode LED OMNIDRIVE User Manual
Page 2: Continued, Wiring connections, 10w 20w
1.877.817.6028
www.DiodeLED.com
www.DiodeLED.com
INSTALLATION GUIDE
2 OF 4
®
OMNIDRIVE™ ELECTRONIC DIMMABLE DRIVER
IG071014-1.1
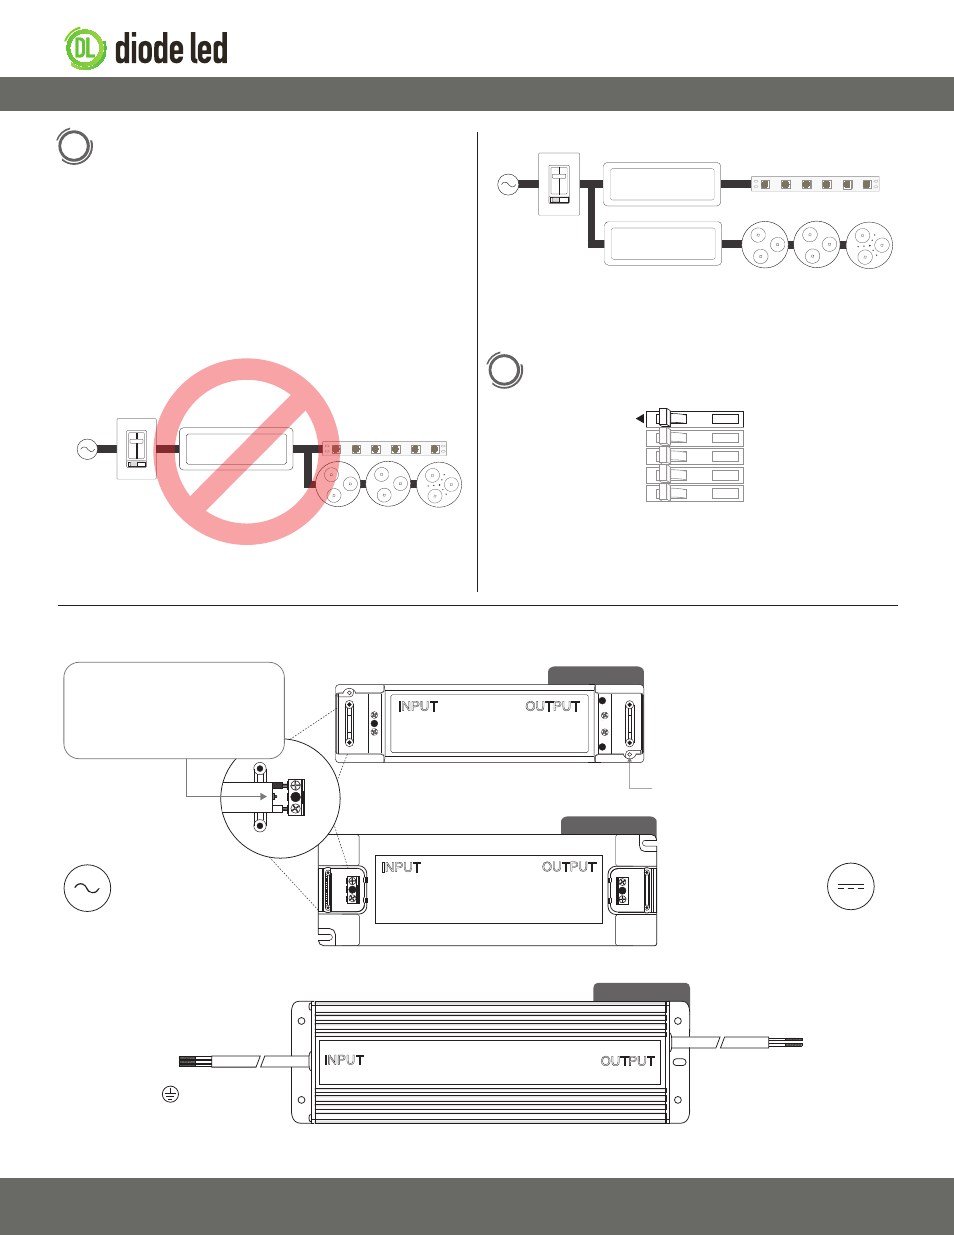
b. Indoor/Dry Location Models - Remove cover ports with Phillips-
head screwdriver. Use a mini Phillips or flathead screwdriver for
attaching wires to terminal ports. Terminals fit up to 12AWG solid-
core copper wire.
Outdoor/Wet Location Models - Use applicable UL Listed wire
nuts and junction box to secure wire connections.
4
Continued
5
Install Additional Components, Verify connections, and Turn
Main Power ON at Breaker.
ON
OFF
OFF
OFF
ON
ON
OFF
OFF
ON
ON
If system remains unresponsive or is working improperly, turn
OFF main power at breaker and verify all connections. Review the ‘Wiring
Connections’, ‘System Diagrams’, and dimming control installation
guides.
10W 20W
L
N
V+
V-
L
N
V+
V-
L
N
Ground (Green/Yellow)
L(Bro
wn)
N(Blue)
90~135VAC
~50/60 Hz
V+ (Red)
V- (Black)
To Low Voltage
LED Load
Dry/Indoor location drivers don’t require a
framed ground connection. When utilizing
3-conductor cables, trim ground wire to
sheathing. Ensure wire sheathing is set on
top of wire strain relief once cover ports
are reattached.
Mounting Hole
30W 45W
60W 80W
Wiring Connections
. .
.
.
.
.
.
.
.
. .
.
.
.
.
.
.
.
. .
.
.
.
.
.
.
.
Dimmer
INCORRECT
Driver
Fixtures
c. Do not install different fixture types on the same power supply
as flickering and altered dimming range may occur.
CORRECT
Dimmer
Driver
Fixture
. .
.
.
.
.
.
.
.
. .
.
.
.
.
.
.
.
. .
.
.
.
.
.
.
.
Different fixture types on separate drivers.