Diode LED Indoor Wall Washer User Manual
1 of 3 installation sheet, Indoor wall washers, P 6 3
1 OF 3
INSTALLATION SHEET
Operation Overview
Wall Washers can be operated in two ways:
1) Independently (One or more fixtures): Primary fixture operating independently or commanding additional fixtures.
2) With a DMX Controller: One or more wall washers commanded by a DMX controller.
Before you begin, read all warnings and installation instructions thoroughly.
Safety & Warnings
• Turn power OFF at main breaker before servicing or installing this product.
• This product is intended to be installed and serviced by a qualified, licensed electrician.
• Install in accordance with the National Electric Code, and local regulations.
• Install in a well-ventilated, combustion-free environment.
• Do not disassemble or modify this product beyond these instructions. Doing so will void your warranty.
• This fixture is not compatible with any traditional dimming controls. Wall washers can only be controlled/dimmed with the on-board interface or
with an external DMX controller. Please contact customer service for additional information.
• Ensure all adjusting screws on mounting brackets and fixtures are properly secured prior to installation.
• THIS FIXTURE IS INTENDED FOR FLOOR MOUNTING ONLY. DO NOT MOUNT TO WALLS OR CEILINGS.
• This fixture is rated for indoor installation only and is IP 20 rated.
• It is recommended to power this fixture by a GFCI protected circuit.
• This fixture is only UL Listed for connection with a 120VAC, 15- or 20-ampere branch circuit.
• This fixture is not to be used in or around chlorinated, treated or salt water due to the corrosive and degrading qualities of chlorine, saline, and other
chemicals on the fixture components. Keep at least 16 feet away from pools and spas.
• This fixture is rated for use in an environment where the ambient operating temperature is -4°
~ 104° F (-20° ~ 40° C).
INDOOR WALL WASHERS
LINAIRE™ Wall Washer
1/4” mounting holes
A B
Address Menu
Fig. 1a
Field 1 Field 2 Field 3
A B
Field 1 Field 2 Field 3
Function (P) Menu
Fig. 1b
P 6 3
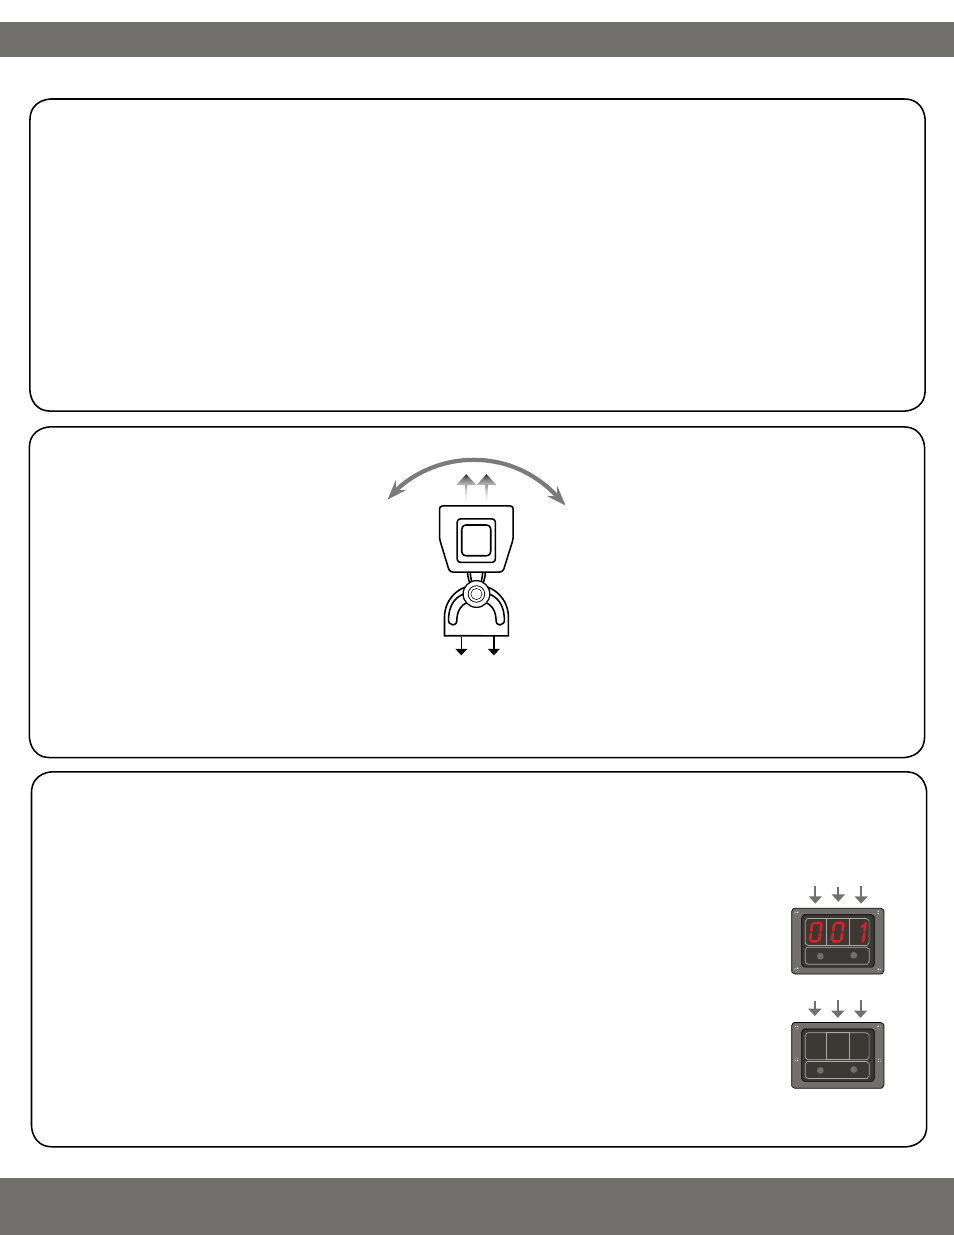
Mounting
Each wall washer has its own on-board control pad and 3-digit display, operated by two menu button
controls – ‘A’ and ‘B’. Button ‘A’ cycles through the 3-digit display and switches the display from the
Address Menu (Fig. 1a) to the Function (P) Menu (Fig. 1b). Pressing Button ‘B’ continually changes the
desired value of each field.
At startup, the wall washer will always be set in the Address Menu. To switch to the Function (P) Menu
(Fig. 1b), press Button ‘A’ once and Field 3 will begin to flash. Press Button ‘A’ three times to be directed
to the Function (P) Menu. Once in the Function (P) Menu, press Button ‘A’ two times to switch back to
the Address Menu.
Note: this fixture is intended for floor mounting only. Do not mount to walls or ceilings. Ensure fixture is properly mounted and
all adjusting screws are properly secured prior to permanent installation. All fixtures must be individually powered by 120VAC.