Data entry screen builder – Rockwell Automation 2707-NP DTAM Programming Software User Manual
Page 70
Chapter 8
Creating Data Entry Screens
8–2
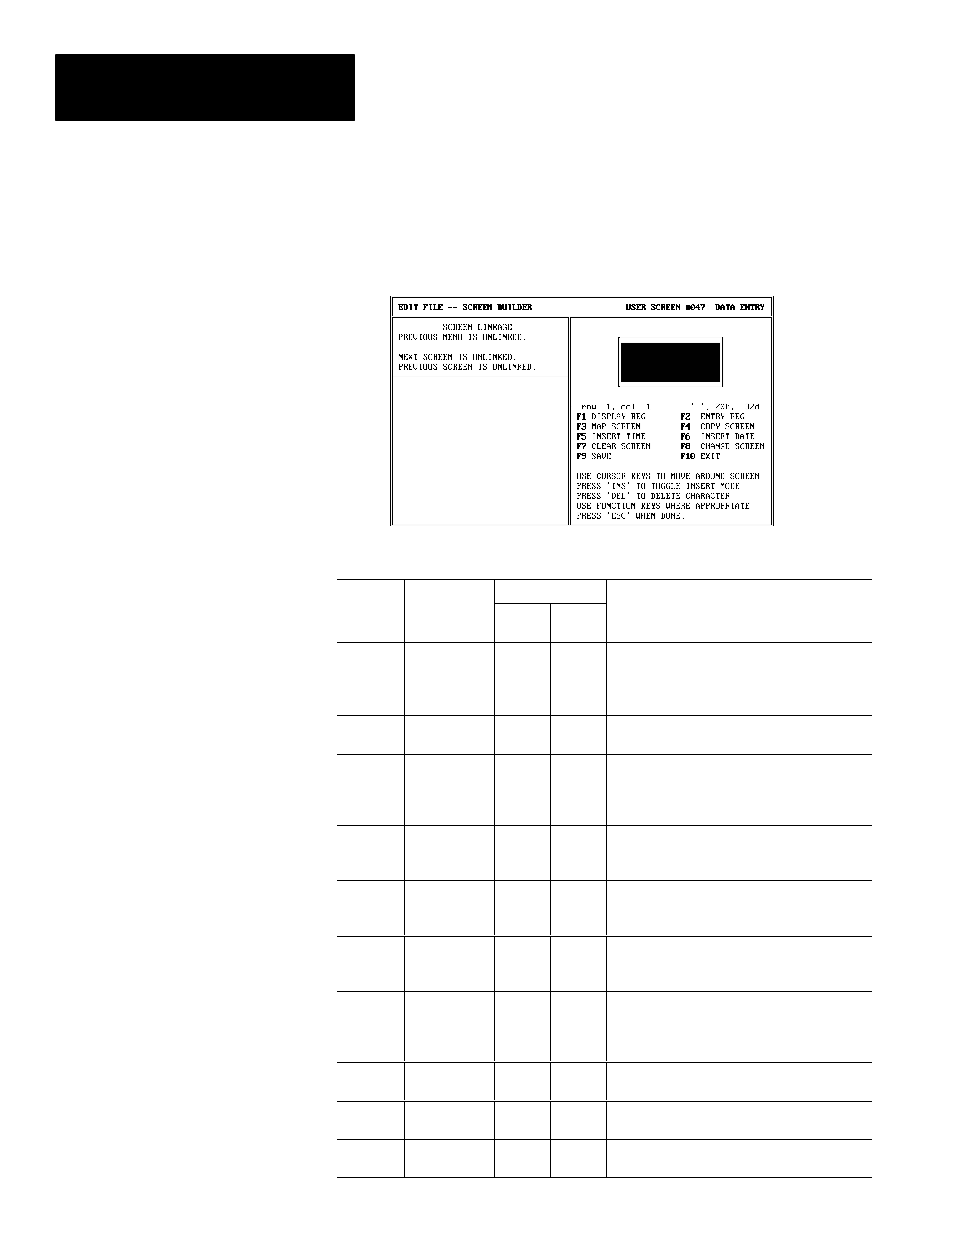
The screen for creating data entry screens is the same for the DTAM Plus and
DTAM Micro. The only exceptions are the DTAM Micro display does not
show the time and date function keys and has a smaller display size (2 lines
of 20 characters).
Data Entry Screen Builder Function Keys
Applies to:
Function
Key
Designation
DTAM
Plus
DTAM
Micro
Function
[F1]
DISPLAY REG
✓
✓
Inserts data display field at the cursor point.
Accesses the display register information.
Note: Display values must positioned before the
data entry field.
[F2]
ENTRY REG
✓
✓
Inserts data entry field at the cursor point.
Accesses the entry register information.
[F3]
MAP SCREEN
✓
✓
Accesses screen mapping functions that link
application screens in a logical sequence.
Link screens only after all of the screens have
been created.
[F4]
COPY
SCREEN
✓
✓
Copies an existing screen to the current window.
Both the source and destination screens must be
of the same type (Data Entry screens).
[F5]
INSERT TIME
✓
Inserts the time into the display. Only available
with a DTAM Plus having the Calendar/Clock
option.
[F6]
INSERT DATE
✓
Inserts the date into the display. Only available
with a DTAM Plus having the Calendar/Clock
option.
[F7]
CLEAR
SCREEN
✓
✓
Clears the current screen. You have the option of
clearing only the screen text or deleting the
entire screen including any linking you may have
established.
[F8]
CHANGE
SCREEN
✓
✓
Selects another operator screen.
[F9]
SAVE
✓
✓
Saves the application without exiting the Screen
Builder function.
[F10]
EXIT
✓
✓
Prompts you to save the application to the
current file and exits the DPS software.
Data Entry
Screen Builder