Removing the nema 1 wim (20-wim-n1), Removing the nema 1 wim (20-wim-n1) -5 – Rockwell Automation 7000 DPI Wireless Interface Module User Manual
Page 21
Installing the WIM
2-5
9. Establish wireless communication between the WIM and the Pocket
PC or computer. For this procedure, refer to the respective section in
Chapter 3 that corresponds to the drive software tool you are using:
•
Using Pocket DriveExplorer for Pocket PC on page 3-2
•
Using DriveExplorer/DriveExplorer Lite on page 3-10
•
Using DriveExecutive on page 3-16
When communication is achieved, the WIM status LED will turn
solid blue.
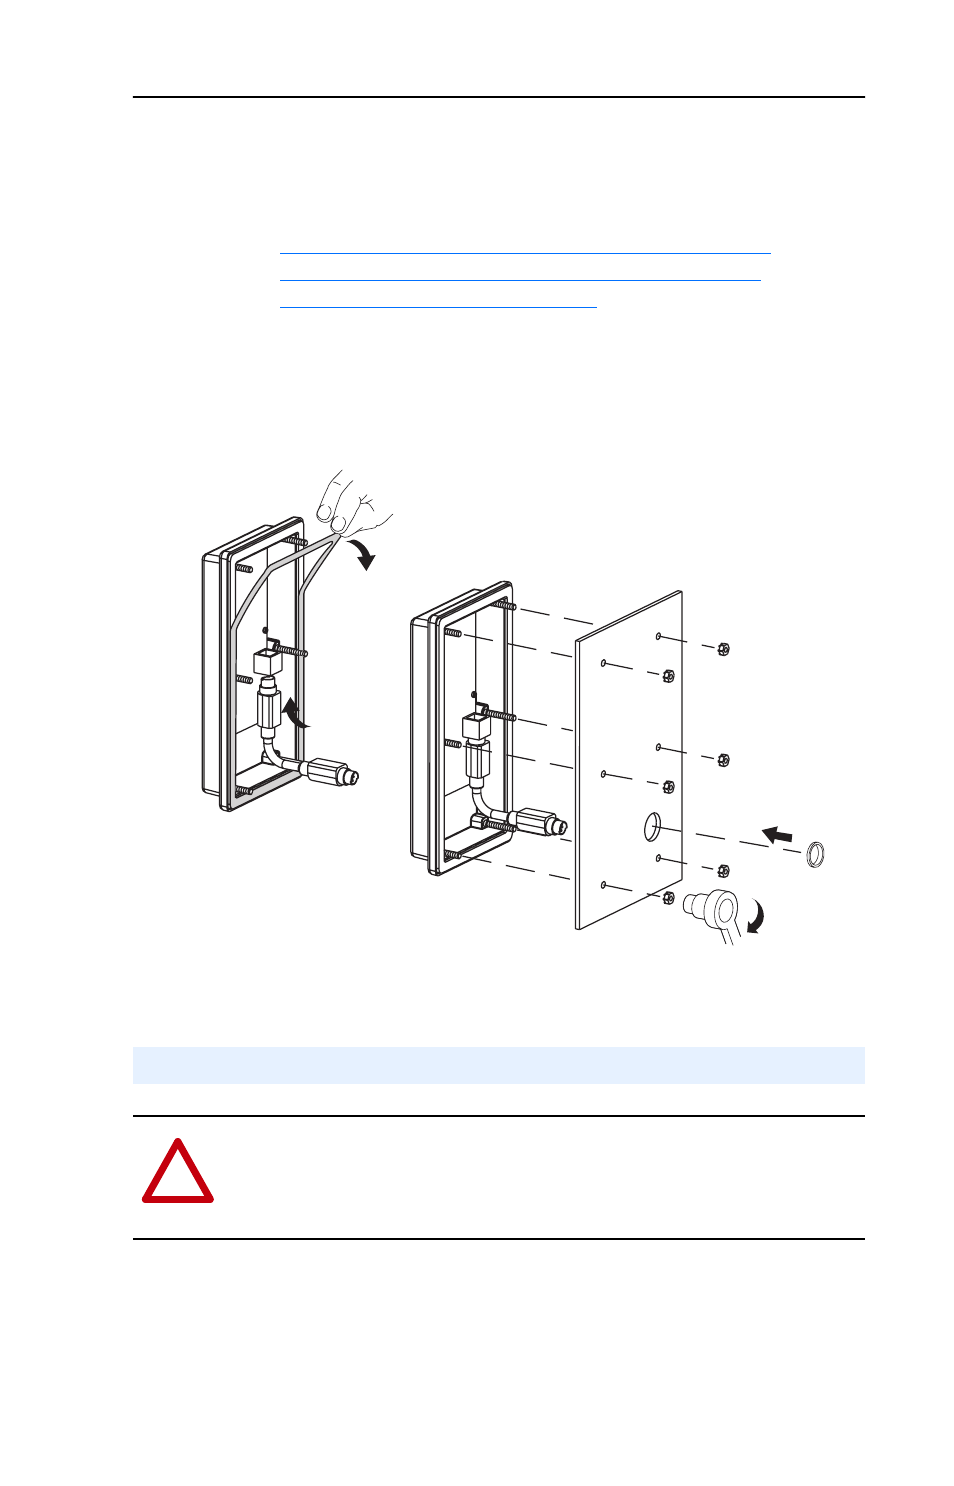
Figure 2.5 Mounting NEMA 4 WIM onto Panel
The drive can remain powered when removing a WIM.
Remove the WIM from the drive HIM cradle or the remote-mounted
HIM bezel.
➌
➋
➍
➎
➏
0.68 N-m
(6.0 lb.-in.)
Removing the NEMA 1 WIM (20-WIM-N1)
!
ATTENTION: Risk of injury or equipment damage exists. If the HIM
bezel cable (for a bezel-mounted WIM) is disconnected from Port 2 on
the bottom of the drive, the drive may fault. Determine how the drive
will respond before disconnecting the cable.