5 anti-reflection clip – function, Anti-reflection clip – function, Initial operation – Leica Biosystems ASP200 S User Manual
Page 30
30
Instructions for Use V 1.4, RevE – 03/2013
4. Initial Operation
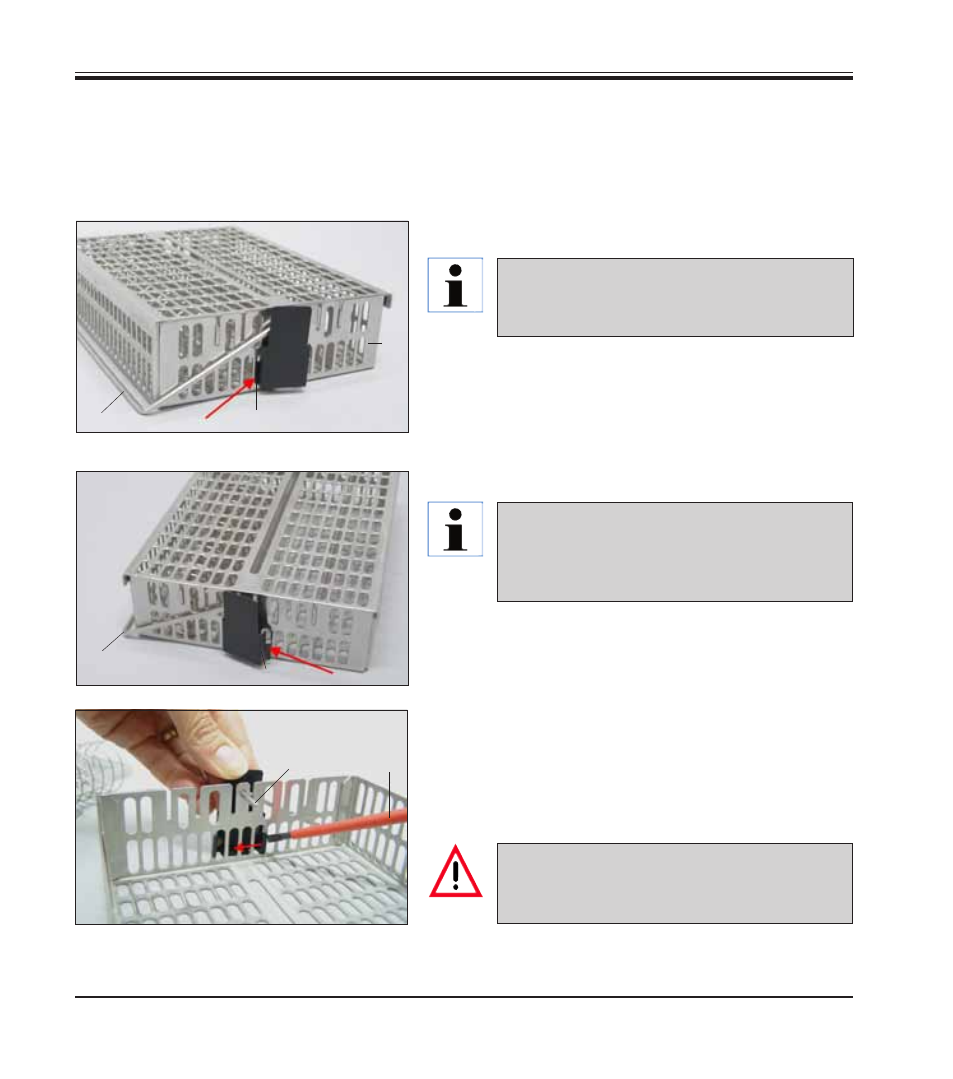
Changing the clip
• Once the clip is installed, the handle (4) of the speci-
men basket cannot be removed, as otherwise the clip
will be bent.
• To remove or replace a clip, all parts that are inside
the basket (e.g. spiral insert and separating walls)
must be removed from the basket.
• Suitable tool (screwdriver 5,
Fig. 12
).
5
4
Fig. 12
Once bent, clips may no longer be used and
must be disposed of. In this case, install a new
clip from the standard scope of delivery.
The anti-reflection clip (Order no. 14 0476 44135) prevents any reflections that might otherwise
be emitted from the specimen basket (3, order no. 14 0476 34193) and that could affect the level
sensor in the retort, thus causing malfunctions.
Fig. 10
Fig. 11
Installing the clip
1
2b
2a
1
3
4
4
• Insert the left lug (2a) of the anti-reflection clip (1)
into the seventh hole (from the left) of the lower oval
openings (
Fig. 10
).
• Snap the right lug (
Fig. 11
, 2b) into the seventh hole
(from the right) with gentle pressure.
The anti-reflection clips are intended for
installation on the specimen basket to prevent
reflections of the level sensor.
When inserting or removing the metal baskets
into/from the retort, always do so carefully so
that they do not touch or become caught on
the retort wall.
4.5 Anti-reflection clip – Function