2 electrical connection, 1 connecting the power supply, Electrical connection – Leica Biosystems ASP200 S User Manual
Page 25: Instrument setup
25
Leica ASP200 S
4. Instrument Setup
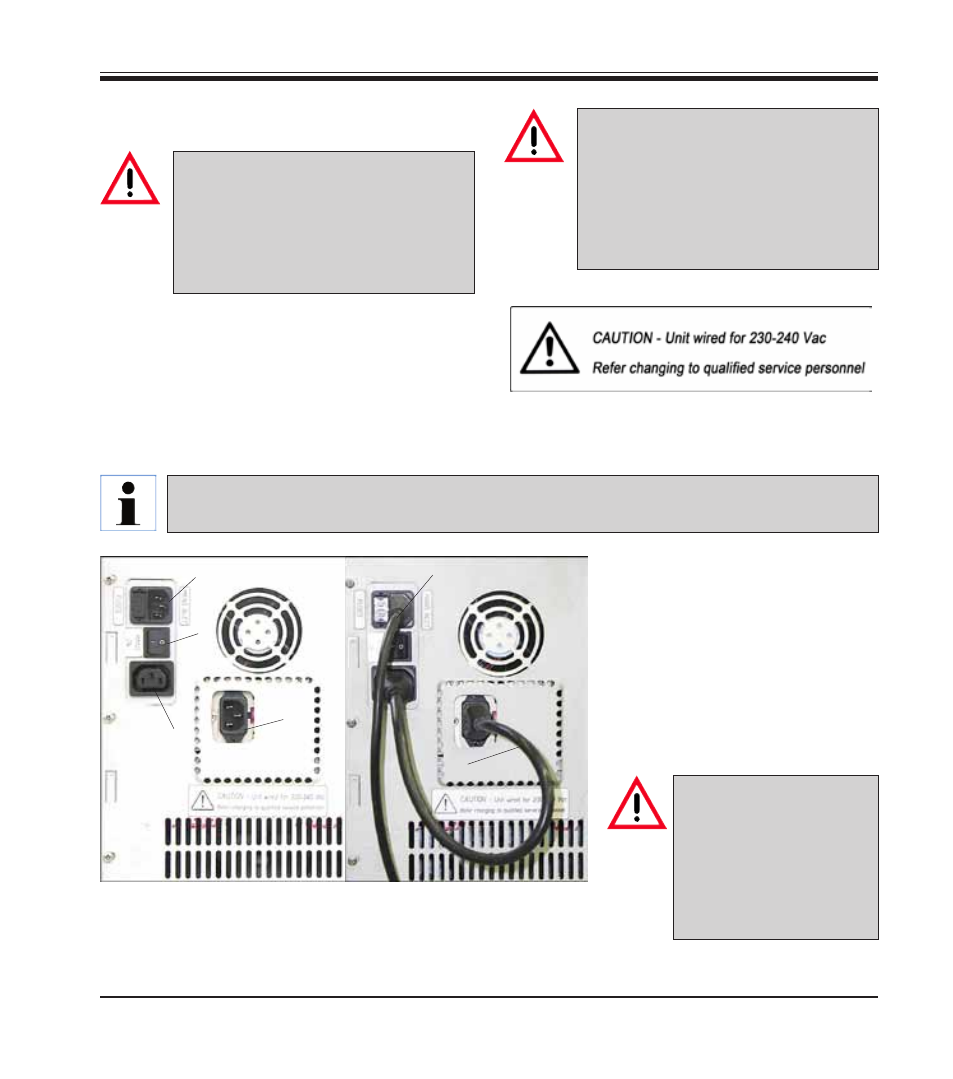
4.2 Electrical connection
• Check the voltage label (
Fig. 3
) on the rear of
the instrument to ensure that the instrument
delivered is set to the correct voltage range.
Fig. 3
Severe damage may occur if the in-
strument is connected to a power sup-
ply voltage other than that to which it
was originally set.
The power supply voltage for the
instrument is factory preset and
CANNOT be altered by the user.
Notice!
Observe the following instructions
carefully to prevent damage to the
instrument (refer also to
Chap. 2.2
"Warnings – Transport and installa-
tion"
).
41
4.2.1 Connecting the power supply
43
37
38
40
42
Left Fig.
Electrical ports on the rear
panel of the instrument.
Fig. 4
Right Fig.
Correct connection of the cables.
Once the instrument has been switched on, the main switch (ON/OFF) (5) should always remain
in the ON position.
• Connect the power cable (37)
to the input socket (41) of the
main power supply.
• The jumper cable provided
(38) connects the output of the
main power supply (43) to the
input of the electronics module
(40).
Important!
The specification for the
connection (40) is speci-
fied as follows:
100 - 120 V or
230 - 240 V,
maximum 200 VA.