Flush mounting – classic bricks – 2N Lift8 v1.6.0 User Manual
Page 99
99
1.
2.
3.
4.
5.
6.
Choose the
position according to
audio unit
the supply cables too. If the cables lead inside
a structure or wall, use the holes on the audio
bottom.
unit
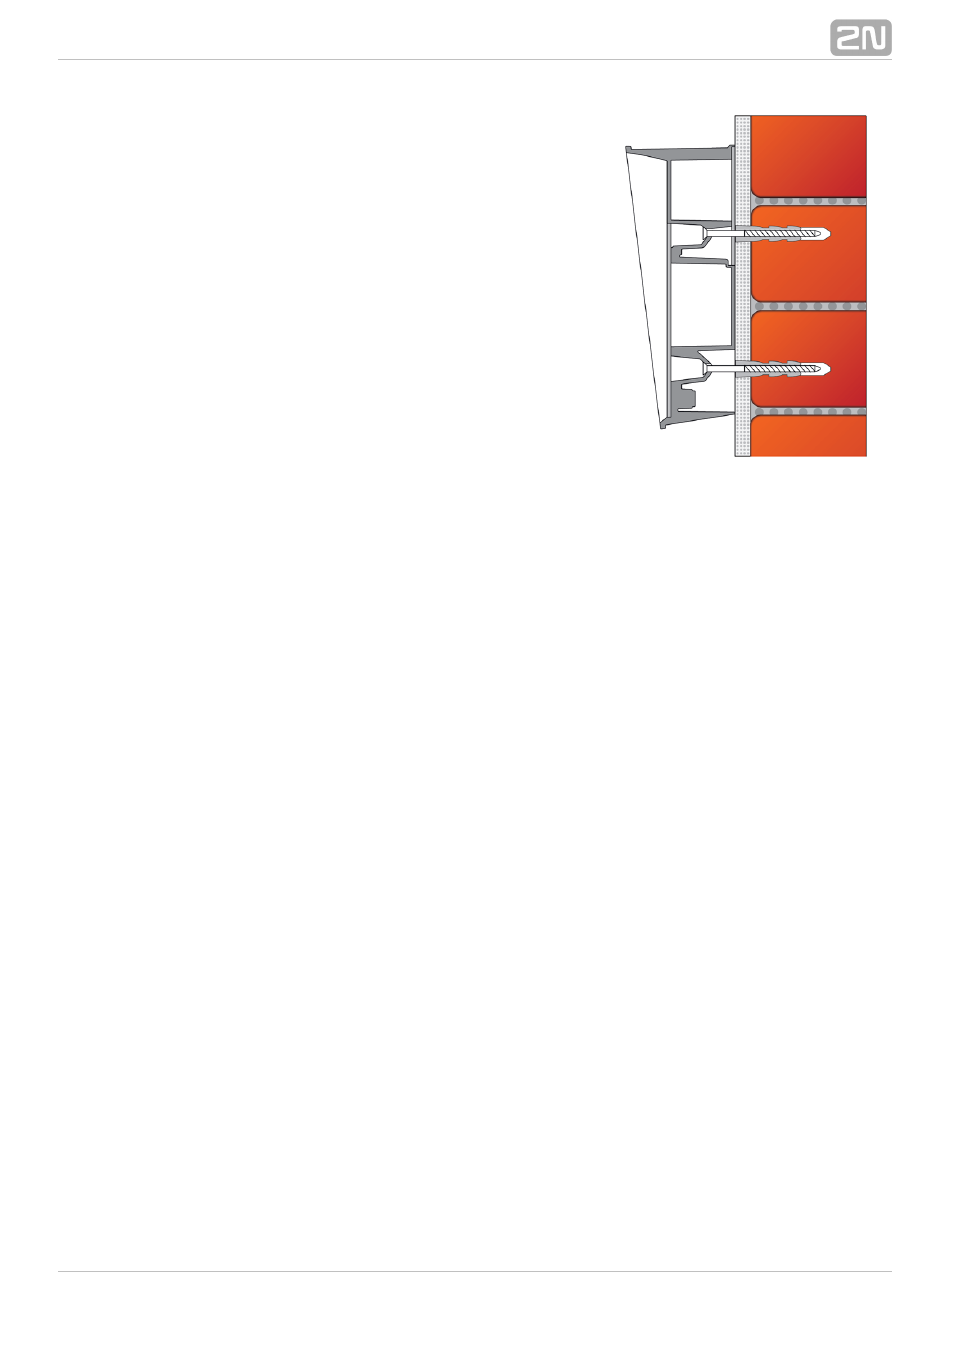
Drill plug holes of the depth of 70 mm (as
shown in the figure below) into concrete and
similar walls. Push or hammer the supplied
plugs into the holes. If the plugs are too
loose, use a mounting glue. Use fitting
elements of your own for steel structures –
metric screws and nuts, for example.
Remove the front panel from the
.
audio unit
Select the holes for the cables. Choose and
mount the enclosed bushing depending on the
count of cables: two-hole, one-hole or both
types of bushings. Fill the other holes with the
packing included.
Fit the
to the wall or structure and
audio unit
lead in the cables leaving a small reserve
inside. Insert the packings into the unused
bushings and tighten the bushing nuts.
Do not complete the mounting procedure until
you have connected the
electrically
audio unit
– refer to
. If the cables
Electric Installation
lead on the surface, use the bushings included
in the delivery.
Flush Mounting – Classic Bricks
Follow the instructions for the flush mounting kit if used. Follow the instructions below
if you do not use the flush mounting kit.
- Analogue GSM gateway 2N EasyGate - Manual, 1575 v1.1.0.2 (69 pages)
- Fixed line replacement with 2N EasyGate - Quick Start, 1129 v1.5E (2 pages)
- Fixed line replacement with 2N EasyGate PRO - Quick Start, 1711 v1.01 (2 pages)
- Analogue GSM gateway 2N EasyGate PRO - Manual, 1749 v1.03 (79 pages)
- Fixed line replacement with 2N EasyGate PRO UMTS - Quick Start, 2018 v1.00 (2 pages)
- Analogue UMTS gateway 2N EasyGate UMTS USB - Quick Start (9 pages)
- Analogue UMTS gateway 2N EasyGate UMTS USB - User Manual, v1.00 (38 pages)
- Wireless 3G router 2N EasyRoute_old design - Quick start, 1526 v2.00 (2 pages)
- Wireless 3G router 2N EasyRoute_new design - Quick start, 1664 v1.00 (2 pages)
- Wireless 3G router 2N EasyRoute_new design - User manual, 1670 v1.06 (101 pages)
- Wireless 3G router 2N EasyRoute_old design - User manual, 1571 v1.06 (99 pages)
- Entrance guard 2N Helios - Manual - antivandal installation (2 pages)
- Design intercom 2N Helios - Guide mounting (2 pages)
- Door camera for 2N Helios - Installation manual - camera 9135210E (2 pages)
- Home intercom 2N Helios - Manual - display installation (5 pages)
- Electric lock for 2N Helios - Secondary switch - installation manual, 1360 v2.0 (2 pages)
- Door intercom 2N Helios - Manual, 1322 v3.0 (76 pages)
- Helios IP User manual, 1510 v1.13 (143 pages)
- Helios IP User manual, 1510 v1.12 (127 pages)
- Helios IP User manual, 1510 v1.11 (119 pages)
- Lift emergency phone 2N LiftNet - Manual, 1446 v1.8.3 (97 pages)
- Mobile Audio Gateway public address system - Quick start manual (2 pages)
- IVR Editor manual v1.0.2 (43 pages)
- Omega Lite PBX Assistant - manual v1.2 (57 pages)
- Omega series - Configuration Tool manual v1.10 (114 pages)
- IVR Editor manual v1.0 (43 pages)
- Omega series - Configuration Tool manual v1.9 (114 pages)
- Omega series - VoIP manual v1.4 (113 pages)
- Omega 48 - Basic Services v1.0 (60 pages)
- Omega 48 - Installation Manual v1.0 (48 pages)
- Omega 48 - Operator Services v1.0 (48 pages)
- StarPoint 500 - manual v2.0 (32 pages)
- Omega Lite - Configuration Tool manual v1.6 (101 pages)
- Omega Series - Voicemail v1.0 (31 pages)
- Omega Lite - Installation Manual v1.9 (58 pages)
- Omega Lite - Configuration Tool manual v1.8 (112 pages)
- Omega Lite - Configuration Tool manual v1.7 (112 pages)
- Omega Series - Basic Services (60 pages)
- Omega Lite - Installation Manual v1.5 (53 pages)
- Omega Series - Operator Services (48 pages)
- Omega Lite Panel - manual v1.0 (34 pages)
- Omega Lite PBX Assistant - manual v1.0 (49 pages)
- Omega Lite - Quick Guide v1.0 (1 page)
- Omega Series - VoIP manual v1.2 (88 pages)
- Lift emergency phone 2N SingleTalk - Manual, 1514 v6.3.0 (73 pages)