Installation instruc tions – Poison Spyder JK FRONT CRUSHER FLARES User Manual
Page 4
INSTALLATION
INSTRUC
TIONS
Poison Spyder Customs • JK FRONT CRUSHER FLARES INSTALL
Page 4
©2010 POISON SPYDER CUSTOMS, INC. • 951-849-5911 • WWW.POISONSPYDER.COM
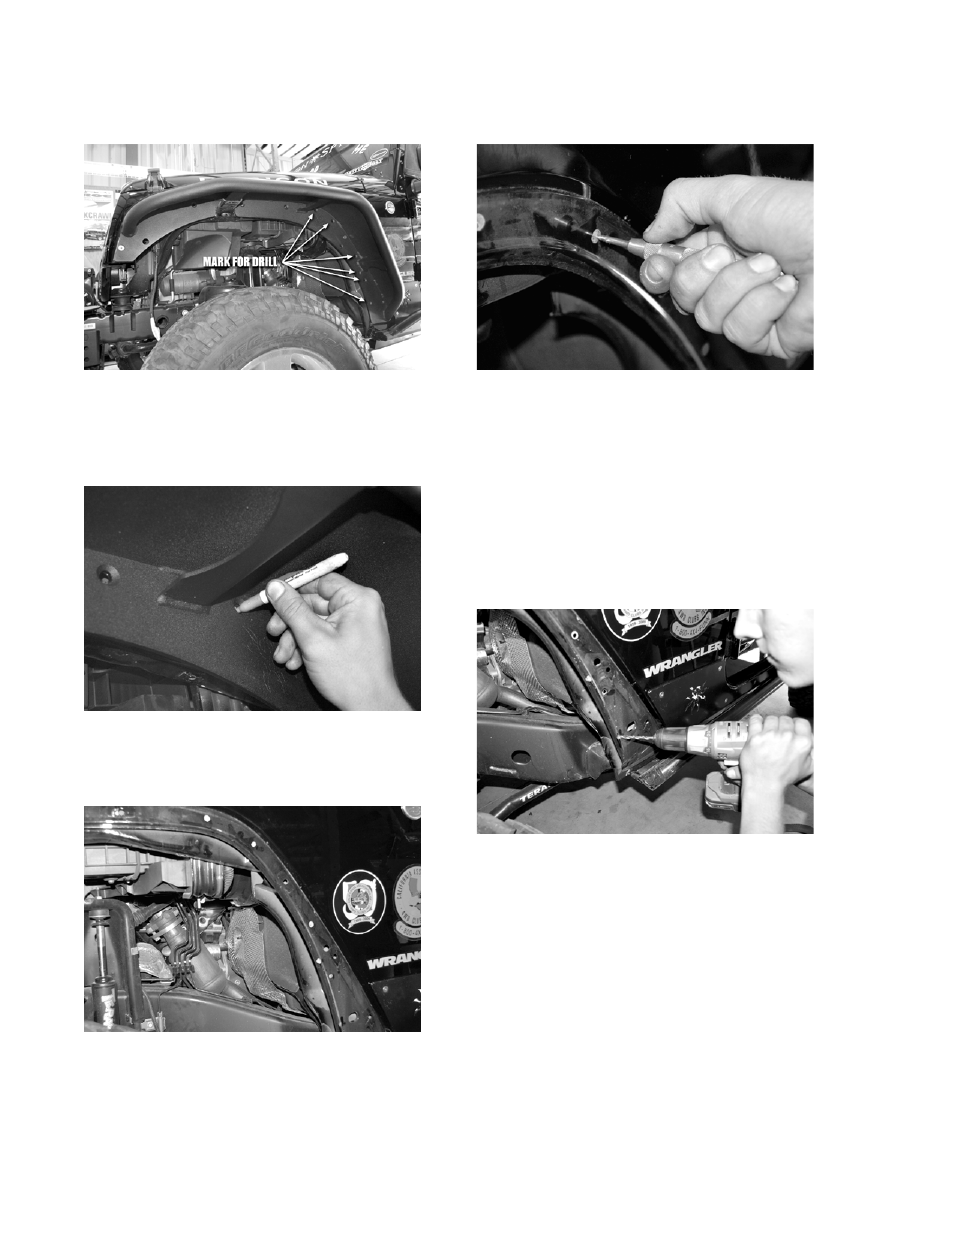
7. Mark where extra mounting holes will need
to be drilled. These are shown in Figure 12.
FIGURE 12
Use a fine tip felt marker to mark the holes. If
your Jeep has black paint, as our test vehicle
did, use a silver or gray marker to show up
against the dark paint.
FIGURE 13
8. Remove the Crusher Flare from the Jeep.
You’ll now see the marks you made for drilling
the extra mounting holes.
FIGURE 14
9. Use an auto-punch or a center punch with
small hammer to punch a pilot mark into the
center of each of the hole marks you made.
If you use a hammer and punch, be careful
not to strike the punch too hard, as the sheet
metal is thin and bends easily.
FIGURE 15
10. Drill a pilot hole at each drill mark using a
1/4” bit. Note that two of the hole marks will
land on the edge bead of the sheet metal.
You must be especially careful when starting
to drill these two holes, as the bit will want
to walk off of the bead. Hold the drill so that
the bit is angled directly into the edge of the
bead, wherever it happens to be along the
curvature of the bead, in order to prevent
walking.
FIGURE 16
Once all of the pilot holes are drilled, switch
to the 3/8” bit and re-drill each hole out to its
final size. Be careful when drilling, as the
larger bit may want to grab the thin sheet
metal and deform it. After the holes are
drilled, apply some touch-up paint or clear
coat to the bare metal of the hole edges to
protect them from rust.
11. Pre-Install one of the Lower Sub-Frame
Brackets into the area between the outer
fender sheet metal and the inner tub bracing,
as shown in Figure 17. The Lower Sub-
Frame bracket is designed so that it may