Installation instruc tions – Poison Spyder JK FRONT CRUSHER FLARES User Manual
Page 3
INSTALLATION
INSTRUC
TIONS
Poison Spyder Customs • JK FRONT CRUSHER FLARES INSTALL
Page 3
©2010 POISON SPYDER CUSTOMS, INC. • 951-849-5911 • WWW.POISONSPYDER.COM
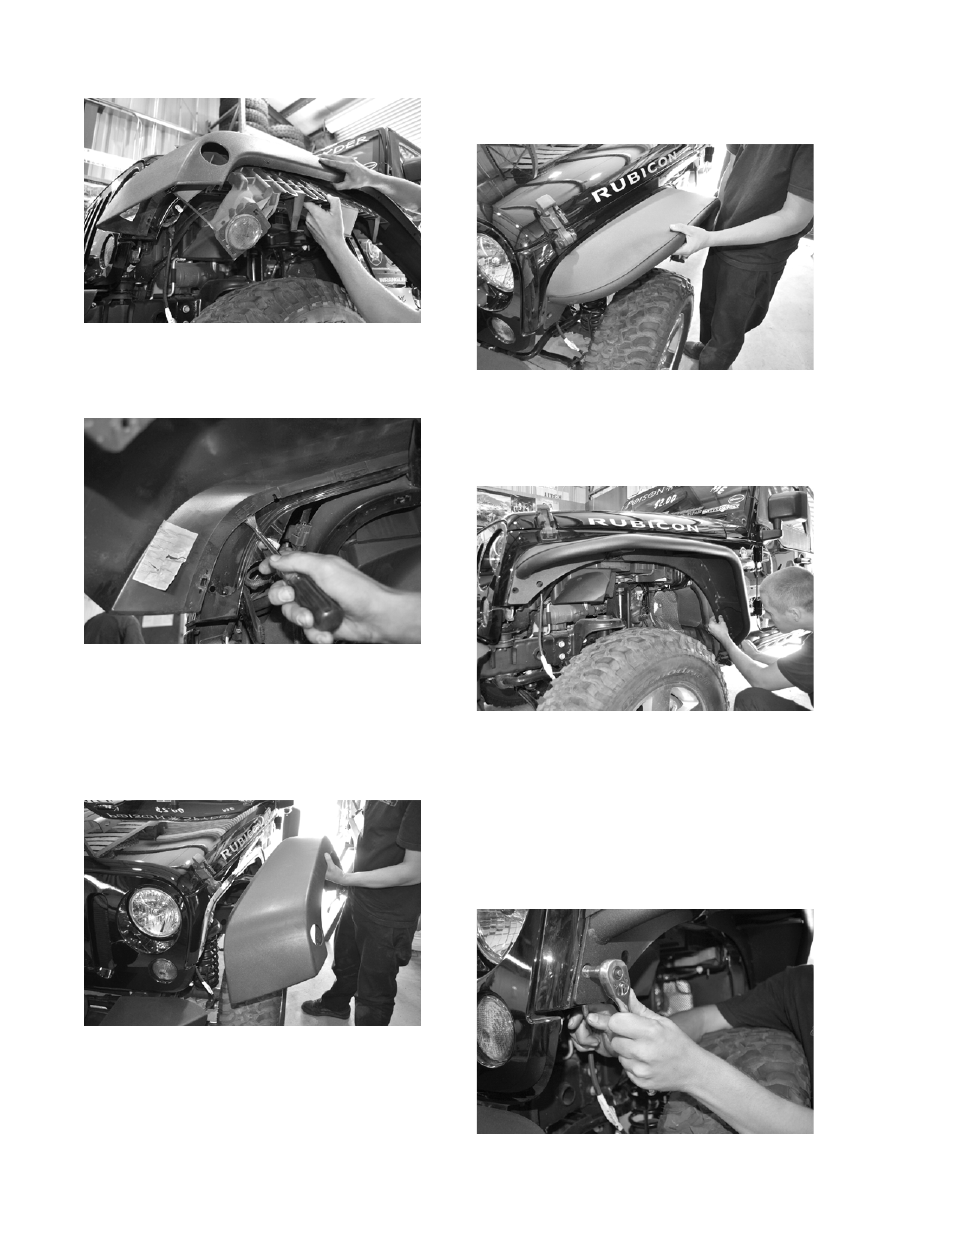
FIGURE 6
5. Remove the stock fender flare. There
will be several more plastic retainer clips to
remove in order to remove the flare.
FIGURE 7
Some of these retainer clips are of a different
type than the others, and are tougher to
remove. Be careful when removing them
not to bend or deform the Jeep body sheet
metal. Set the stock fender flare aside. It will
not be re-used.
FIGURE 8
6. Pre-install the Crusher Flare. Place it
against the Jeep and line up the bolt holes. It
will rest somewhat on the stock fender brace
to make this task easier. Still, be careful
while handling the Crusher Flare, to keep it
from contacting the exterior finish of the Jeep
and scratching the paint.
FIGURE 9
Pre-install two of the stainless steel flat head
cap screws, one at each end of the Crusher
Flare, to support and align the Crusher Flare
during the next few steps.
FIGURE 10
Visually align the mounting holes in the
Crusher Flare with the corresponding holes
in the Jeep body before tightening the bolts.
Note that some of the holes in the Jeep body
are missing, these we will mark and drill in
the following steps. Continue to check for
alignment as you tighten the two pre-install
bolts, and adjust as necessary.
FIGURE 11