Figure 29, Tightening the clasp nut – Vaisala DMT340 User Manual
Page 45
Chapter 3 ________________________________________________________________ Installation
VAISALA ________________________________________________________________________ 43
0505-276
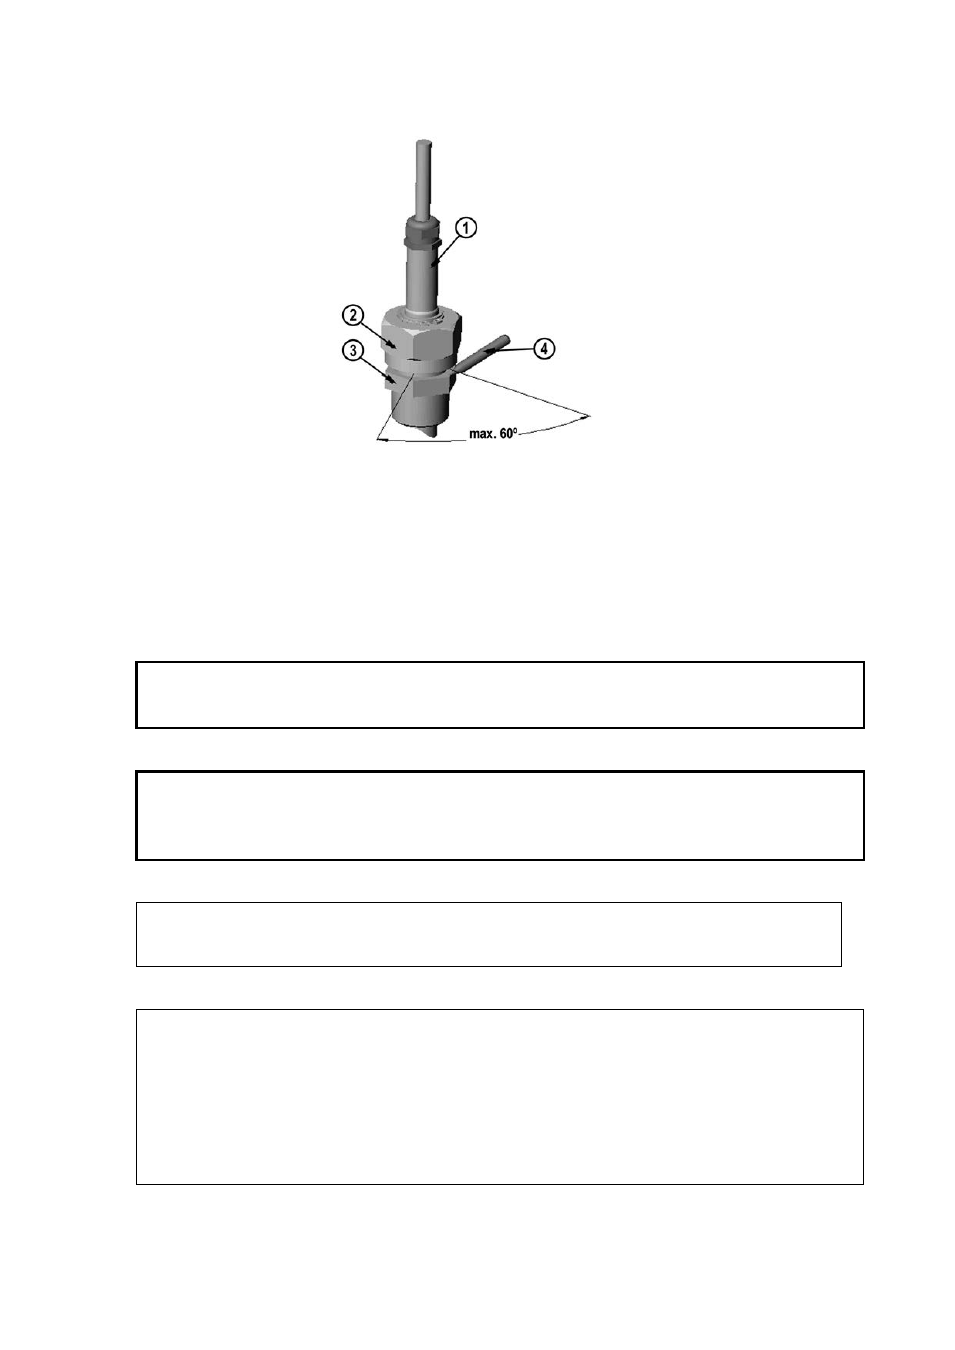
Figure 29
Tightening the Clasp Nut
The numbers refer to Figure 29 above:
1 = Probe
2 = Clasp nut
3 = Fitting screw
4 = Pen
CAUTION
Take care not to damage the probe body. A damaged body makes the
probe less tight and may prevent it from going through the clasp nut.
CAUTION
In pressurized processes it is essential to tighten the supporting nuts and
screws very carefully to prevent loosening of the probe by the action of
pressure.
NOTE
Take care not to over tighten the clasp nut to avoid difficulties when
opening it.
NOTE
When the DMT340 is installed in a process with a pressure differing
from the selected operating pressure at the time of ordering, please enter
the pressure value of the process into the transmitter memory, see
section Pressure Compensation Setting on page 106. Use the serial line
commands XPRES and PRES or the display/keypad. The pressure set
buttons on the motherboard inside the transmitter can also be used to set
pressure compensation.