HP XP P9500 Storage User Manual
Page 83
4.
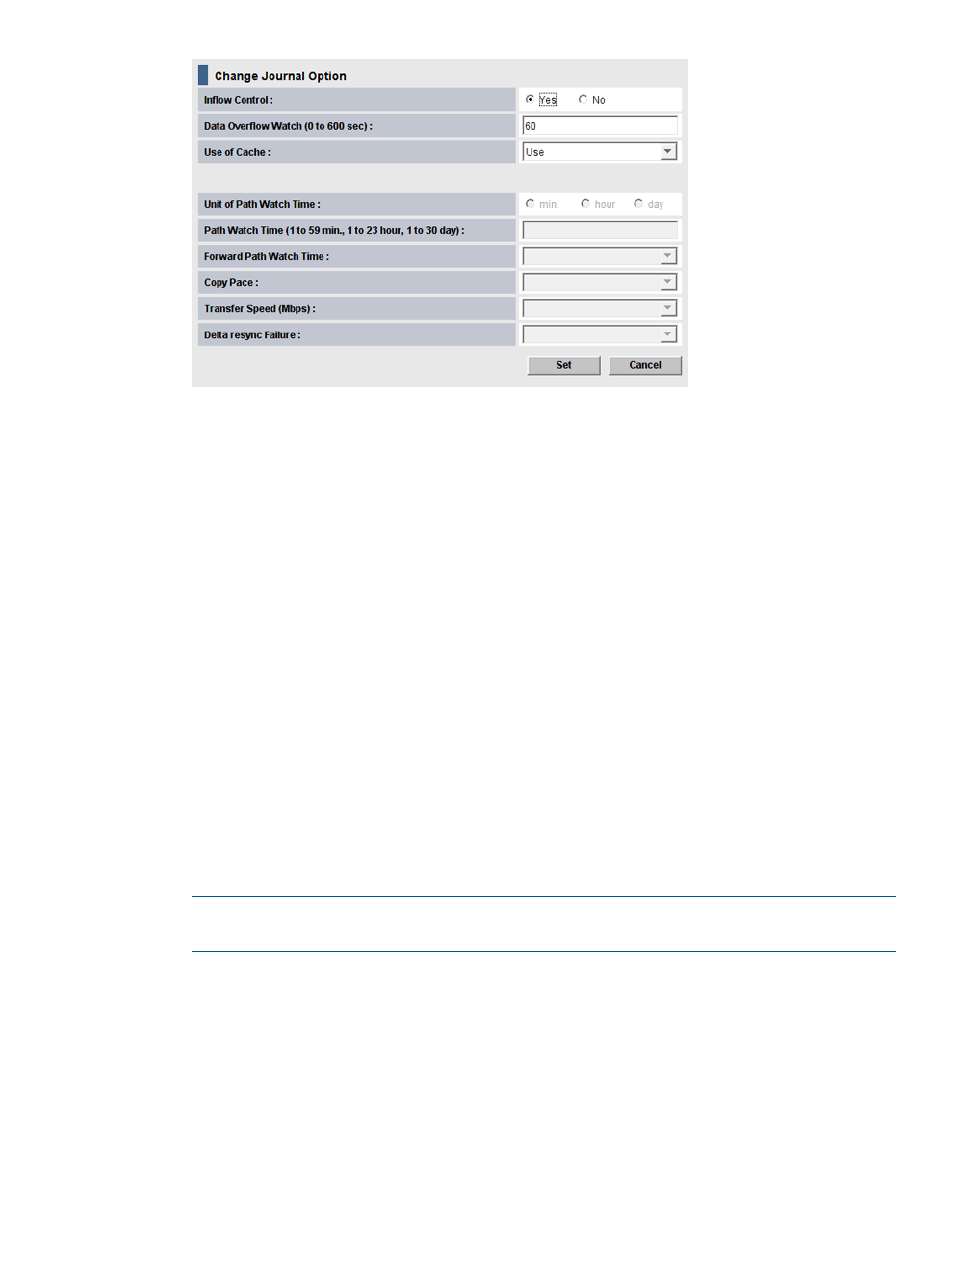
For Inflow Control, specify whether to restrict inflow of update I/Os to the journal volume
(slows delay response to hosts).
For example, you could have a 100 GB-bandwidth data path with three journals using it. If
an important database is saved to a primary volume in one of the journals, with data of lesser
importance in the other journals, you may decide to restrict the Inflow Control for the less
important journals while not restricting control to the important journal.
Yes indicates inflow will be restricted. No indicates inflow will not be restricted.
If Yes is selected and the metadata or the journal data is full, the update I/Os may stop.
5.
For Data Overflow Watch, specify the number of seconds for the system to monitor write data
to the journal volume when the journal volume threshold (80%) is reached. Range is 0-600
seconds. Default is 60 seconds. See status definitions for PFUL and PFUS in
for more information.
If Inflow Control is No, Data Overflow Watch is disabled.
6.
For Use of Cache, specify whether to store journal data (initial copy or resynchronization data)
in the cache memory on the remote side (restore journal).
- Use: Journal data will be stored in the cache. When there is insufficient space in the cache,
journal data will also be stored into the journal volume. This setting only takes effect on the
journal volumes of RAID-5 or RAID-6.
Not Use: Journal data is not stored in the cache.
- Blank: The current setting of Use of Cache will remain unchanged.
NOTE:
This setting does not effect master journals unless the RAID Manager horctakeover
command is used to change a master journal into a restore journal.
7.
Click Set when finished.
8.
See the Preview list in the Journal Operation window to check the settings that you have made.
•
If you want to modify a item, select and right click the setting in the Preview list and then
select Modify.
•
If you want to cancel a item, select and right click the setting and then select Cancel.
9.
Click Apply to apply the settings. If an error occurs, the error code appears in the rightmost
column of the Preview list. To view detailed information about the error, right click the error
code and select Error Detail.
Journal and mirror maintenance
83