FUTEK VCal Sensor Verification User Manual
Page 51
Futek Advanced Sensor Technology – Futek VCal™Documentation
Rev. 1.8.0
07/26/05
©Futek Advanced Sensor Technology 2005
51
Instructions For Printing A Calibration Verification Certificate
Now that we have walked through the layout of the Calibration interface, we have talked about the methods of configuring your test to obtain
the types of results you desire. We have also talked about the three different types of calibrations you can perform (Main, Time, and Signature),
we have now walked through some examples of each type, and we have looked at some pictures of some different ways to fixture your
sensor for the different calibration directions. Now we need to talk about printing out reports and certificates which will state your results.
Print -
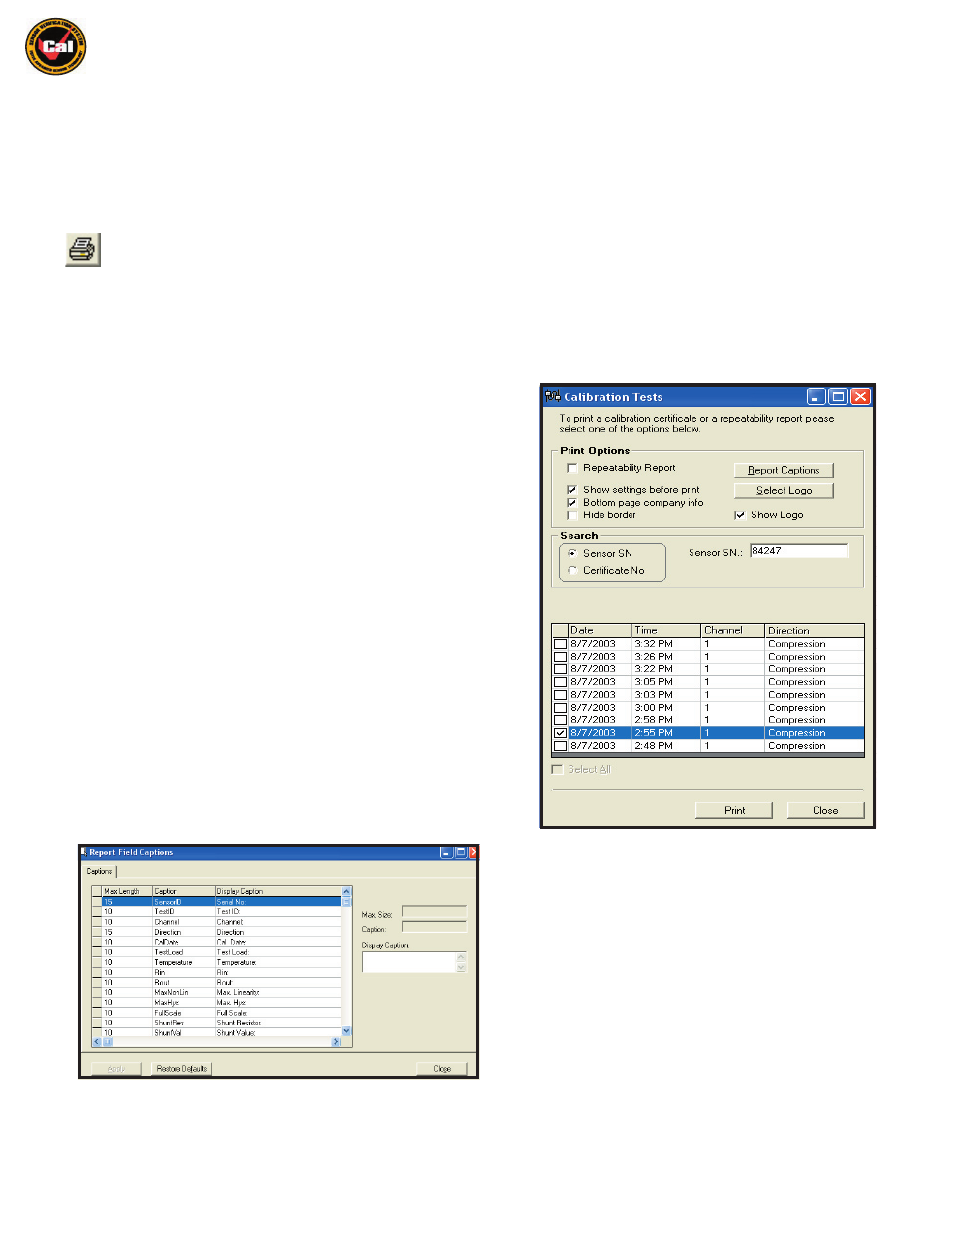
Clicking this icon brings up the Print Options interface. Here you can search for and select which tests to print, set print options
before printing, decide whether you wish to print a simple report or a full certificate, decide exactly which fields you wish to include
or exclude in your print out or certificate, and decide exactly how you want the included fields named. This allows you to fully modify and
customize your print out or certificate to fit your individual application.
1. Under Print Options the first thing to decide is whether to print a
Certificate or a Repeatability Report. For our purposes we will list the
steps for printing a Certificate first, so we will leave the Repeatability Report
Box unselected for now.
2. Next, by simply selecting or unselecting the appropriate checkboxes, you can
decide whether to Preview the Certificate before printing, whether to include an
additional page which will show Company Information, whether to print your
Certificate with borders, and whether to include your Company Logo or not.
Please select or unselect the options as you see fit.
3. Also under Print Options; pressing
Report Captions
shows the following
screen where you have the option of changing how any of the fields are
labeled on your Certificate. The first column on this screen shows the maximum
allowed length for the name of this field; the second column shows VCal™’s
current name for the field; the third column shows the name which will be
displayed on the Report or Certificate. To edit the name which is displayed on
your Certificate or Report, simply click on it in the Report Captions Screen,
then type the name you wish to appear in the Display Caption text box on the
right half of the Report Captions Screen. In the example below; VCal™’s name
for the field is Sensor ID, the Display Caption name is Serial No, and I have
changed the Display Caption name to Sensor Number
.
Print Options Interface
Report Captions Screen
4. Under Print Options you are also given the chance to include your company logo on your Report or Certificate. To use this function simply
click on the
Show Logo
button, and then point the Save window at the location of your Company Logo file. (At this time VCal™ only supports
Logo files in the bitmap format).
COL 1 COL 2 COL 3