FUTEK VCal Sensor Verification User Manual
Page 27
Futek Advanced Sensor Technology – Futek VCal™Documentation
Rev. 1.8.0
07/26/05
©Futek Advanced Sensor Technology 2005
27
Loading Points -
This is where you enter the number of
Load Points
you wish to include in your test. Default is 5 points.
Calibration Date -
This where you enter the
Date
of your test. If you are entering data from a previous test you may enter the date manually. If you
are performing the test now there is a convenient button for entering the current date with one click.
Next Calibration Date -
This is where you define the
Calibration Interval
for your sensor. You may enter a date manually, or you can click the
Interval
button to bring up a window where you can define
Interval
in terms of Daily, Weekly, Monthly, or Yearly.
Description / Notes - Here you can enter a brief Description or Notes to help you label or differentiate your tests (maximum 50 characters).
NIST Number - Here you can enter the NIST traceability number for your test.
Locations - Here you can enter the Location where your test took place. Once again, there is an available pull-down menu to quickly access
previously saved locations, as well as an icon for going directly to the Location section of Management Tools. (
p.38
)
Refresh - You can use this button to reload or Refresh your screen.
Next Tab
-
This button allows you to move to the next tab (Example: from Sensor Info to Test Setup). You can also click on
the tab title to move to that tab.
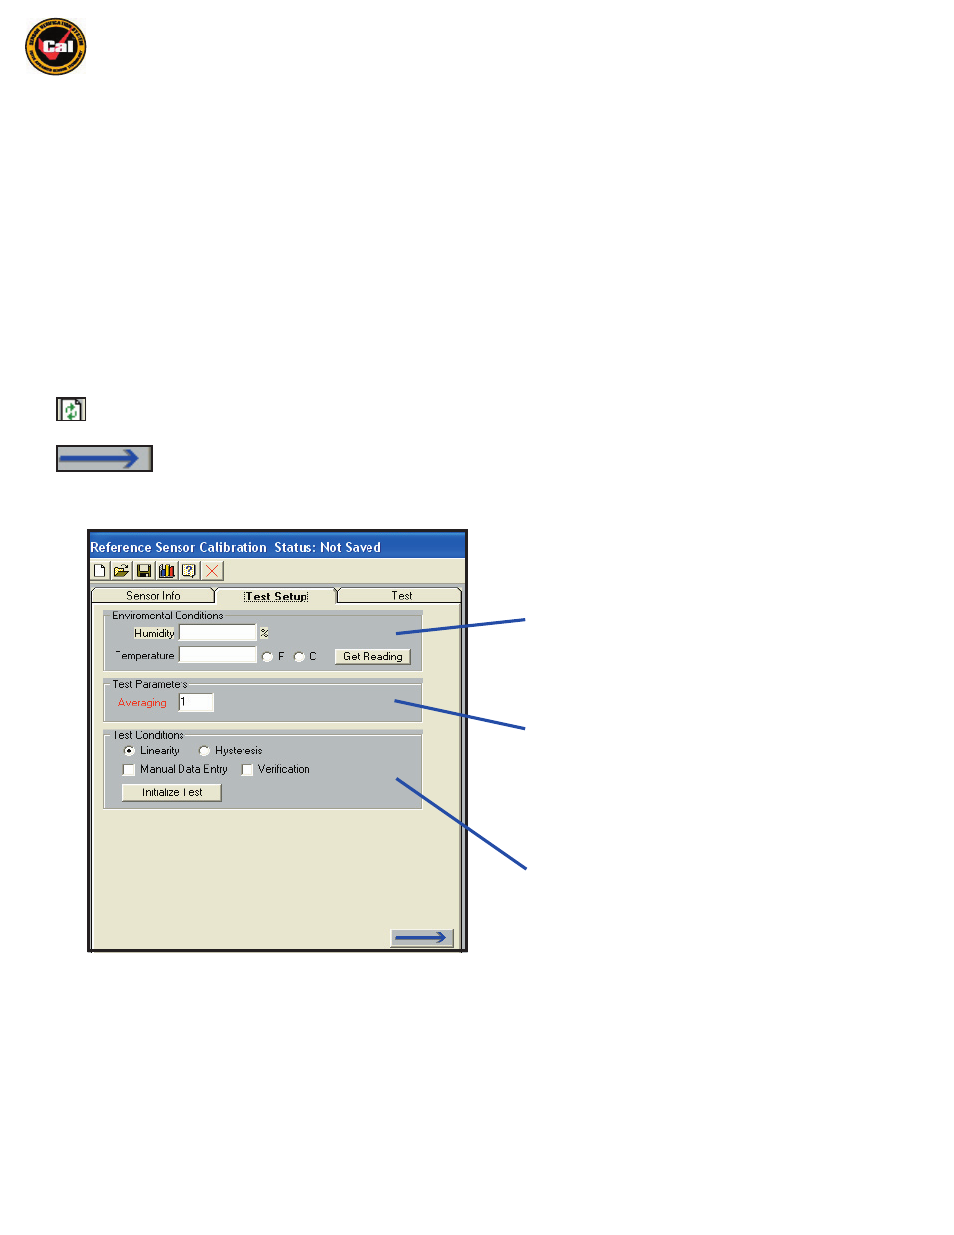
The next window under the
Information Tabs
is the
Test Setup
tab. This is where you define/document the conditions for your Test. . .
There are three main divisions to the
Test Setup
Tab;
The first is the
Environmental Conditions Window -
Here you can manually enter readings for temperature
and humidity from your external sensors; OR you can
use the Futek VCal™ temperature probe and click
Get
Reading
and VCal™ will take and enter a value for you.
The next main division is the
Test Parameters Window -
Here you can enter an
Averaging Value,
this number tells
VCal™ how many readings to take, and then return the
value which is the
Average
of these readings.
The last division under the
Test Setup Tab
is the
Test
Conditions Window
- Here you define whether you wish
to test for
Linearity
OR
Linearity and Hysteresis
; and also
whether you wish to enter your
Data Manually
, or let
VCal™ take and enter your
Verification
readings. There
is also an
Initialize Test Button
when you are ready to
start your test, and the
Arrow Button
to take you to the
next tab when you are ready.