8 how to replace the timing belt – IAI America IF User Manual
Page 53
5. Maintenance inspection
47
5.8 How to Replace the Timing Belt
[Items Required for Replacement Work]
x
Replacement Driving Belt
x
Packing Tape
x
8 mm Spanner Wrench
x
Hexagon Wrench Set
x
Push-Pull Gauge and Square
x
Personal Computer or Teaching Pendant
x
Tension Gauge (Tension of 10 kgf or more available)
x
Strong Thread (or Long Harness Belt)
[Replacement Operation Outline]
1) Loosen the tension adjusting bolt and replace the belt. Then, tighten the adjusting bolt until
the specified tension value is reached.
2) Perform the homing operation.
Loosen the deceleration belt and then, move the slider to the mechanism end and fix it. Then,
fix the motor shaft at the position about 90 degrees deviated from the counter mark and
adjust the deceleration belt to reach the specified tension value.
3) Perform the homing operation using the personal computer or teaching pendant and confirm
the deviation from the original home position. If there is any deviation, adjust it using the
home offset value in the parameters.
(Note) For the home offset for E/G controller, any negative value can not be entered.
Therefore, deviate the position slightly less than 90 degrees.
[Procedure]
1) Confirm the motor shaft rotating direction when the slider is moved from the home position to
the mechanism end.
(The rotating direction varies depending on the motor installation position. Therefore, the
confirmation is always required).
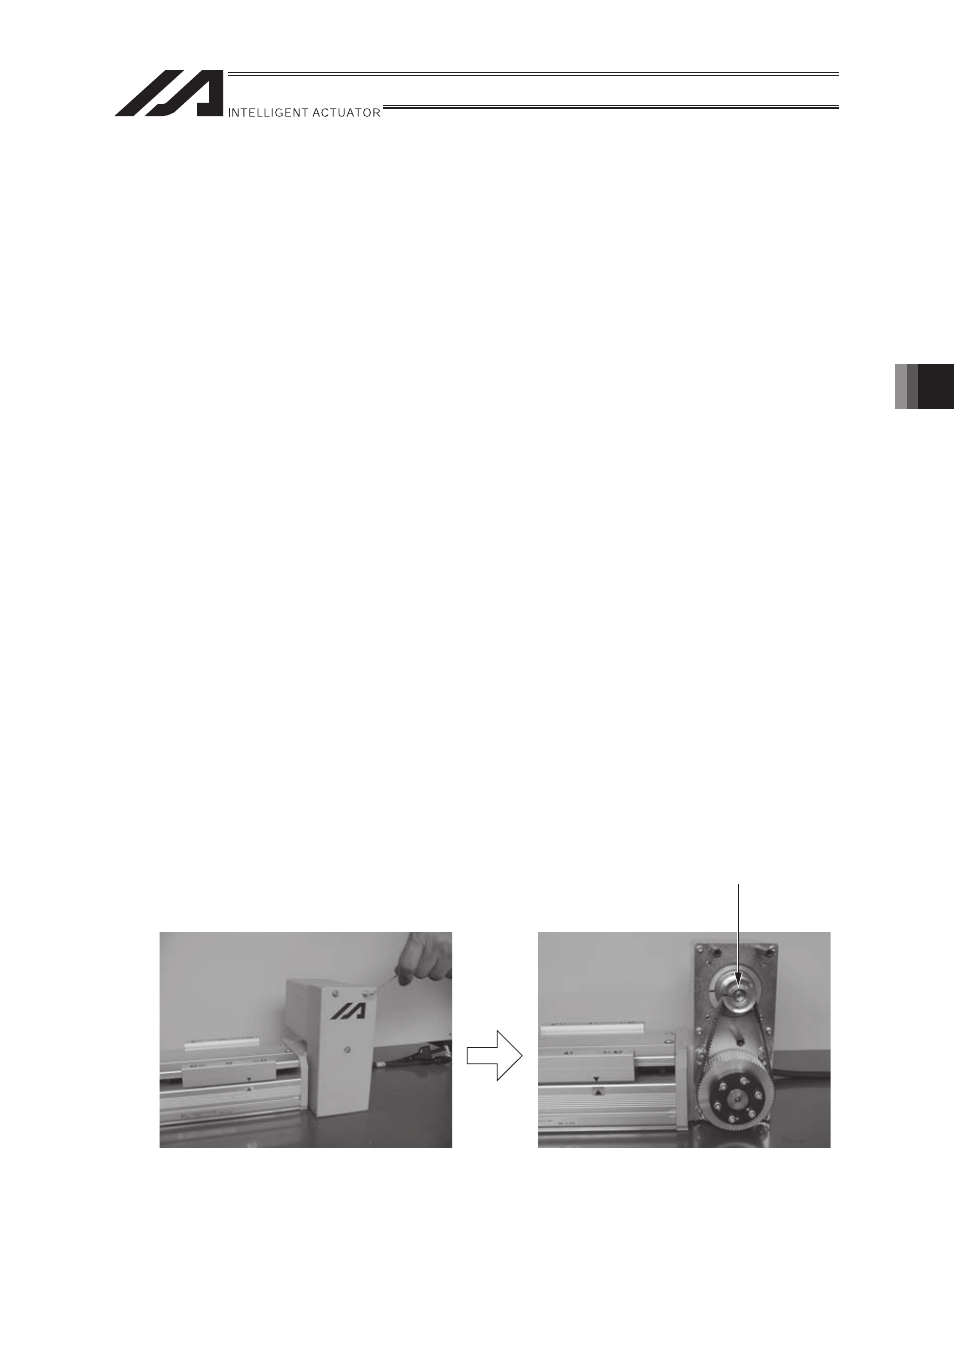
• Remove the pulley cover.
(Use a hexagon wrench with the distance to the
opposite side of 1.5 mm for IF-S or 2 mm for IF-M).
• Confirm the motor shaft rotating direction.